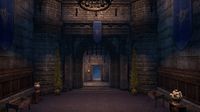
Online:Moon Hunter Keep
|
||||
|---|---|---|---|---|
| Group Dungeon | ||||
| Discoverable | Yes | |||
| Completion | Objective | |||
| Dungeon | Yes | |||
| # of Zones | 3 | |||
| Zone | ||||
| Northern Woods, Reaper's March | ||||
| Location | ||||
| North of Senalana | ||||
| Instanced Dungeon | ||||
| Min Level | 45 | |||
| Group Size | 4 | |||
| Bosses | 5 | |||
| Veteran Speed Run Target | 30 mins | |||
| Loading Screen | ||||
 Moon Hunter Keep! A name spoken by the Silver Dawn werewolf hunters of Reaper's March only in whispers—that is, when there still were Silver Dawn werewolf hunters in Reaper's March.
|
||||

Moon Hunter Keep is a group dungeon located in Reaper's March, in a Colovian fort overrun by werewolves. It can be found north of Senalana, on the Cyrodiil side of the Strid River.
It is the headquarters of a group of werewolf hunters known as the Order of the Silver Dawn, but has recently been invaded by the Werewolf Lord Vykosa and her Moon Hunter Pack, who has begun amassing a massive army of were-beasts. Along with the March of Sacrifices, it is part of the Wolfhunter DLC.
The following item sets will drop in Moon Hunter Keep: Moon Hunter, Savage Werewolf, Jailer's Tenacity, and Vykosa.
Backstory Description[edit]
- Update 19 Patch Notes
The Moon Hunter Keep was once the Colovian headquarters of the Order of the Silver Dawn, a group of peerless werewolf hunters found in western Tamriel. It was destroyed by the ancient werewolf Vykosa, who then took up residence at the estate. At first she merely turned the hunters against each other, each competing for the prize of joining her pack, but now she draws in werewolves from distant lands to vie for her favor. Imprisoned in the foul cells below the keep, Adonatus Varian must seek your help to eradicate Vykosa's evil werewolf followers and remove her influence from the land before it spreads.
Situated in northern Reaper's March, Moon Hunter Keep served for years as a base of operations for the werewolf hunters known as the Order of the Silver Dawn. Heavily fortified both inside and out, at first glance, the stronghold appears impregnable to assault. However, the unthinkable has happened, and the very beasts the Order has sworn to destroy have managed to infiltrate the keep and overwhelm its defenders … Now, the ancient werewolf known as Vykosa controls Moon Hunter Keep, and from her new base of operations, she has begun to draw her fellow lycanthropes to her cause. You and your team must mount your own assault on the keep, expel the werewolf invaders, and put a stop to Vykosa's insidious plans … Vykosa's forces grow stronger, and soon, her ferocious army will be ready to march. It is time to drive the monsters out of Moon Hunter Keep and liberate the headquarters of the Order of the Silver Dawn. Are you prepared to face Vykosa and her were-beasts?
- Wolfhunter Bundle Details
A vicious pack of werewolves, led by the mighty Vykosa, has crushed the wolf hunters of the Silver Dawn and occupied their citadel of Moon Hunter Keep. Now you must retake the keep and defeat the Werewolf Lord and her feral followers!
Related Quests[edit]
- Moon Hunter Keep Objective: Investigate Moon Hunter Keep. / You've defeated Vykosa and her Moon Hunter Pack.
 Moonlight Ascent: Explore an old Silver Dawn stronghold and deal with the werewolves controlling it.

 Pledge: Moon Hunter Keep: Prove you are truly Undaunted by clearing the Moon Hunter Keep.
Characters[edit]
|
Enemies[edit]
Normal Enemies[edit]
| Jail | Gardens | Bailey |
|---|---|---|
Elite Enemies[edit]
| Jail | Gardens | Bailey | Overlook |
|---|---|---|---|
Bosses[edit]
- Jailer Melitus, an Imperial man-beast
- Hedge Maze Guardian, a large golden lurcher
- Mylenne Moon-Caller, a towering white werewolf and Vykosa's second
- Archivist Ernarde, an Imperial mage forcibly turned to the werewolves' cause
- Vykosa the Ascendant, the Khajiit werewolf lord leader of the Moon Hunter Pack
Boss Mechanics[edit]
The dialogue during this battle is very useful for figuring out which mechanics are going to happen. Pay attention to your audio cues and react accordingly. You're probably going to be roll dodging a lot. This dungeon also punishes you for dealing damage too quickly, as many of the bosses summon adds or perform mechanics at certain health intervals, as opposed to those mechanics being on a timer.
Jailer Melitus[edit]

Jailer Melitus is the first boss. There are several things to be aware of during the fight. First thing's first: blood is bad. The bloody AoEs Jailer Melitus unleashes will slow you down. The Jailer will use two attacks involving blood:
- Moonlit Rage: Jailer Melitus channels Moonlit Rage, a large AoE. After this aoe is done expanding, it deals damage to those standing in it. Additionally, four smaller aoes are sent across the floor in four different directions, away from the boss. The smaller AoEs will cause your movement speed to be slowed if you get hit by them.
- Bloody Geyser is an ability where AoEs start appearing underneath all four group members. As with Bloodmoon's Mercy, standing in any of these will slow your movement speed. Keep moving to avoid being hit; it's harder to avoid the geysers if you've been slowed after standing in one.
Every now and again, the Jailer will empty the cells around you, summoning adds. The first time he does it, he'll release one Werewolf Bloodcaller. The second time he does it, a Bloodcaller and a Moon Hunter Archer will appear. Subsequent releases will involve more Bloodcallers.
If Werewolf Bloodcallers are left alive too long, they will enrage, dealing more damage and causing an aoe to appear around them which enrages other enemies who stand in it.[verification needed] Kill them as soon as possible. Moon Hunter Archers should be focused after you kill the werewolves. If they point their bow in the air and have red line telegraphs emanating off of their body, you need to roll dodge. This means they're casting Taking Aim, which deals massive damage to those it hits.
Pay attention to the tank. If the Jailer holds his greatsword over his shoulder as if he's going to swing it very hard, someone needs to interrupt him. He stuns his target (usually the tank) and has red lines coming off of him when he channels this ability. Because the Jailer lifts his sword up and brings it down very slowly, someone should have time to see it happening and bash it. If this attack lands, it kills the target instantly.
Hedge Maze Guardian[edit]
This fight has a few mechanics, but is comparably simple when you consider the other fights. There are several things to consider during battle. The boss will summon Spriggans to heal itself at 75%, 50% and 25% health. They will heal the boss for a great deal of health, and should be killed quickly. As long as the spriggans are alive, you will not be able to make any progress in damaging the boss.
The spriggans are located within the hedge maze surrounding the arena, so someone will need to navigate the maze in order to root them out. Look for where the beams of light are being fired towards the boss from the depths of the hedge maze; that's where you'll find your spriggans. For this task, the two damage dealers should stick together in the maze and kill the spriggans. The healer should stay with the tank, who will be facing the boss towards the entrance.
The dps must not get separated, because if one of them gets caught by a strangler while traversing the maze, the other dps needs to be available to bash the strangler so their partner doesn't die. If you are alone in the maze and get caught by a strangler, you will die unless the strangler is bashed. Stay together, go in pairs.
There are two other things to consider during this fight:
- Root Stomp
- The Guardian stomps its foot, causing bundles of roots to barrel towards the group. Getting caught in it leads to the target getting rooted by vines and damaged continuously. If you're caught and don't escape, you could be killed by the ongoing damage. When Narazda yells at you about being crushed or trapped by roots, you need to roll dodge. There is an achievement for avoiding every root snare this boss throws out.
- Thorn Toss
- The Guardian fires thorns out of its body, telegraphed by a giant, conal aoe that stays wherever the Guardian is facing. It appears as a large cone, and can pierce through the hedges of the maze. The tank will want to face the boss towards the gate everyone entered through, so the thorns don't hit the dps in the maze while they're killing the spriggan healers.
The boss will stop moving to face the tank when it performs this attack, so the tank can move safely out of this aoe without the lurcher moving to follow them. This is part of the reason why you want the lurcher facing the entrance gate: if the cone is within range of the dps in the tight corridors of the hedge maze, the dps will need to scramble out of its reaches before they get impaled. Be mindful of where the boss is facing, but otherwise, don't worry about this attack. You can easily get out of it.
Mylenne Moon-Caller[edit]
Mylenne is located just beyond the Hedge Maze, and appears after two trash waves are defeated. It is imperative that all members of the group stay together, but not too close, during the fight. She summons several adds, which add to the complexity of the fight. She also deals a lot of physical damage to whoever has her taunted, so maintain heals on the tank (but don't forget about the dps).
Throughout the fight, Mylenne will call dire wolves to attack one member of the group. When she summons dire wolves, she will face one party member and roar. Whoever she targets will have a red aura around their head, and the dire wolves will target that player. The wolves deal out a movement speed debuff that stacks, so stay away from the wolves if you're targeted and take them down quickly. Their summon is indicated by an audio cue where Mylenne shouts to the wolves about wanting that one ("that one" being a player) to be feasted upon or struck down. The wolves need to die quickly so no group members are slowed down for the next part of the fight.
Shock Wardens are one of the more important parts of this fight. To put it simply, they need to die first whenever they're up. This is where the "stay close, but not too close" part of the fight kicks in.
- The Shock Wardens summon many lightning AoEs all over the arena. If Mylenne gets hit by one (which she will), she will become Enraged. While Mylenne is Enraged, she takes less damage from players, and deals more damage to players.
- When the Shock Wardens die, they leave behind a pool of lightning that appears as a large AoE on the ground. If Mylenne is Enraged, she must be dragged over to one of these AoEs to get rid of her Enraged status.
To execute this part of the fight cleanly, the dps should each head for a Shock Warden. The healer and the tank need to stay together (but don't stand too close together, or else another mechanic will screw you over), with the tank carrying Mylenne and the healer dishing out heals wherever it's needed. When one of the Shock Wardens dies, the tank should carry Mylenne to the closest lightning pool to cleanse her. Alternatively, instead of having the dps run off in different directions while the tank and healer are glued together, all members of the group can maintain social distancing, but stick together, so there's less of a chance that a dps will die to a shock warden or a dire wolf while out of the healer's range.
Mylenne Jumps
This is why you and your group members need to maintain "social distancing" of a sort. Mylenne will occasionally pounce on one group member and pin them down. Anyone that is too close to that person when they get jumped on will also get pinned down. Mylenne will roar with her arms outstretched and her head facing skyward, then she'll leap into the air and come down upon whoever is trapped beneath her, killing all targets instantly. Anyone not pinned down needs to interrupt this attack so you're not left without a tank.
Archivist Ernarde[edit]

This is a boss where burning too fast is particularly punishing. At 100, 80, 60, 40 and 20% health, Moon Hunter Cleavers and Strikers will accompany Ernarde. They are on a timer and will transform into Werewolf Behemoths if they are not burned down. They should be dealt with quickly. It is advised that no damage is done to Ernarde while adds are up. Burn down the adds as soon as possible.
Archivist Ernarde has several mechanics where he singles a group member out.
- For Targeted Lightning, he will choose a random player, and they will be the focus point of a lightning storm which is signified by a red circle outline which rapidly fills in. Get away from other players if this is cast on you. If the ability is cast on another player, try to stay away from them. This ability is not like Siroria's Roaring Flare. You cannot share the damage. If another player stands in the circle when it finishes filling, more damage is dealt to both players.
- The Archivist will also occasionally cast a Crushing Bubble around a random player. The bubble needs to be broken through damage, otherwise it will kill the target. When one of your group members is bubbled, the dps needs to be focused on the bubble so you don't lose a group member.
Every minute or so, Archivist Ernarde will announce that he is going to cast a powerful spell. Various circles marked with colored Symbols of Xarxes will appear around the room. Watch the seals above his head. He cycles from red to green to blue, and will stop on one of these colors. Whenever a color appears above his head, the circles with the corresponding color will pulse with golden light.
Whichever color he eventually lands on will glow bright gold. There are always four circles with this colored symbol hovering above them. When he picks a color, the party must run to a circle which is glowing gold, as it will shield them from his spell.
Two players cannot be standing on the same circle, you must find your own. One of you will die if you try to stand on the same circle. A good strategy is to have the tank and healer prioritize circles near Ernarde, and for the two dps to try to take the circles in the entryway.
There is a red circle around him that causes the extra enemies to enrage if they stand in it. While enraged, they deal far more damage and take less damage. The tank should keep the adds out of this circle to make the fight easier.
Vykosa the Ascendant[edit]

There are two phases to this fight, which repeat several times as Vykosa's health falls. Vykosa punishes you for damaging her too quickly, as a new phase begins every time ten percent of her health is shaved off.
Pet Phase[edit]
When Ary and Zel are engaging the players, Vykosa equips her inferno staff and stays in one position in the back of the arena. She stands between the two Silver Dawn standards, flanked on both sides by her Direwolf companions, Ary and Zel. Vykosa will light attack from this position, set down fire runes to deal flame damage, and channel a large conal aoe that reaches the back of the arena. Vykosa also summons a fear totem, which inspires fear in any players who stand in it.
- Vykosa will call her Direwolf pets, Ary and Zel, to fight alongside her at health intervals of 100%, 80%, 60%, 40% and 20%. If they have been made to cower previously, these are the health intervals her pets will return to her side.
- At 20%, the wolves break free of their chains and are able to run freely throughout the arena. This signals that the boss has gone into "execute phase", meaning that the group must burn Vykosa down before the group can be defeated.

Ensure that Ary and Zel are pacified before damaging Vykosa.
- The strategy for this is for the tank to grab one wolf and drag it to Vykosa, and for the other to remain free. For example, if the tank takes Ary to Vykosa, Zel will be forced to stay near the wall. In this case, Zel will be restrained, as Ary is taking up more of their tether to follow the tank. The wolves run quite literally on a leashing mechanic.
- Make sure the dps take out the wolf the tank hasn't grabbed first. If left alone for too long, the restrained wolf will pounce, causing massive damage to one random player.
Add Phase[edit]
When werewolf adds spawn, Vykosa will engage in unarmed combat and move from her position.
Vykosa will summon werewolf adds at health intervals of 90%, 70%, 50%, 30% and 10%. Initially, she summons 2 werewolves, but at 30% and 10% health Vykosa will summon 4 werewolf adds. On Hard Mode, the amount of werewolves summoned when Vykosa reaches 90-50% and 30-10% health is doubled: 4 werewolves are summoned at 90% and 50%, and 8 werewolves are summoned at for 30% and 10% health.
The tank will have to deal with the brunt of Vykosa's abilities during this phase. She pounces (which needs to be blocked), swipes with her claws and roars (which fears those standing in front of her). If a member of the group dies during combat, she can also devour their corpse to restore health. This can be interrupted.
Hard Mode Mechanics[edit]
Invoking the Scroll of Glorious Battle before the fight will cause the following changes during the fight:
- Increases Vykosa's health by roughly 1.5 million hit points.
- Increases the amount of damage done by Vykosa, her pets (Ary and Zel), and the summoned adds.
- Doubles the amount of werewolf adds spawned at 90%/70%/50%, health from 2 (without the scroll) to 4
- Doubles the amount of werewolf adds spawned at 30%/10% health, from 4 (without the scroll) to 8.
- Causes stranglers to spawn in at 80% health, which fling poisonous spit at the group and act as a nuisance. To avoid damaging Vykosa too quickly, your group can use the stranglers to build up Ultimate in between phases.
- Causes shock wardens to spawn in from 60% health and lower, enraging Vykosa. While enraged, Vykosa's damage done increases and damage received decreases. This requires her to be pulled over to the wardens' residual lightning pools (left after they die) to cleanse the enrage status. This mechanic is reminiscent of the fight against Mylenne Moon-Caller.
- Ary and Zel can become enraged too, increasing the damage they do and decreasing the damage they receive.
- The shade of Archivist Ernarde will appear when Vykosa is down to 30% health, and he will begin channeling symbols for "puzzle phase" (or "sigil phase") on top of all of the above mechanics and the 8 werewolf adds. Players must watch the shade as he cycles through colored Seals (red, blue and green) and watch for the color he stops on (which will also be glowing on the ground). When he stops cycling through colors and begins channeling his one-shot mechanic, each player must find and stand on their own Seal of Xarxes (two players cannot be on the same colored Seal; if two players stand on the same Seal, one of them will be killed and the other will survive).
This mechanic is on a timer, and is identical to the mechanic featuring the Seals of Xarxes on the previous fight with Archivist Ernarde. If a player is standing on the wrong colored Seal, standing on no Seal, or standing on the same Seal as another person, that player will die. - If you take too long to kill Vykosa after she reaches 30% health and lower, eventually, a Moon Hunter Archer and a Moon Hunter Striker will spawn as adds, just like in the previous fight with Archivist Ernarde. If these added enemies are not killed fast enough, one of them will transform into a Hulking Werewolf.
Completing Hard Mode earns you The Alpha Predator, an Achievement that grants you a title of the same name.
Hard Mode[edit]
Hard Mode is only available in the Veteran version of Moon Hunter Keep. When you get to the final boss fight against Vykosa the Ascendant, you have the option to activate the Scroll of Glorious Battle, located just to the right of the door after you enter Moon Hunter Overlook. Activating the scroll will display the following:
- <This scroll bears the insignia of the Undaunted and a potent spell, conceived of by the renowned Hroltar the Boaster. When invoked the scroll will empower one's enemies with astonishing power.
- The full incantation isn't short on colorful language.>
- Give me a foe worth bragging about!
Activating the scroll will cause a blinding flash of light and will make the boss fight more difficult. For full details of the changes, see Hard Mode Mechanics below. If your group dies, the scroll will need to be activated again to reenable Hard Mode.
Layout[edit]
Moon Hunter Keep Jail[edit]


The quest giver, Adonatus Varian, can be found here, being tortured by the jailer. Orders given to the Silver Dawn when they invaded Moon Hunter Keep can be found in front of Adonatus.
The first boss of the dungeon, Jailer Melitus, can be found at the end of the first hallway. After the jailer is defeated, head east from his room. You'll end up in a large square room with a fireplace at the north wall. There's an archer, a cleaver and two dire wolves in here. Take the northeastern path and turn left as soon as you can. From here, keep going north and you'll be out of the jail and in the gardens.
Extraneous Paths[edit]
There are extra rooms full of loot. In the first hallway just outside the square room with the fireplace, there's a fork in the path. If you take the southern hallway, you'll end up in a room with a moving mill. The only thing of note is a backpack. There are three bookshelves on the way to this mill.
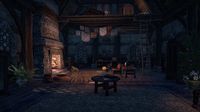
In the northern hallway, you'll encounter a Werewolf Berserker. There's another fork in the road here: heading north leads you through the dungeon, and continuing east brings you to a lovely little room with a fireplace, some cabinets, and a few beds. A ladder leads to an inaccessible loft. This room is cozy. There are some coins on the round table in front of the door.
Taking the northern path from here brings you to the keep's stockroom, which is full of food and enemies: two archers, one feral, a vicious dire wolf and one cleaver. Rolea's Journal is located by the exit to the north, atop a table near the torture rack in the northeastern corner of the stockroom. A bed, a bookshelf and some cupboards lie in the room located west of here, and another room containing a homey fireplace and some cupboards is located off to the east. The western room has a desk and one bed, while the eastern room contains double beds.
Moon Hunter Keep Gardens[edit]


An open-air garden containing imps, stranglers and spriggans. Strange creatures made of vines also stalk the gardens: Wildbriar Bears and Wildbriar Senche. The bears in particular are quite dangerous. The tank should hold them, and the rest of the group should be behind the bear. All heals should be focused on the tank when a bear is around, as they deal a lot of physical damage, and will one-shot anything that isn't a tank.
The stranglers are also dangerous. The stranglers will trap a player that lingers too close to them for too long, rooting them in place and dealing damage. The strangler must be interrupted in order for the group member to be released. The stranglers also don't die if their health reaches zero, they simply fall dormant. Some time after their health reaches zero, they will be able to pop back up when they notice a player.
The first part of the maze has you face one Wildbriar Bear and three imps. The next pull will have a few Wildbriar Senche. You'll move on to an area blocked by a gate, with many stranglers lining the river. Feel free to ignore the stranglers unless a group member gets caught by them. The next portion is blocked off by a gate, and introduces you to Moon Hunter Keep's spriggans, a hallmark of the gardens that are seen nowhere else in the dungeon.
The spriggans in particular are annoying to deal with.
- The orange spriggans will turn members of the group into skeevers, preventing trapped players from using abilities. As a skeever, you are unable to control your movement or defend yourself. The spriggan controlling you must be interrupted to free you.
- The green spriggans will heal other creatures in the hedge maze. These appear in the section just before you enter the boss's arena, and their sole purpose is to show you how the healing mechanic works during the boss fight.
After you deal with the strangler creek, you will encounter an area with an add pull that has two phases. During the first phase, you need to kill one Wildbriar Bear, a few senche and some imps. The second phase awakens the orange spriggans, which will start to transform your group members. There is one spriggan to the west, one to the southeast, and one on the northeast end of this section. Kill the adds and move on to the next section, which precedes the boss arena.
Here, you'll encounter a Wildbriar bear surrounded by several dormant spriggans. When the bear's health is reduced by half, two of these spriggans will awaken, turning green and sending golden charges of magic towards the bear, healing it. The damage dealers need to find the spriggans in the maze to stop them from healing the bear, or else you won't be able to kill the bear. A book titled The Hedge Maze can be found just at the base of a tree outside the gate to the Hedge Maze Guardian's arena, near where Narazda will stand.
The Wolfsbane Flower required to cure Adonatus can be found at the base of the tree in this section. Chests can also be found here; one can spawn in the maze near one of the green spriggans, and one can spawn by the tree where the book is located. The second boss of the dungeon, the Hedge Maze Guardian, can be found just beyond the bear with the healing spriggans.
Moon Hunter Bailey[edit]


Mylenne Moon-Caller is located in the first section of this area, and appears after two waves of trash mobs are burned down. A chest can be found just to the left of the entrance. In the next room lies a Hulking Werewolf, which the tank must grab. When a Hulking Werewolf is in the room, all heals must be delegated to the tank. They deal massive amounts of physical damage.
To get through the dungeon, you'll want to head west from the first large chamber with the Hulking Werewolf. You'll find a Vicious Dire Wolf, a Werewolf Berserker and several man-beasts waiting for you here. Head south through the hall, go west, then head north in the next large chamber. The Belladonna Berries required to cure Adonatus can be picked off of a plant in this room, as can a chest and a heavy sack. Head north from here, and you'll meet a hulking werewolf in the hallway. Keep going north until you reach another large chamber, then take the hallway on the northern side of this room.
In the next hallway, you'll encounter yet another hulking werewolf. Have the tank turn it away from the group, make the DPS stay behind the hulk and focus all heals on the tank before heading forward. Eventually, you'll reach a hallway that features a dead end to the north and a hall to the east. Take that eastern bend and you'll be met with several werewolves and a hulking werewolf.

Beyond the next door lies Archivist Ernarde, the dungeon's fourth boss. Log No. 321: Unexpected Results and A Cure for Lycanthropy can be found here. A chest can spawn in the center of the long hallway, beside the bookshelves on the right-hand side. Head up the stairs and pass through the door to enter Moon Hunter Overlook.
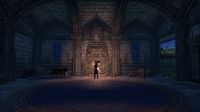
Moon Hunter Overlook[edit]
Vykosa the Ascendant resides here with her pet dire wolves, Ary and Zel. Her manifesto can be found by the entrance, on the left. The Scroll of Glorious Battle sits to the right on Veteran difficulty.
Books[edit]
- A Cure for Lycanthropy by Archivist Ernarde of the Silver Dawn — A lycanthropy researcher's journal
- By Order of the Silver Dawn by Captain Abitius — An order to eradicate the Moon Hunter Pack
- Letter to Mylenne by Vykosa
- Log No. 321: Unexpected Results by Archivist Ernarde of the Moon Hunter Pack — Research notes on the alteration of a werewolf's transformation
- Rolea's Journal by Rolea — A werewolf's final words
- The Hedge Maze by Lantoine Beaufort
- The Hungry Cat's Curse by Vykosa the Ascendant
Sets[edit]
| Set Name | Bonuses | Location(s) | Set Type |
|---|---|---|---|
| Moon Hunter |
2 items: Adds 3-129 Weapon and Spell Damage |
Moon Hunter Keep |
Light Armor |
| Savage Werewolf |
2 items: Adds 25-1096 Maximum Stamina |
Moon Hunter Keep |
Medium Armor |
| Jailer's Tenacity |
2 items: Adds 4% Healing Taken |
Moon Hunter Keep |
Heavy Armor |
| Vykosa |
1 item: Adds 4% Healing Taken |
Moon Hunter Keep |
Monster Helm Sets |
Achievements[edit]
There are 20 achievements associated with this dungeon:
| Achievement | Points | Description | Reward | |
|---|---|---|---|---|
| Wolfhunter Explorer | 5 | Enter either Moon Hunter Keep or March of Sacrifices for the first time. | Hat: Werewolf Hunter Hat | |
| Silver Dawn Style Master | 50 | Learn every chapter in the Silver Dawn style book, occasionally found as rewards for completing the Moon Hunter Keep dungeon. | ||
| Needed for Moon Hunter Keep Challenger | ||||
| Moon Hunter Keep Challenger | 50 | Complete the listed achievements for Veteran Moon Hunter Keep. | Skin: Sable Man-Beast Skin | |
| Moon Hunter Keep Conqueror | 10 | Defeat Jailer Melitus, Hedge Maze Guardian, Mylenne Moon-Caller, Archivist Ernarde, and Vykosa the Ascendant in Veteran Moon Hunter Keep. | Title: Silver Knight Bust: Vykosa the Ascendant (page) |
|
| The Alpha Predator | 50 | Defeat Vykosa the Ascendant after reading the Scroll of Glorious Battle in Veteran Moon Hunter Keep. | Title: Alpha Predator | |
| Running with the Pack | 50 | Defeat all encounters in addition to Jailer Melitus, Hedge Maze Guardian, Mylenne Moon-Caller, Archivist Ernarde, and Vykosa the Ascendant in Veteran Moon Hunter Keep in under 30 minutes. Timer starts when players engage the first group of Moon Hunter enemies. | ||
| Head of the Pack | 50 | Defeat all encounters in addition to Jailer Melitus, Hedge Maze Guardian, Mylenne Moon-Caller, Archivist Ernarde, and Vykosa the Ascendant in Veteran Moon Hunter Keep without suffering a group member death. | ||
| Normal | ||||
| Moon Hunter Keep Vanquisher | 10 | Defeat Jailer Melitus, Hedge Maze Guardian, Mylenne Moon-Caller, Archivist Ernarde, and Vykosa the Ascendant in Moon Hunter Keep. | Trophy: Vykosa the Ascendant (page) | |
| A Hulking Ally | 10 | Defeat Archivist Ernarde without killing his first Hulking Werewolf ally in Moon Hunter Keep. | ||
| Book Smarts | 5 | Defeat the Archivist without taking group member damage from Symbols of Xarxes in Moon Hunter Keep. | ||
| Bloody Mess | 5 | Defeat Jailer Melitus without being damaged by Bloody Geysers in Moon Hunter Keep. | ||
| Veteran | ||||
| Wolfhunter Delver | 50 | Complete Veteran Moon Hunter Keep and Veteran March of Sacrifices. | ||
| Pure Lunacy | 50 | Defeat all encounters in addition to Jailer Melitus, Hedge Maze Guardian, Mylenne Moon-Caller, Archivist Ernarde, and Vykosa the Ascendant after activating Hard Mode in Veteran Moon Hunter Keep in under 30 minutes without suffering a group member death. | ||
| Unending Rage | 10 | Defeat Mylenne Moon-Caller without cleansing her Enrage ability in Veteran Moon Hunter Keep. | ||
| On a Short Leash | 5 | Defeat Vykosa the Ascendant without any party member taking damage from her restrained wolf pet in Veteran Moon Hunter Keep. | ||
| Strangling Cowardice | 5 | Defeat Vykosa the Ascendant after reading the Scroll of Glorious Battle, defeating 7 Stranglers, and never causing her pet wolves to cower in Veteran Moon Hunter Keep. | ||
| Veteran Dire Wolf Slayer | 10 | Defeat 200 Dire Wolves or Vicious Dire Wolves in Veteran Moon Hunter Keep. | ||
| Veteran Hulking Werewolf Slayer | 10 | Kill 50 Hulking Werewolves in Veteran Moon Hunter Keep. | ||
| Sidestepping Stranglers | 5 | Defeat Hedge Maze Guardian without any group member being caught by a Strangler Snare within the Moon Hunter Keep Gardens in Veteran Moon Hunter Keep. | ||
| Root of the Problem | 5 | Defeat Hedge Maze Guardian while avoiding its Lurcher Roots attack in Veteran Moon Hunter Keep. | ||
Notes[edit]
- Parts of the keep can be seen from behind the mountains at the exterior entrance in Reaper's March.
Maps[edit]
|
A map of the Moon Hunter Keep Jail
|

|
A map of the Moon Hunter Keep Gardens
|

|
A map of the Moon Hunter Keep Bailey
|

Gallery[edit]
-
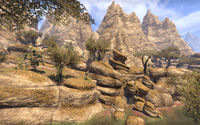
The keep's location prior to Update 19
-
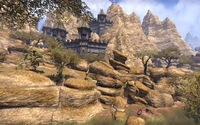
After Update 19
-
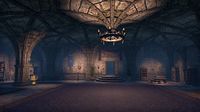
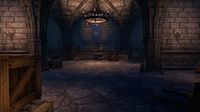
Moon Hunter Keep Jail
-
Moon Hunter Keep Jail
-
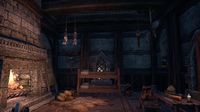
Moon Hunter Keep Jail
-
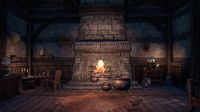
Moon Hunter Keep Jail
-
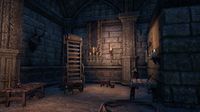
Moon Hunter Keep Jail
-
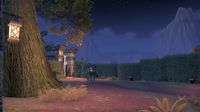
Moon Hunter Keep Gardens
-
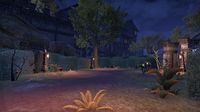
Moon Hunter Keep Gardens
-
Moon Hunter Keep Gardens
-
Moon Hunter Bailey
-

Moon Hunter Bailey
-
Moon Hunter Bailey
-
Moon Hunter Bailey
-

Moon Hunter Bailey
-
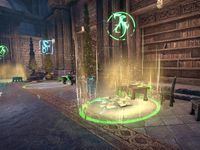
An active green Seal of Xarxes: this will protect someone from Ernarde's blast.
-

Inactive red and blue Seals of Xarxes: these will not protect someone from Ernarde's blast.
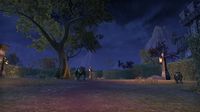
-

The Strid River, viewable from Moon Hunter Keep's exterior
-

Promotional render of a Hulking Werewolf in the Keep


