Skyrim:Fellglow Keep
|
|||
|---|---|---|---|
| # of Zones | 3 | ||
| Clearable | Yes (see notes) | ||
| Dungeon | Yes | ||
| Respawn Time | 10 days | ||
| Level | Min: 8 | ||
| Occupants | |||
| Warlocks, Atronachs, Vampires, Frostbite Spiders, Skeevers, Wolves, Skeletons, The Caller, Orthorn | |||
| Important Treasure | |||
| A Hypothetical Treachery Spell Tome: Raise Zombie Spell Tome: Sparks The Doors of Oblivion Unusual Gem |
|||
| Console Location Code(s) | |||
| FellglowKeepExterior01, FellglowKeepExterior02, FellglowKeep01, FellglowKeep02, FellglowKeep03 | |||
| Region | |||
| Whiterun Hold | |||
| Location | |||
| East-northeast of Whiterun Northwest of Valtheim Towers |
|||
| Special Features | |||
| # of Alchemy Labs | 1 | ||
| # of Arcane Enchanters | 1 | ||
| # of Forges/Anvils | 1 | ||
| # of Workbenches | 1 | ||

Fellglow Keep is a medium-sized fort east-northeast of Whiterun containing warlocks, atronachs, and vampires, and the mages' leader, the Caller. It contains three zones: Fellglow Keep Dungeons, Fellglow Keep, and Fellglow Keep Ritual Chamber.
Part of Fellglow Keep and all of Fellglow Keep Ritual Chamber are only accessible during the quest Hitting the Books.
Related Quests[edit]
- Arniel's Endeavor: Uncover an ancient Dwemer secret. (radiant)
- Hitting the Books: Find the books needed to identify the artifact found in Saarthal.
- No Stone Unturned: Find the 24 gems to restore the Crown of Barenziah.
Walkthrough[edit]
Exterior[edit]
The keep can be reached by following a path from the northern Valtheim Tower. Two elemental mages and a flame atronach guard the exterior of the keep. One of the mages is standing lookout on a damaged tower, while the other is standing by a campfire near the main entrance to Fellglow Keep. It is initially locked and requires a key to enter. During Hitting the Books, the flame atronach is to the southwest, near an entrance to Fellglow Keep Dungeons, which is the entrance you will have to enter in order to reach the interior of the keep. Otherwise, the flame atronach will be near the main entrance to Fellglow Keep, with one of the mages. There is a long wooden table to the right of the main entrance with a haunch of horse meat, a bottle of ale, a portion of grilled leeks, a small coin purse, a sprig of frost mirriam, a dagger, a quiver of arrows, and a bow on top. There is a small vegetable patch to the east of the campfire. It consists of a potato plant, three leeks, and seven cabbages. There is a chicken wandering the area, and to the southeast a shallow pool that contains a salmon.
Fellglow Keep Dungeons[edit]
The entry leads into a narrow passage that has suffered quite a lot of damage, with fallen stones blocking part of a short flight of stairs leading down to the east. There is a dresser and a barrel on your immediate left with a common book and an iron dagger on top, while on your right is a bucket containing two samples of scaly pholiota fungus. There are numerous barrels and sacks containing ingredients and food throughout the dungeon and keep. At the bottom of the stairs is an iron battleaxe on the ground. The passage enters a small room that is partially flooded, where a Nordic barnacle is growing on some masonry on the ground, while among some rubble on the right is an iron mace. The passage continues to the southwest, through an open door. There is a bear trap in front of the door, with a second bear trap a short way along the next passage. Ahead is another partially flooded room. This next room has a balcony to the left, where an ice mage is standing guard with two frostbite spiders or skeevers. There are two more Nordic barnacles, three loose slaughterfish eggs, and at least four salmon swimming in the flood water. There are many crates and unusable barrels around the room, on the balcony, and throughout the dungeon and keep, with many items of clutter among them. There are stairs along the rear wall leading up to the balcony. In the southern corner is a long wooden table with a goat hide, a bottle of ale, a portion of grilled leeks, and an iron dagger on top. Behind the table, among thick cobwebs is a blue butterfly wing, while beside it is a counter with two petty soul gems, a random empty soul gem, and a common book on top. In front of the counter is a pair of iron boots and a basket containing a leg of goat. Against the northeast wall is a set of shelves holding a potion of healing, a potion of minor magicka, five common books, a leather strip, three bottles of alto wine, and four bottles of wine. To the left is a small square table with two more common books and a random pair of gauntlets on top, while to the right of the shelves are two pieces of firewood.
To the southeast is a passage leading down a few steps to a T-junction with a pressure plate on the ground. This triggers a poison dart trap from the right. Passageways lead to the left and straight on. The latter ascends a few steps before turning to the right. There is an end table by the turn with a random potion of stamina on top. Around the corner is a closed wooden door into a small room containing an apprentice-locked chest, and a set of shelves holding an iron cuirass, a random cuirass, and an iron warhammer, with a random shield in front. Beside the shelves is another small end table with a leather strip on top.
Back at the junction, take care as a few paces along the passage to the left is a shock rune trap on the ground (Note: this rune has been reported to be invisible at times, so tread carefully; additionally, if you trigger it from a distance, it may alert the mage in the next room). Beyond this is a food barrel with a flute on top by an open door that leads into a larger room with four cells along the far wall. To the right of the door is a torture rack, and hanging from the ceiling is a small cage. There is a mage around the corner to the right. During Hitting the Books, three of the cells have live captive leveled vampires locked in them; otherwise, the cells contain dead vampires. You can either kill each of the vampires with ranged magic or a bow, or if you unlock the cells, they will rush through the door to the southeast and attack a group of mages that have been performing dissections on a pair of master vampires, a Khajiit, and a Nord. The vampires will then leave the dungeon without attacking you (unless you attack them first). The cells are all apprentice-locked, and can either be lockpicked or opened using the four levers on the southeast wall to the right of a wooden door, each opening one of the cells. The vampires may be carrying useful items, including potions. There is a steel warhammer leaning against the wall by the rack. Under the levers is a dresser with a dagger, a set of clothes, and a hat on top. To the right of the dresser is a long wooden table holding an iron dagger, a common book, a salt pile, five loose septims, and an emerald; some of these are in a wooden bowl. Beside the table is a set of shelves holding a random mace, a medium coin purse, two common books, a bottle of alto wine, a bottle of wine, and two bottles of ale. Against the northwest wall, beside some rubble from a cave-in is a stack of crates with an iron war axe on top.
The next room contains three mages, who will be dealt with by the vampires if you released them; otherwise, you may be in for a difficult fight. There are four wooden tables in the room with experiments on top: two with dead master vampires on top against the northwest wall and in the middle of the room between two pillars, a third with a dead Khajiit on top against the southeast wall, and the final table with a dead Nord on top against the northeast wall. The first three have leveled mages standing beside them. On your right as you enter is a table with a set of working shackles on top, and beside the table against the southwest wall is a set of shelves holding four books and a pair of iron gauntlets. To the left is a passage that has caved in, with a patch of Namira's rot fungus growing among the rubble, and to the left of the passage is a crate with an iron mace on top. In the northern corner is a cupboard with two common books and a salt pile on the shelves. There are three small cages hanging from the ceiling; the one in the southern corner has a dead Khajiit inside, while the others contain only bones. Along the northeast wall is a wooden block with an iron dagger and a salt pile on it, another set of shelves holding six more books and a bowl of bone meal, and a dresser containing clothes with a random potion of healing on top. In the eastern corner is a wooden door. To the left of the Khajiit against the southeast wall are two more sets of shelves holding four more books, a filled lesser soul gem, and a sample of bleeding crown fungus.
Through the door is another caved-in passage, with a flight of stairs descending on your right. At the bottom is a round table holding a woodcutter's axe, with the passage opening up to the northeast into another room with cells against the walls. This next room is circular, with one mage on guard opposite by a large fireplace. There is a random pair of boots on the hearth, and a long wooden table to the right. On the table is an iron dagger, a leather strip, and some bread and cheese. Opposite the fireplace, against the wall is a set of shelves holding clutter and a random empty soul gem. Beside this is another woodcutter's axe. There are two barrels to the left of the fire, with a random helmet on top. There are three levers in the middle of the room that open the three cells to the east, southeast, and south. Orthorn is in the southeast cell, and two wolves are in the east cell unless the mage is able to release them to aid him in fighting you. You can choose whether or not to release Orthorn, and even if you take pity on him, you are not required to allow him to accompany you. In the northern corner of the cell containing the wolves is a medium coin purse that is difficult to see due to cobwebs.
There are three doors from this room, not including the entrance you used. The locked door to the west opens into a small storeroom containing an apprentice-locked chest, a sideboard with an iron warhammer, an iron greatsword, and a pair of iron gauntlets on top, and a set of shelves holding a common book, a thistle branch, a salt pile, a medium coin purse, a bottle of wine, and a random potion. At the top of the stairs to the northwest is another dresser containing clothes and a wooden door that leads to Fellglow Keep that requires a key to open. The third door to the northeast isn't locked. Behind it is a passage with a bucket on the floor on your left containing a creep cluster and a sprig of elves ear. After a few paces the passage staggers to the right, by a table with an iron dagger on top. The next section is brightly lit, with a small shelving unit holding a bunch of jazbay grapes and a leather strip. The passage descends a flight of stairs to the northwest. You can hear someone receiving instruction ahead.
The passage turns to the northeast at the bottom, where you will see two mages ahead practicing fire spells while a third mage looks on. There are three target lanes opposite: the one on the right contains a dead vampire in a small hanging cage, the middle one has a practice dummy at the end, and the one on the left has a captive vampire in a small hanging cage. There is long wooden table in the middle of the room with a copy of The Legend of Red Eagle on top. In the southern corner is a cupboard, with seven common books and three food sacks on the shelves. To the left is a dresser containing clothes, with an iron dagger on top. The northwestern side of the room has a slightly raised area, with a cupboard on the left holding five more common books, a sprig of frost mirriam, and a sliced goat cheese in a basket. To the right is a small shelving unit partially buried in rubble, with an iron mace on a shelf. Between these is a flight of stairs; at the top of the stairs is another cupboard, with a garlic braid and a drum on the shelves. The passage turns to the northeast, with a basket on the right holding a leg of goat and two potatoes. The passage continues to climb two more small flights of stairs, opening into a lit room containing two leveled necromancers and a total of eleven sarcophagi along the side walls. The sarcophagi burst open and skeletons emerge; some rise, while others are already dead and can be looted. The last sarcophagus on the right also contains a random filled soul gem and a random war axe. At the far end is a plinth with a Spell Tome: Raise Zombie on top. Behind this is a twelfth sarcophagus. To the right is a small room where the ceiling has caved in, containing a cupboard with a creep cluster on a shelf, two barrels of ingredients, and a set of shelves holding a random filled soul gem, a leather strip, and two common books. To the right of the shelves is an unlocked chest. To the left of the last sarcophagus is a passage leading up to a door to Fellglow Keep.
Fellglow Keep[edit]

Through the door is a passage, with a dresser ahead with a medium coin purse, a random empty soul gem, and a common book on top. To the right is a flight of stairs leading up to another door. This door opens into another room containing two mages and a familiar or atronach. There is a damaged altar with a shrine of Talos that can still be used. Behind the damaged statue is a random greatsword stuck into the rubble. Next to the altar is a plinth with a copy of the Conjuration skill book The Doors of Oblivion on top. There are four filled petty soul gems in holders on the floor in a square overlaid with four lit candles, presumably for some form of ritual, while to the right of the square are several wooden benches facing east toward another door.
The door opens into a small room containing a necromancer seated at a table. There is a large fireplace on the right, beside a counter with an apothecary's satchel, a grass pod, two food sacks, and a cabbage on top. By the fireplace is a flower basket containing a sample of white cap and a sample of scaly pholiota. There are three small tables with chairs and one long table with a bench in the room; one table has a bottle of alto wine on top. To the north is a wide doorway into a passage. In the northwest corner is a cupboard holding a basket containing three sheaves of wheat. To the right is a dresser. Against the south wall is a crate with a woodcutter's axe on top. The passage heads east, passing a small shelving unit holding a gourd and a food sack, and a long wooden table with a random potion of healing, a bottle of wine, a portion of grilled leeks, and a baked potato on top. To the north is an alcove with a locked door to Fellglow Keep Dungeons. The door, which cannot be picked and requires a key to open, opens at the top of the stairs in the dungeon where Orthorn was held. On the left on top of some unusable barrels is a random battleaxe.
Ahead the passage passes through a door into a room on two levels. You enter into the lower level; to the right is a flight of stairs up to the upper level where you will find a mage and a familiar or atronach. On the lower level are two doors: one to the north and another to the east. The door to the north is the keep's main entrance, but is locked and requires a key. There are two long wooden tables and benches in the middle of the room, and several sets of shelves, cupboards, and a dresser around the room which hold a random potion of magicka, a bottle of alto wine, two bottles of wine, a salt pile, a deathbell flower hidden in a cast iron pot, a bowl of bone meal, eleven common books, and a sack of food. There is also a small counter with a cabbage, a carrot, and a sack of food on top. The upper level has a cupboard holding two potatoes, a bottle of ale, and three sacks of food, and a set of shelves holding two bottles of alto wine, two bottles of wine, and two pieces of cheese. Three doors lead off this level to the east, south, and west.
The door to the east from the lower level leads into a dormitory containing two necromancers, six single unowned beds, a dresser, an end table, a tall wardrobe, and a set of shelves. On the shelves are two bottles of alto wine, a knapsack, a honey nut treat, a bowl of glow dust, a medium coin purse, and three common books. Beside the wardrobe is a bucket containing a gourd. To the south is a passage with two barrels on the right, with a bunch of jazbay grapes in a wooden bowl on top. A dresser on the left has a briar heart on top; around to the left is a common book on a barrel.
To the west from the upper level is a room containing an alchemy lab, an arcane enchanter, a workbench, an anvil, and a fireplace. There is a small counter with an unusual gem (related to the quest No Stone Unturned), an apothecary's satchel, a bunch of lavender, a dragon's tongue flower, a random potion of magicka, and three pieces of charcoal on top. There is also a cupboard with a blacksmith's apron, a hammer and tongs, three quicksilver ingots, three common books (including a copy of Lost Legends, which starts the quest Forbidden Legend), and two soul gems, one filled and one empty, on the shelves. The door south is barred from the other side. The door to the east opens to a short passage leading to stairs up into a larger room above. There is a wardrobe and a table with a bowl of bone meal on top at the bottom of the stairs. The room at the top has two leveled mages, who may be alerted during previous fights.
The room at the top of the stairs is circular, with passages to the north and south, sets of shelves along the walls around the entire room, and a circle of shelves forming a small area in the middle facing outwards. In the middle of these central shelves are three small tables and chairs, with a copy of the Destruction skill book A Hypothetical Treachery, a bottle of alto wine, a piece of bread, a portion of grilled leeks, a bottle of wine, a common book, a small coin purse, and a random potion on top of the tables. The shelves around the room hold many ruined books, a bottle of Nord mead, a sample of scaly pholiota fungus, a salt pile, two bunches of lavender, several food sacks, a copy of The Aetherium Wars(DG), an iron helmet, a sample of creep cluster, a lute, two leather strips, a sample of blisterwort fungus, an iron mace, three bottles of alto wine, four bottles of wine, a copy of Boethiah's Proving (which starts the quest Boethiah's Calling as long as you are level 30), a hooded black robe, a Spell Tome: Sparks, a bowl of void salts hidden in a flower basket, and two iron daggers.
The passage to the south turns after a few paces and heads west up a flight of stairs, then opens into another wider passage. There is a cupboard on the right holding only clutter, and a short distance farther along a door on the left opens into a bedroom containing an unowned double bed, a wardrobe containing clothes, an unlocked chest, and a long wooden table with a gourd and a baked potato on top. Farther along the passage is a door ahead, while the passage turns to the north to another door at the far end. The door ahead opens into another bedroom, this one containing two unowned single beds, one of which has a mage sleeping in it, a wardrobe, an end table, and a cupboard holding a leather strip, a satchel, a swamp fungal pod, a random helmet, a bunch of jazbay grapes hidden in a wooden bowl, and two food sacks. There is a random dagger on the floor in front of the cupboard. The mage carries a copy of the Fellglow Keep key.
At the end of the passage are two doors: one to the north, and an adept-locked one to the east that can be opened with the Fellglow Keep Key carried by the previous mage. The room contains a long wooden table holding a baked potato, a grilled chicken breast, a portion of grilled leeks, a salt pile, a bottle of alto wine, a piece of bread, a piece of cheese, and an apothecary's satchel. There is a small table and chairs in the middle of the room, with a bottle of wine and some bread and cheese on top. In the southern corner is a shrine of Julianos on top of a dresser, with two sets of shelves to the left. The shelves hold a bottle of alto wine, two bottles of wine, a bowl of bread, a plate holding a dragon's tongue flower and a bunch of jazbay grapes, two red apples, and a bowl containing a sweet roll.
To the east is a door into another bedroom with an unowned double bed coming out from the south wall, with an end table to the left with a small coin purse and a common book on top, and an adept-locked chest and a pair of random boots at the foot of the bed. There is a wardrobe and a dresser against the north wall, with a bottle of alto wine and a leather strip in a basket on the dresser. In the southwest corner is a set of shelves holding a potion, a basket containing a sample of fly amanita fungus, and a bowl containing a sprig of frost mirriam and a bulb of garlic. Returning to the passage, through the door to the north is a flame atronach and curved stars leading up. By the bottom of the stairs are two sets of shelves holding a bottle of wine. The stairs curve up and around to a door to the southeast at the top. Opposite the door are more shelves holding a bottle of alto wine, a bottle of wine, two scrolls of Ice Spike, a random potion of resist fire, a gourd, and two random potions of healing. The door opens into the Ritual Chamber.
Fellglow Keep Ritual Chamber[edit]
Upon entering the chamber, you will finally find the Caller. Regardless of whether you are sneaking, you will be instantly spotted, and she will initiate a conversation. She is the leader of the group of renegade mages, and is quite upset over your presence and the destruction you have caused. She also possesses the three books required for the quest Hitting the Books that are found within this room. The books you seek are on three plinths: one is in the center of the room, and two are in the center of alcoves behind.
Your options are essentially:
- Fight the Caller: either through certain dialogue options, by attacking her, or by picking up one of the quest books;
- Trade the books for Orthorn: through some dialogue options, the Caller will offer the books in exchange for your companion; if you accept, Orthorn will walk back to the keep, while you may pick up the books and leave without a fight. If Orthorn is not with you, and you tell her "Maybe we can come to an arrangement," she replies that you have nothing she is interested in;
- Persuade her to give you the books: she will then let you pick up the books without fighting.
- If you successfully persuade the Caller, Orthorn will act as if you accepted her trade, saying "How could you leave me here?" and walking off into the keep.
She will raise a Frost Thrall to aid in fighting you, and will teleport each time you close with her and deal damage; having a follower or raising your own atronach can greatly help in the battle. Once she is dealt with, collect the books Fragment: On Artaeum, The Last King of the Ayleids, and Night of Tears. The Caller carries a Fellglow Ritual Chamber Key that opens a door to the northwest, where you will find a boss chest with a random shield leaning against it, and a cupboard to the left holding a random helmet, a bowl hiding a bowl of bone meal, a bulb of garlic, a satchel, five soul gem fragments, a random filled soul gem, a copy of The Wolf Queen, v8, a random potion of healing, and a random potion. Beside the cupboard is a soul gem stand holding a random empty soul gem. To the right of the chest are two barrels of ingredients, and beside them is a stack of crates with a sheaf of wheat, a medium coin purse, and a gourd on top. There are two food sacks among some rubble on the left, and a trapdoor that opens into a room in Fellglow Keep. The room has a door that is barred from this side. Through the door is the two-level room passed previously. The door opposite leads outside via the main door that was previously locked.
If Orthorn helped you, after the fight, he may tell you he will stay away from the College for a while, and leave you.
Notes[edit]
- If you enter the keep before Hitting the Books (or are not affiliated with the College of Winterhold), the doorway leading to the library which leads to the uppermost room is blocked by rocks and rubble. The same happens after the quest, after the interior has respawned. However, enemies still spawn on the other side, even though you can't reach them and they cannot reach you. You also can't open the door which leads to the Caller's chamber, as it is blocked by a bar on the other side.
- You cannot clear this location during Hitting the Books, since the boss is disabled for the duration of the quest. If you have completed Hitting the Books, and if the enemies have respawned, a leveled conjurer will spawn in the interior of Fellglow Keep. This conjurer has the boss tag, so killing them will allow you to clear the keep. (There are a few conjurers, but only one of them has the boss tag.)
- As soon as you turn in the quest Hitting the Books, the upper part of the castle will be blocked, and more enemies will spawn. If you enter through the main entrance to Fellglow Keep (after obtaining the key), you end up directly in the living quarters. Right up the stairs is the room to the right with the smithing equipment and enchanter. The other two passages to the upper part of the castle are blocked by collapsed ceilings.
- The room across from the Caller can't be opened unless you have the Fellglow Ritual Chamber Key. This key can't be pickpocketed, and can only be obtained by killing the Caller or by using the Wax Key perk on the vampires' cells in Fellglow Keep Dungeons.[verification needed — see talk page]
- The insurgent mages do not share factions with the permanent atronachs both inside and outside the keep. It's therefore possible for the mages to detect you without alerting the atronachs, or for the atronachs to attack you on their own.
- There is a chest hidden on the outside of the keep. If you climb the cliff the keep is next to, you can drop down to the second level and reach it from there.
Bugs[edit]
- Once you clear the fort, trying to enter it again will cause a crash. This can happen even during the quest Hitting the Books if you try to backtrack from the Ritual Chamber. If you are on the quest, just leave by the exit to the exterior in the chamber.
 To avoid this, enter
 coc FellglowKeep03in the console to move to the Ritual Chamber, complete the quest, then use the console again to arrive at the exit (coc FellglowKeep01), turn around, and go out the door.
Maps[edit]
-

Fellglow Keep Dungeons
-
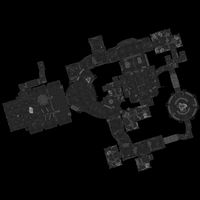
Fellglow Keep
-
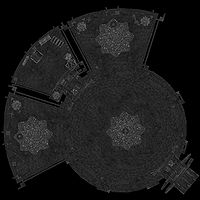
Fellglow Keep Ritual Chamber


