Skyrim:Forbidden Legend
|
||||||||||||||||||
Quick Walkthrough[edit]
- Learn of the Gauldur legend.
- Read Daynas Valen's journal and notes in Folgunthur to learn the truth in the legend.
- Find the three parts of the amulet in Saarthal, Geirmund's Hall, and Folgunthur.
- Reforge the amulet in Reachwater Rock.
Detailed Walkthrough[edit]
The Legend of Gauldur[edit]
"The history of Skyrim is vast, predating even the most ancient records of man and mer. Much has been lost, fallen to the ravages of war or the turning of the ages. But nothing is ever truly forgotten. Where no records exist, legends and folk tales offer us a key to the past, a way to piece together truths half-remembered in the minds of men."
The easiest way to uncover one of the best-kept secrets in Skyrim is to locate and read the book Lost Legends for a bit of guesswork on the tragic events that took place back in the First Era. Due to the secrecy surrounding the Gauldur legend, the author will rely mostly on speculation to provide two possible takes on Gauldur's demise. Gauldur, once an incredibly powerful wizard in the courts of King Harald, was assassinated by either the king himself, or by his three sons, Jyrik, Mikrul, and Sigdis Gauldurson. Both theories suggest jealousy as the main motive. The legend then tells about how the three sons had to flee into the night, immediately chased by King Harald's warriors, led by battlemage Lord Geirmund. The books mention that one of the brothers disappeared into Folgunthur and the others were run into the ground soon thereafter.
A Key to the Past[edit]
There are multiple ways of initiating the quest.
- Reading Lost Legends is the way to go if you want to initiate the quest properly and learn every detail about Gauldur and his sons (see book locations here).
However, a few other items scattered around Skyrim will start the quest as well.
- Defeat Sigdis in Geirmund's Hall or Jyrik in Saarthal and read the writ of sealing. This will add a map marker to the nearest copy of the book.
- Defeat Mikrul in Folgunthur and read his writ of sealing, then follow the map marker to Daynas Valen's Notes.
- Read the Ancient Edict inside Reachwater Rock, then follow the map marker to the book.
- Read Daynas Valen's Notes, found on his corpse inside Folgunthur, then proceed as instructed.
Another quest-related item, Daynas Valen's Journal, can be found and read in the camp outside Folgunthur but can break the quest if read at the wrong time (see bugs section for more information) and should only be read when the quest marker points to it.
Folgunthur[edit]
After reading Lost Legends, the quest will start right away. Your first objective is to investigate the Gauldur legend. As mentioned in the book, the only known location is the Nord ruin of Folgunthur, south of Solitude. When you arrive you will notice an abandoned camp set up right outside the ruin entrance. Investigate the tents to find an interesting journal scribbled down by Daynas Valen, a Dunmer obsessed with the legend, who searched all over Cyrodiil for clues. The search eventually brought him to Skyrim and Folgunthur; follow your map marker into the ruin.
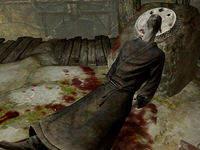
Immediately upon entering it is evident that someone was there before. An adventurer obviously overlooked the pressure plate and the corresponding spear trap. More supporting evidence can be found in the first room where a Dragon Claw puzzle and surrounding pillars have been solved already, except for a hidden door that you do not have the claw for yet, so remember to bring it by here after you have acquired it. Moving on past the remains of yet another adventurer, you will encounter a draugr and a huge room which immediately seals behind you. Several draugr enemies will break out of their coffins and attack. Using the oil on the floor will be to your advantage. Locate the spiral staircase to the north and beware of the disappearing grate. Should you fall into the water, just locate the handles and pull yourself back out. Head upstairs and locate the dead body of Daynas Valen leaning against another dragon claw trigger. Examine his body for the ivory dragon claw and his essential notes; make sure to read them as instructed. This will add three new map markers and three new objectives which will reveal the truth about Gauldur and his three sons.
After reading the notes, insert the ivory dragon claw in the keyhole and cross the bridge. Proceed through the catacombs and fight the draugr enemies until four gates block the path. Investigate the wall for four corresponding levers. Each lever activates a specific set of doors. The first lever on the right activates doors 1, 3, and 4; the second lever on the right activates doors 1 and 4; the first lever on the left activates doors 2 and 3; the second lever on the left activates door 3. While facing the gates, pull the first lever on the left and the second lever on the right to open all four gates. Head down the stony steps and watch out for the falling boulders in the next room. Four draugr and another puzzle wait in the next room, along with three symbols in the neighboring room. The first room contains an iron chain and two handles next to the thrones. The chain will only release a few darts at the moment, so check out the symbols in the neighboring room. Facing north, clockwise, the symbols are: Snake—Whale—Eagle. Pull any of the handles in the previous room, which will reveal a new room and release a high level draugr. The movable pillars will have to reflect the ones you just saw, so face north and turn them so they match clockwise. Return to the first room and pull the chain, which will now remove the grate leading downstairs.
The damp underground area hosts a few frostbite spiders. As you surface from the water, six draugr enemies will burst out of their coffins and attack. The puzzle door will require you to examine the claw found on Daynas Valen's body; the solution, from the outermost ring inward, is Hawk—Hawk—Dragon. Turn the rings and insert the claw in the keyhole and watch the wall disappear. Finally, make your way to Folgunthur Crypt and prepare yourself for battle.
Mikrul Gauldurson[edit]
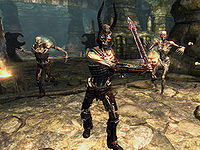
The final resting place for Mikrul Gauldurson is a large chamber. When you approach, Mikrul himself smashes open his coffin. Soon he is flanked by four draugr thrall, and the battle with Mikrul begins. Mikrul himself is a powerful draugr and will use a Frost Cloak and Frostbite spells along with the leveled Gauldur Blackblade, a one-handed sword with an Absorb Health enchantment. Begin the fight and focus on Mikrul as the other draugr will only do minor damage. When he is disposed of, search his body for the writ of sealing, his leveled blade, and, most importantly, the Gauldur Amulet Fragment. This fragment is one of three pieces of Gauldur's powerful amulet, stolen by the brothers after the murder. Although referred to as a fragment, it is a fully functional amulet that increases your health 30 points. Lastly, use the claw on the southern wall for access to a boss-leveled chest and a word wall, which has one of the words for the Frost Breath shout. To make it out of the dungeon, pull the chain at the right of the closed metal gate and head upstairs.
Saarthal[edit]
As part of your initiation into the College of Winterhold, you will have to participate in an expedition to one of the earliest Nord settlements in Skyrim. This settlement happens to be none other than Saarthal. The related quest, Under Saarthal, is the only way to access the ruin, so join college professor Tolfdir on what is meant as an educational journey for college newcomers. The trek through the ruin will reveal more than one secret, along with the sealed resting place of Jyrik Gauldurson, your next target for the Forbidden Legend quest. However, make Under Saarthal your active quest for now and follow the walkthrough.[verification needed — see talk page]
Jyrik Gauldurson[edit]
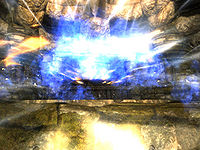
After a long trek through the dungeon with Tolfdir, the final chamber will reveal a sight to behold. A huge, glowing orb rotates in the center of the room, seemingly shielded by magic, and Tolfdir will be understandably puzzled. When you approach what turns out to be the Eye of Magnus (as revealed during the College of Winterhold quest line), Jyrik Gauldurson will rise from his throne near the table. Tolfdir will attack him with all he's got, but will soon realize he is invulnerable due to the Eye of Magnus. You will have to keep Jyrik occupied while Tolfdir drains the magic from the eye, which will make Jyrik vulnerable after a short period of time. He uses an ancient Nord war axe but should not give you any trouble once Tolfdir has performed his magic tricks. When he is disposed of, claim his Amulet Fragment, which increases magicka by 30 points and the writ of sealing. Remember to claim the unique Staff of Jyrik Gauldurson from the table, then speak to Tolfdir. Tolfdir will ask you to return to the College of Winterhold. Make Forbidden Legends your active quest again and leave him through the western door where you will find a boss leveled chest and a word wall with a word for the Ice Form shout.
Geirmund's Hall[edit]
According to the research of Daynas Valen, Sigdis Gauldurson was the brother to finally slay Lord Geirmund after the defeat of his other brothers. Sigdis himself fell in the lengthy battle and Geirmund's Hall was to be his final resting place, forever sealed and protected by the earthly remains of Geirmund. Geirmund's Hall is found on an island straight east of Ivarstead, conveniently surrounded by Lake Geir. Compared to the other two tombs, Geirmund's Hall is rather small, but it soon becomes apparent exactly why Geirmund fell to Sigdis.
Upon entering, fight a few resident skeevers and examine yet another dead adventurer. Locate the deep pit in the center of the chamber and make sure you have stocked up on supplies, then take the long fall into the depths, where you will land in an underground lake. Examine the water for a tunnel with some treasure and a Draught of Waterbreathing potion, then head up the wooden bridge and open the door. Two frostbite spiders will protect their nest and a locked door hiding some minor loot. Beware of the plate triggering a dart trap and proceed to the first a flooded puzzle chamber. Dispose of the residing draugr enemies and, if so desired, carefully claim the soul gem from the weight sensitive plate on the table, which will trigger a deadly battering ram when removed.
Return to the stairs near the entrance to the chamber and take a look at the symbols on the walls. Your task is to rotate the pillars on the walls to match these symbols in the same order and on the same walls. The sequence is Eagle—Whale—Snake—Whale. Stand at the first encountered pillar, then moving around the room clockwise, rotate the pillars accordingly.
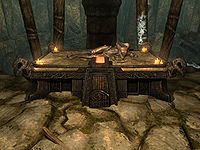
Pull the lever, head up the stairs, and proceed to the next room, a narrow chamber in two levels. Take the wooden bridge to the upper level and behold the sight of Archmage Geirmund, the mighty slayer of the three brothers, now reduced to a draugr-like skeleton on a pedestal. Read his epitaph and claim the key from his fingers. Use it to unlock the nearby door, then fight another draugr and a frostbite spider protecting an arcane enchanter. The pathway east leads to a collapsed tunnel with a levelled Potion of Invisibility sitting on a broken table.
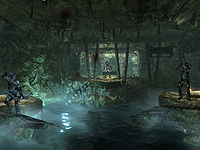
Take the western stairs and follow the tunnel as it bends until you reach a lever and a raised wooden bridge. Stay away from the obvious lever as it will only release a set of spikes, and investigate the wall to the west of (directly behind) the obvious lever for hidden lever that will lower the bridge. From the bridge, it is optional to jump down on a secret ledge to the southwest for a locked chest protected by a spellcaster trap. Get back on track and lower the second bridge for still more draugr enemies and a hall protected by swinging blades. Make your way through and turn them off using the chain on the wall. Proceed forward until you enter a flooded room with several platforms and a mysterious mist coming from the water. This is the final resting place for Sigdis Gauldurson.
Sigdis Gauldurson[edit]
Before heading up the wooden bridge, take a look around the chamber. All the platforms can easily be reached from below and if you are a melee fighter, you will need this knowledge later.
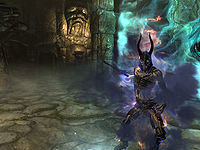
Head up the bridge and approach the coffin, which will cause Sigdis to break out and immediately teleport to any one of the three pedestals around the room. He will then conjure two illusions of himself, placed on the platforms. If you kill the illusions, Sigdis will simply teleport and create two new ones, so there's not much point in going after the illusions at all. You must find the real Sigdis and defeat him.
How to quickly distinguish between the real Sigdis and his Illusions
- The real Sigdis does not glow blue like the illusions do.
- The illusions have glowing purple runes on them, which the true Sigdis lacks.
- The real Sigdis' health bar goes down when he is hit; the illusions generally die in one hit.
- The real Sigdis has a helm with horns curled down, like an ancient Nord or Ahzidal's helmet; the illusions have helms with the horns straight and pointed upward.
If you approach Sigdis, he will generally try to deal one more hit of damage before teleporting and summoning new illusions. This rapid room-crossing can be tricky to overcome for melee-dependent classes. Ranged classes can quickly climb onto either of the central platforms and snipe away. Sigdis will neither teleport to nor create illusions on the platform you are standing on, however he can knock you off the platform with his Unrelenting Force shout and do heavy damage with his bow as you struggle to your feet.
Use your combat method of choice and defeat the hard boss. Keep an eye on your health at all times and be careful he doesn't disarm you. When he is slain, claim his unique Gauldur Blackbow, the writ of sealing, and the Gauldur Amulet Fragment (+30 points to stamina) from his corpse. Doing this will reveal a tunnel behind his coffin leading to his treasure room, which includes the boss-leveled chest, the Two-handed skill book Words and Philosophy, and some scattered potions and soul gems. Find the nearby tunnel and follow it to a lever that will lower a rock wall and bring you right back to the pit you jumped into near the entrance.
Reachwater Rock[edit]
After conquering Saarthal, Folgunthur, and Geirmund's Hall and defeating the undead reincarnations of Jyrik, Mikrul, and Sigdis, the time has finally come to reforge the three Gauldur Amulet Fragments and put the legend to rest. You are pointed towards Reachwater Rock, a cave hidden underneath one of the waterfalls running into Karth River, southeast of Markarth. Enter the cave and head downstream. There is an adept-locked chest in the water, plus a skeleton not far away (at the bottom of the pond) with some armor. Be careful if you decide to swim for the chest, as the waterfall applies a great amount of force to the water above you forcing you to the bottom of the pool, hindering your escape. Without a spell or potion of Water breathing you will likely drown attempting to return to the surface.
Climb back out of the water and up to the central plateau with a deceased adventurer and a podium with the emerald dragon claw, along with the unsettling ancient edict. Head to the door and examine your new dragon claw for the combination (Bear—Whale—Snake) and rotate the rings to match. Insert the claw in the keyhole and the door will open, along with three similar doors further ahead.
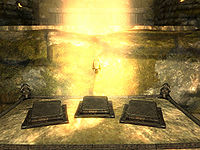
Another puzzle door will block your path, and this time you will need the ivory dragon claw you claimed back in Folgunthur. Rotate the rings to match the Hawk—Hawk—Dragon symbols on the claw and follow the corridor a long way down toward a huge chamber with a set of stairs in the center. Notice the many coffins surrounding the area and make your way to the three Amulet Pedestals. Place a fragment on top of each pedestal and listen to the sound of the gate closing behind you.
Gauldur[edit]
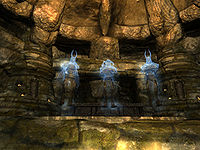
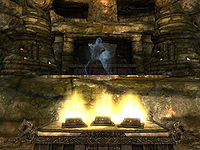
The ghosts of all three murderous brothers will now appear over the pedestals and you will have to fight them all, one by one. First up is Mikrul, who appears near the recently closed gate along with an army of draugr thrall. Pick the chaotic fight and watch the ghost of Mikrul disappear and kneel next to his brothers when you slay him. Next up is Sigdis, the hardest of the three, who will repeat his old trick, spawning three fake clones this time around instead of two. As before, the real Sigdis has a different helmet with curved horns, making him easy to identify. Jyrik is the last of the three, and he will teleport himself around at random times and summon daedric enemies to help him out. Take him down and watch the last of the three ghosts fall to the ground. As the three of them try to get back on their feet, Gauldur himself will appear and blow them all away with a gigantic explosion. He will then forge the three amulet pieces into one, finally ending the curse and providing your reward. The complete Gauldur Amulet increases your health, magicka, and stamina by 30 points. Before you leave, take a look at the skeleton remains of Gauldur, the powerful wizard murdered by his own sons thousands of years ago. Search the bones for a considerable amount of gold, then leave. On your way out, a hidden wall will have lowered, revealing even more rewards for your tireless quest for the truth: a boss leveled treasure chest.
"And once it was done, King Harald ordered every record of their murders destroyed, and Gauldur's name and deeds were struck from the rolls of history. Even today, few sources remain, and no bard will tell the tale. But perhaps the truth yet remains in some ancient ruin, waiting to be unearthed. For nothing is ever truly forgotten."
Locations of Lost Legends[edit]
A total of 24 fixed copies can be found scattered around Skyrim, with the majority of the copies only available during quests or dungeon delving. This is a list of the ten copies that can be found and studied without any prerequisite actions or consequences, all of them found in larger cities. Remember, it is not opening a book that constitutes a crime, but stealing the book which incurs a bounty.
| City | Location | Specific details |
|---|---|---|
| Dawnstar | The White Hall | Jarl's Quarters, on the wardrobe. |
| Falkreath | Dengeir's House | On the dresser. |
| Markarth | Understone Keep | Jarl's Quarters, shelves on the northern wall. |
| Riften | Black-Briar Manor | On the second floor. |
| Solitude | Bards College | Second floor, northern classroom. |
| Solitude | Blue Palace | On a corner table outside Sybille's quarters. |
| Whiterun | Dragonsreach | On a shelf in the Wizards Quarters, underneath a flagon. |
| Whiterun | Dragonsreach | Jarl's Quarters, top floor, southwestern room. |
| Whiterun | House Gray-Mane | Shelves on the second floor. |
| Windhelm | Palace of the Kings | Upstairs area, northeastern bedroom. |
Notes[edit]
- This quest is only added to your log when you read one of the documents connected to the quest; if you take all of the fragments to Reachwater Rock and assemble the amulet, the quest can be completed without any objectives being given.
- The clones of Sigdis encountered in Geirmund's Hall and Reachwater Rock are the only source of Rusty Arrows in the game.
- In Folgunthur, Mikrul Gauldurson bursts from his coffin as soon as you reach the corner of the passage leading to the last large chamber. If you have a good ranged weapon (e.g. crossbow (Fine)) and reasonable archery skills, it is possible to kill him with two (or more) steel bolts from that corner of the passage. If you succeed, the Draugr will all die (or never wake up) leaving you free to loot the entire chamber at your leisure.
- It is possible to loot the spirits of the brothers in Reachwater Rock before the "bodies" disappear, meaning you can get two Gauldur Blackblades and two Gauldur Blackbows.
Bugs[edit]
- Conjuring an Ash Guardian may cause Gauldur to indefinitely stalk back and forth across the upper platform as though enemies still exist even after he has destroyed the three brothers. The Ash Guardian will appear hostile towards him, but will not attack. This causes the animation for reconstructing the amulet to fail, and you end up stuck in the chamber indefinitely with his ghost and the guardian, as there is no way to banish it. ?
- The Amulet fragments can disappear after you leave a dungeon without taking it.
- The Official Skyrim Patch, version 1.4, fixes this bug.
- Killing Mikrul Gauldurson while sneaking may make his corpse inaccessible.
- The Official Skyrim Patch, version 1.4, fixes this bug.
- Killing Sigdis right as he is rising from his tomb can cause the corpse to disappear, making his corpse inaccessible.
- Using lightning attacks might disintegrate the brothers without leaving lootable ash piles behind, so you won't be able to proceed with the quest, and you will be stuck or forced to load a previous save. Likewise, if any of the three brothers is disintegrated at the finale, the quest won't be able to continue.
- The Official Skyrim Patch, version 1.4.21.0.4, fixes this bug.
- Saving at the end of the battle and reloading may fix this.
- While Daynas Valen's Journal is a quest-related item, reading it before reading Lost Legends will cause the quest stages to stumble upon each other. First, it will render Lost Legends useless. Reading Lost Legends will then render all three writs of sealing and the Ancient Edict useless. If you read them in a different order, the quest will initiate but will not update.
- If you stumble upon this bug, the only solution is to find Daynas Valen in Folgunthur and read his notes. The quest will then start and proceed from quest stage 30.
- If any dragon claw doors or rotating pillars do not work, check here for possible fixes.
- In Reachwater Rock, it is possible to be thrown through the walls of the chamber by the second boss' shouts. This may cause you to be stuck, or thrown back to the beginning of the dungeon.
- In Reachwater Rock, if any of your summons remain after the battle, Gauldur may rise from the dead but continue to dart back and forth ready for battle, even though all three brothers have disappeared, and ignore the pieces of the amulet. This is most likely if you conjure an Ash Guardian, since it will continue to exist indefinitely.
- In Reachwater Rock, if you have the Bonewolf with you, Gauldur may rise from the dead but continue to attack the Bonewolf, even though all three brothers have disappeared, and ignore the pieces of the amulet. Reload and tell the Bonewolf to wait outside. ?
- If after collecting all three amulet pieces your journal doesn't update with the final phase of the quest, you can proceed to Reachwater Rock and complete the quest as if it did update. The quest will complete after defeating the brothers and upon receiving the fused amulet.
- Both of the leveled rewards, Gauldur Blackblade and Gauldur Blackbow, do not actually follow the proposed leveled tables written on their respective pages. Some have hypothesized the leveling might be connected to the acquirement of this quest. Discussions have lasted for 5 years mainly here and here, yet no conclusion has currently been reached.
Quest Stages[edit]
| Forbidden Legend (dunGauldursonQST) | ||
|---|---|---|
| Stage | Finishes Quest | Journal Entry |
| 6 | In Reachwater Rock, I found a cryptic message that said the tomb here had been sealed, and should be forgotten forever. What is the story of this place?
Objective 6: Investigate the cryptic message
|
|
| 7 | In Folgunthur, I found a cryptic message on the body of a powerful Draugr, condemning him for his ancient crimes. What was his story? Why was he entombed with a broken amulet?
Objective 6: Investigate the cryptic message
|
|
| 8 | In Geirmund's Hall, I found a cryptic message on the body of a powerful Draugr, condemning him for his ancient crimes. What was his story? Why was he entombed with a broken amulet?
Objective 6: Investigate the cryptic message
|
|
| 9 | In Saarthal, I found a cryptic message on the body of a powerful Draugr, condemning him for his ancient crimes. What was his story? Why was he entombed with a broken amulet?
Objective 6: Investigate the cryptic message
|
|
| 10 | Long ago, the Archmage Gauldur was murdered, and his three sons were hunted down by King Harald's personal battlemage. The entire incident was covered up, their names struck from every record. But the legend survived. Perhaps someone still knows the truth of this ancient tale.
Objective 10: Investigate the Gauldur legend
Objective 20: Learn the truth from Daynas Valen
Objective 21: Read Daynas Valen's notes
|
|
| 20 | Long ago, the Archmage Gauldur was murdered, and his three sons were hunted down by King Harald's personal battlemage. The mage Daynas Valen spent his life searching for the truth of this tale, and came to Folgunthur with the key needed to unlock its secret.
Objective 21: Read Daynas Valen's notes
Objective 20: Learn the truth from Daynas Valen
|
|
| 21 |
Objective 21: Read Daynas Valen's notes
|
|
| 30 | Long ago, the Archmage Gauldur was murdered by his three sons, who stole his amulet of power and divided it among themselves. The brothers were hunted down in secret and sealed in tombs across Skyrim. To reclaim the amulet, I will need to seek out their final resting places.
Objective 31: Find the Gauldur Amulet Fragment in Folgunthur
Objective 32: Find the Gauldur Amulet Fragment in Geirmund's Hall
Objective 33: Find the Gauldur Amulet Fragment in Saarthal
Objective 100: Reforge the Gauldur Amulet
|
|
| 100 | Long ago, the Archmage Gauldur was murdered by his three sons, who stole his amulet of power and divided it among themselves. I defeated the brothers and reclaimed the fragments of the amulet. Perhaps Gauldur's tomb holds the secret to restoring it to its original form.
Objective 100: Reforge the Gauldur Amulet
|
|
| 105 | Long ago, the Archmage Gauldur was murdered by his three sons, who stole his amulet of power and divided it among themselves. I collected the fragments of the shattered amulet and brought them to Gauldur's tomb, where the ghosts of the three brothers ambushed me. | |
| 150 | Long ago, the Archmage Gauldur was murdered by his three sons, who stole his amulet of power and divided it among themselves. I defeated the undead brothers, located the fragments of the shattered amulet, and forged it anew in Gauldur's tomb.
Objective 150: Take the Gauldur Amulet
|
|
| 255 | ||
- The following empty quest stages were omitted from the table: 0, 1, 31, 32, 33, 101, 102, 103, 110, 111, 119, 120, 121, 129, 130, 131, 139, 140.
- Any text displayed in angle brackets (e.g.,
<Alias=LocationHold>) is dynamically set by the Radiant Quest system, and will be filled in with the appropriate word(s) when seen in game. - Not all Journal Entries may appear in your journal; which entries appear and which entries do not depends on the manner in which the quest is done.
- Stages are not always in order of progress. This is usually the case with quests that have multiple possible outcomes or quests where certain tasks may be done in any order. Some stages may therefore repeat objectives seen in other stages.
- If an entry is marked as "Finishes Quest" it means the quest disappears from the Active Quest list, but you may still receive new entries for that quest.
- On the PC, it is possible to use the console to advance through the quest by entering
setstage dunGauldursonQST stage, wherestageis the number of the stage you wish to complete. It is not possible to un-complete (i.e. go back) quest stages, but it is possible to clear all stages of the quest usingresetquest dunGauldursonQST.
