Lore:Chimera of Desolation
| Chimera of Desolation | |
|---|---|
| Type | Plane |
| Realm | Oblivion |
| Appears in | Battlespire |
The Chimera of Desolation is a small realm of Oblivion created by the Daedric Prince Mehrunes Dagon.[1]
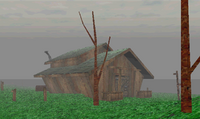
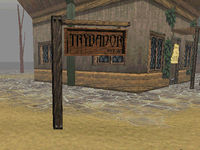
The Chimera was once Caecilly Island, a small island off the coast of Northmoor[2] (or Glenumbra, according to some sources)[3] in High Rock.[1] The entire island was cast into the void during the Third Era as an act of revenge against Chimere Graegyn, a mortal conjurer living there. The abandoned towns of Trybador and Granvellusa still stand on the desolate island.[1][2][4]
The plane was once accessible via the Battlespire, but this link was severed following Dagon's invasion of the edifice during the Imperial Simulacrum.[1][5] Upon Dagon's banishment during the Oblivion Crisis, Caecilly was returned back to Tamriel.[UOL 1]
Contents
Geography[edit]
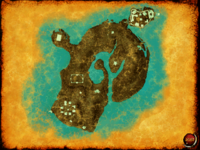
The Chimera of Desolation can be roughly divided into three parts; in the southeast sits the abandoned town of Trybador, the Chapel of the Innocent Quarry, and a fortress to the north. The northern section of the island is called Hartmoor, and is the home of the Chimera's only permanent resident. Off the northeast coast is the walled town of Granvellusa, which sits atop the eastern island called Allanscrag Mountain, which is surrounded on all sides by sheer cliffs. At the main island's center lies an isthmus known as Carnac Island.[1][6][7]
Notable Places[edit]
- Allanscrag Mountain
- A series of cliffs with a drawbridge to Granvellusa
- Cardinal Fane of Desire
- A large temple sitting on the northwest peninsula
- Carnac Isthmus
- An isthmus in the center of the island
- Chapel of the Innocent Quarry
- A fortress south of the Carnac Isthmus
- Garden of Time
- A small fortress on the central-west end of the island
- Granvellusa
- A walled town off the northeast coast
- Great Horned Temple
- Also called the Temple of the Daedric Rites, a temple with moon crescents found on the south coast
- Hartmoor
- The northern region, which has a cottage called Hartcroft belonging to Old Man Chimere
- High Rock Falls
- A scenic waterfall in the northeast with a secret passage to the Grotto of Gamewyrd
- Quayside
- A dock on the southwest end
- Shrine of the Unspoken Powers
- A temple with a large altar
- Temple of Dust
- A seaside tower rising above the south beach
- Tomb of the Saintly Fathers
- A graveyard on the south coast
- Trybador
- A town dating back to the First Era that sits near the southern coast
History[edit]
The Chimera of Desolation[edit]
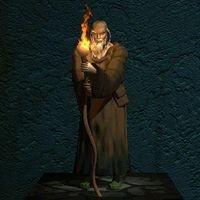
While the exact date of the Chimera of Desolation's creation is unclear, signposts seen in Trybador say it was established in the year 2112;[8] whether this refers to the First Era (1E 2112) or if it is the product of some other dating system remains unclear. It appears it was created at some point prior to 3E 172[2] when a Direnni clan retainer named Chimere Graegyn made a pact with Mehrunes Dagon, wishing to live forever in his home town among the happy voices of his friends and countrymen. Chimere schemed against Dagon, and won—casting him into Oblivion. However, Dagon had time enough to retaliate, and twisted the literal words of Chimere's pact; the Daedric Prince hurled Caecilly Island into the void, instantly killing the other residents of the island, but allowed the sounds of their voices to remain to torment Chimere for eternity. The summoner was granted eternal life, but cursed to grow progressively old and crippled with arthritis.[2]
The Chimera played a role in the invasion of the Battlespire. Dagon's forces were able to enter Shade Perilous, one of Nocturnal's realms, via a portal. An apprentice from the Battlespire retraced this path on the way to a confrontation with the Prince of Destruction.[1]
The Ritual of the Innocent Quarry[edit]
Eventually, the Chimera of Desolation became the setting for the Ritual of the Innocent Quarry, also called the Wild Hunt[nb 1] or Great Hunt,[3] an ancient Daedric rite that drew energy from the powerful magicka stream engulfing the plane. The creators and times of the rituals are lost to history, but when followed properly the rite brought great power and prestige to an individual dubbed the "Huntsman". The ritual pit this all-powerful Huntsman and their Greater and Lesser Dogs (all Daedra) against a mortal known as the Innocent Quarry, or simply, the Hare. In short, the Huntsman's aim was to corner and kill the Hare, while philosophically reflecting on the nature of their places in the Hunt.[9] Many Daedra considered being the Huntsman a great honor.[10]
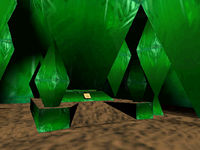
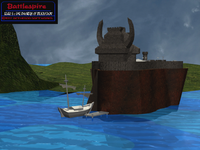
The Ritual began at the Chapel of the Innocent Quarry, a large green crystal edifice, and the only structure erected by the Daedra on the island.[2] The Lesser Dogs assembled outside, while inside the Huntsmen, the Greater Dogs, and the Master of the Hunt performed rites to initiate and sanctify the Huntsmen, the Hunt itself, and the Innocent Quarry. Afterward, the Huntsmen emerged, displayed the Spear of Bitter Mercy, and recited the Offices of the Hunt. The Offices explained the four stages of the Hunt: the Drag, the Chase, the Call, and the View to the Kill. In the Drag, the Lesser Dogs flushed the Hare out into the open. The Chase was conducted by the Greater Hounds, who pursued the Hare. They then cornered the Hare during the Call, and summoned the Huntsman for the kill. Finally in the View, a Huntsman killed the Hare with the ritual Spear of Bitter Mercy, then called upon the Master of the Hunt to view the kill by ringing the town bell of Trybador. After the Hunt was concluded, the Master of the Hunt then bestowed the Bounty upon the Huntsman Bold (the one who made the successful kill). The Huntsman Bold was then allowed to name the next Hare for the next Hunt (though was forbidden from participation in that Hunt).[9]
The Huntsmen, Master, and Hounds are solemnly sworn to honor the Offices, or Law, of the Hunt. The Law strictly defined all details of the Hunt, such as how many Hounds of each sort could participate, how the Spear of Bitter Mercy could be wielded, and so on. Of particular importance, the Law stated that the Hare must have a genuine chance to escape, no matter how slim. This generally took the form of six keys, which if collected would allow the Hare to open a portal in the Temple of Daedric Rites and escape the Chimera of Desolation. The Daedra considered escape to be effectively impossible, but considered a failure to provide the opportunity to be a "shameful and unforgivable betrayal of the Law of the Hunt".
Additionally, the Ritual of the Hunt granted the Huntsmen protection from all forms of attack, including virtually all weapons and magical effects. The only exception was a Huntsman's own Spear; a single touch of the Spear of Bitter Mercy meant instant and certain death, whether the victim was Hare or Huntsman. It was believed that only the most powerful Daedra were immune to the deadly effects of the Spear.[9]
Invasion of the Battlespire[edit]
In 3E 398, Mehrunes Dagon's forces attacked and seized control of the Battlespire with the blessing of Imperial Battlemage Jagar Tharn, who was impersonating Emperor Uriel Septim VII.[11] With the portal back to Tamriel blocked, an apprentice trapped within the Battlespire made it to the Chimera and became the Hare in a Wild Hunt instigated by Dagon's Herne minions. However, the apprentice was aided by both Old Chimere and Clan Dremora.[1][12]
One of the Huntsmen was a Herne named Egahirn; it was his first Hunt, and he was given the honor of making the Kill. However, in order to assure his victory, he kept one of the six gatekeys needed for the Hare to escape on his person. This was a direct violation of the Law of the Hunt, and it did not sit well with many of the other participants (as Egahirn was protected against all weapons and magics).[13] It also presented an opportunity; when he tricked Mehrunes Dagon, Chimere wore the Armor of the Saviour's Hide, which protected the wearer from attacks by oathbreakers—which Egahirn was by his actions.[14] The apprentice retrieved the Spear of Bitter Mercy, wore the Saviour's Hide, and was able to slay Egahirn and escape the realm.[1] When Dagon manifested in the Imperial City during the Oblivion Crisis, he was defeated by the Avatar of Akatosh and banished back to Oblivion, sealing the vale between the realms and transporting Caecilly back to its original location off the coast of Northmoor.[15][UOL 1]
Gallery[edit]
Notes[edit]
See Also[edit]
- For game-specific information, see the Battlespire article.
Books[edit]
- Tal Marog Ker's Researches by Tal Marog Ker — On the exploits and studies of Chimere Graegyn
References[edit]
- ^ a b c d e f g h Events of Battlespire
- ^ a b c d e Tal Marog Ker's Researches — Tal Marog Ker
- ^ a b Harvest's End, the ESO version of Tal Marog Ker's Researches
- ^ Savior's Hide Notes
- ^ The Doors of Oblivion — Seif-ij Hidja
- ^ Chimere's Journal — Chimere Graegyn
- ^ Battlespire Athenaeum — Ronald Wartow
- ^ Text on a Trybador signpost in Battlespire
- ^ a b c The Posting of the Hunt
- ^ Letter to Fire Daedra
- ^ Paxti Bittor's dialogue in Battlespire
- ^ Letters from the Dremora — Letter 1
- ^ Letter from Balaherne — Balaherne
- ^ Old Man Chimere's dialogue in Battlespire
- ^ Light the Dragonfires quest in Oblivion
Note: The following references are considered to be unofficial sources. They are included to round off this article and may not be authoritative or conclusive.
