Online:God of Schemes
|
Quick Walkthrough[edit]
- Talk to the Prophet in the Harborage.
- Talk to Abnur Tharn.
- Talk to Mannimarco in Heart's Grief.
- (Choice) Free Mannimarco or leave him to suffer.
- Talk to Abnur Tharn in the Seat of Tyranny.
- Choose a Companion and receive Akatosh's blessing.
- Defeat Molag Bal.
- Reclaim your soul and talk to Meridia.
- Talk to the surviving Companions.
- Talk to Cadwell.
Detailed Walkthrough[edit]
The Prophet will appear to you once you have ended the Planemeld and will call you to the Harborage for the final fight. Go to the Harborage and talk to him.
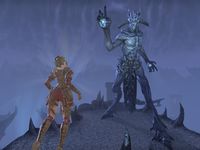
Once you arrive in Coldharbour, talk to Abnur Tharn. Defeat the titan and enter Heart's Grief.
Confrontation with Mannimarco[edit]
Heart's Grief is filled with traitors from various quests, but the central prisoner is your immediate target.
- The Prophet: "This place is alive with pain and suffering. This must be where Molag Bal torments those who displease him."
- Lyris Titanborn: "Look there! Is that Mannimarco?"
- Abnur Tharn: "Mannimarco! He was a back-stabbing hypocrite with delusions of godhood. The fool got precisely what he deserved!"
Defeat the guardians and torturers, then talk to Mannimarco.
- "You! Come to gloat at my torment? Or is your appearance here a part of it?"
- Mannimarco? You're still alive?
- "I am neither alive nor dead. I am trapped in a gout of ash and bile and swirling vapors. My ears are filled with the screams of a thousand nails being drawn. And the pain! The pain is endless."
- Why is Molag Bal keeping you here?
- "I am his plaything. And an abject lesson to others who would thwart him. My plan was flawless. My machinations were executed to perfection. I would have been a god, if not for you.
My only consolation is that you will know this pain, soon enough." - I'm here to defeat him and take my soul back.
- "Arrogant, presumptuous, egotistical twaddle! That bit of costume jewelry is nothing compared to the Master's power.
I expect I'll be seeing you soon. My only joy for the rest of eternity will be hearing your tortured screams!" - I could release you if you wish.
- "After all that's transpired? I killed you, you simpleton. I saw your life gutter and fade like a candle flame in a tempest. My undead servants drank your blood and I reanimated your corpse.
Do not taunt me with such hilarity." - So be it.
After you finish talking to him you can choose to free him if you want. You need to press the release mechanism next to him. However, he says you will regret your decision and disappears. Regardless of your decision, Mannimarco cannot be sacrificed to power the Amulet of Kings.
Around the room you will find other servants of Molag Bal whom you are able to free if you so choose; these include the Duchess of Anguish from the Halls of Torment, Prince Naemon and Javad Tharn from the Aldmeri Dominion storyline, Faolchu and Septima Tharn from the Daggerfall Covenant storyline, Aera Earth-Turner and Fildgor Orcthane from the Ebonheart Pact storyline, and Aelif from the Fighters Guild quest chain. Releasing some of them, like Aera, simply kills them and ends their torment, while others, like Aelif, will attack you.
Proceed out of the Vestibule and along the Path of Woe to the Seat of Tyranny.
The Sacrifice[edit]
Wait for the Companions to assemble in the Seat of Tyranny, then talk to Abnur Tharn.
- The Prophet: "Molag Bal is here. I can feel his presence. Sense his foul breath upon the wind."
- The Prophet: "There. That place should serve us well. Let us assemble and prepare the ritual."
- Lyris Titanborn: "What do you suppose this place was?"
- Sai Sahan: "A temple of some kind. The Dark Anchors may have pulled it into Coldharbour. Or, perhaps it was created by the Daedra to mock the Divines."
- Abnur Tharn: "What does it matter? We can't wait any longer. We must perform the ritual. Vestige, it is time for you to make your decision."
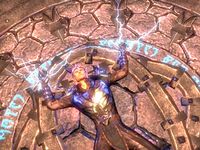
You need to pick which companion to sacrifice: Varen, Lyris or Sai. You can talk to each one, or you can choose to tell the one you want directly. Once you have made your choice, you need to stand on the yellow rune circle and wait for the ritual. The selected sacrifice will give some final speech. The Prophet, for example, will ask Akatosh to forgive him for his hubris.
Talk with Abnur Tharn to learn about the sacrifice and the choice you must make. With the sacrifice chosen, Abnur Tharn begins the ritual:
- Abnur Tharn: "Divines of Tamriel! With this vessel of your power, the Amulet of Kings, I call upon your strength! Let this noble sacrifice be a testament to our desire to set things right and restore balance to the Mundus! Your champion stands ready! Accept this offering and imbue this vestige with your glory! Let the will of Molag Bal be denied!"
You are surrounded by golden light and lifted into the air for a moment. However, there is no time to lose: you must vanquish Molag Bal.
THIS IS THE POINT OF NO RETURN. Once you choose the sacrifice and recieve the power of the Amulet of Kings, there's no turning back or teleporting out. Conclude any Zone Stories or grinding before choosing the sacrifice.
Molag Bal's Defeat[edit]
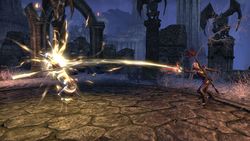
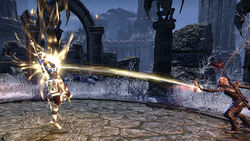
With the power of Akatosh, you burn through the walls of Molag Bal's castle and head up the stairs to the right. The Daedric Prince summons an army of Dark Seducers, but they are no match for you and a few hits kill them. You burn through more walls, easily defeating daedroths and titans. Molag Bal, standing a hundred feet tall, is visible in the distance, and will taunt you along the way. He will also throw the odd fireball at you, as during The Final Assault, except that they will hit you, doing no real damage.
When you come to a chasm, you use one of your new powers, Aedric Command, to reshape the rocks into a bridge. You defeat a group of titans, then prepare for the final battle with Molag Bal.
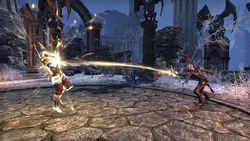
You approach the Daedric Prince. Suddenly, Molag Bal lifts you into his palm and begins crushing you in his fist. However, you use the Sacrifice of Courage, which hits him with a fiery beam and causes parts of his face to flake off. Infuriated, Molag Bal lands on your level, mace in hand, and attacks you.
The arena is a large, flat area with jagged boulders to maneuver around. Molag Bal uses a combination of ranged and melee abilities during combat. He holds his mace in his left hand, leaving his right hand free to channel single-target spells. At first, he only uses two basic skills, but as the fight progresses, audio cues herald the use of new abilities.
|
When his health falls to 10%, he will appear dazed, then teleport in front of you and drop to his knees. You summon a two-handed sword made of Divine light and cut him in half at the waist. Molag Bal's arms fall to the ground, the wounds glowing intensely with his blue essence, and he explodes.
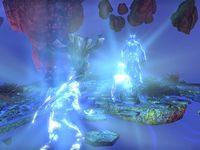
In a flash of light, you are transported to the Colored Rooms, Meridia's realm of Oblivion.
A Realm of Light and Color[edit]
- "Come forward, Vestige. You are safe, for now. Something precious to you has been riven from Stone-Fire's being. I have brought it here for you to reclaim."—Meridia
At the end of the northern path is a glowing figure—your soul. You reclaim it, and listen to the spirit of Molag Bal.
- Molag Bal: "I congratulate you, little insect. Your sting is formidable."
- Molag Bal: "You have bested me and released a thousand times a thousand souls back into the Mundus."
- Molag Bal: "For the moment, your world is spared, but my grand scheme has only begun to unfold. Excellent. Your power shall prove useful in the coming conflicts."
- Molag Bal: "You've made a great and terrible enemy this day. Your world would have been better off if the Planemeld had succeeded. Had you bowed before me and accepted eternal servitude, I would have protected you. There are worse masters than I. Far worse."
- Meridia: "You are but a phantom here in my domain, Stone-Fire. The mortal prophecies of the Scrolls have been fulfilled. Leave this place and return to your pit!"
- Molag Bal: "You have a powerful ally. Did you know that she would bring you here? What future role has she to play in this grand, cosmic farce, I wonder?"
- Molag Bal: "Bah! Your meddling has already cost me too much, accursed creature of light and flame. This farce no longer amuses me."
Talk to Meridia.
- "Your soul is restored. I can see its light within you. And you have saved your world from a great calamity. But know this, mortal. The forces of Oblivion are legion, and the God of Schemes is but a single player in a complex battle for supremacy."
- What happened to Molag Bal?
- "You have wounded him gravely. It will be some time before his power is restored."
- Where is the Amulet of Kings?
- "As your enemy fell, the one you call Abnur Tharn took Chim-el Adabal and fled. He returns to the land from whence he came, the place you call Cyrodiil."
- He took the Amulet with him?
- "The Amulet's power has been expended for a generation or more. The Imperial will not be able to use it, nor will he profit from it, though he will spend many frustrated years in the attempt."
- Did we succeed? Is Tamriel safe?
- "The tear in the veil between Oblivion and Nirn has been repaired. Your world is safe, for now."
- What of my lost companion?
- "Gone forever, but their memory remains. I can see the light burning brightly behind your eyes. Your friend is a part of you now, just as the strength of the Divines burns like a flame within your renewed soul."
- What about me?
- "Your story has only begun. Molag Bal still has plans for you. In many ways, these events played out to his advantage. And you have attracted the attention of the other Daedric Princes, as well."
- What must I do?
- "The war between mortal kingdoms is still ravaging your world, but your true enemies are not mortal. If you are to be prepared for the coming conflicts, you must fully comprehend what is at stake. You must live among those you make war upon."
- The other alliances?
- "Indeed. When you return to Tamriel, go to the place you call the Harborage. My gift awaits you there. It will allow you to travel to other lands and hide your true nature from those who would see you as a foe."
- Can you send me there?
- "I have no more desire to keep you here than you had to remain in Coldharbour. I shall return you to your little den in the wild. Your surviving companions await you there. Are you prepared to leave?"
- Yes, I am ready.
She returns you to the Harborage where her gift awaits.
Epilogue[edit]
Depending on whom you chose to sacrifice, the remaining two survivors will have different dialogue. If you choose to sacrifice Varen, Lyris Titanborn and Sai Sahan tell you that they discussed helping Kasura rebuild the Abbey of the Blades weeks ago. They leave together, confident there will be more adventures to come. If you choose to spare Varen, he chooses to leave and fade into obscurity. Lyris or Sai realizes his or her love for the other but decides to help Kasura.
Cadwell calls you over after you finish talking to the Companions. He tells you that he contacted Meridia when you were fighting Molag Bal and that your sacrificed companion will always be with you as their spirit appears near the crystal. He tells you the crystal is Meridia's gift, which allows you to experience the other alliances.
Your reward depends on the Companion you decided to sacrifice. If you chose the Prophet, you will receive his restoration staff (The Emperor's Blessing). If you choose Lyris, you get her two handed axe (Great Axe of the Titanborn), and if you choose Sai, you get his two-handed sword (Sword Saint's Blade). All weapon models are unique and are part of the Oblivion's Foe set.
Notes[edit]
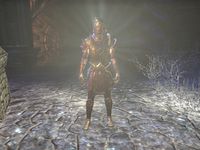
- After the sacrifice, and until you defeat Molag Bal, you will be shown wearing the Emperor's Regalia. Without becoming Emperor, this is the only time you will be able to see your character in this outfit.
- Prior to the One Tamriel update's removal of the level caps on the main quest, this quest could not be started until level 45.
- Originally, this quest required a level 50 character, but this was reduced in Patch 1.0.6 to level 45 when Council of the Five Companions was reduced from 45 to 40.
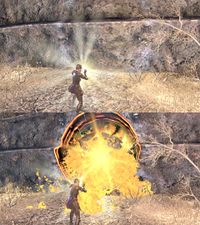
- You don't need to stand on the white circles in front of the fortress walls that you blast with fire: you can perform the animation while standing outside of them.
- All enemies slain after acquiring the power of the Amulet of Kings don't give any experience or loot.
- Molag Bal will make short work of your active companion, as they are not imbued by the same power you are.
Bugs[edit]
- The animation that occurs at the end of the battle against Molag Bal may not play out properly if you exit the game and redo the quest several times. ?
- Try to finish the quest all the way through the first two or three times you enter Heart's Grief.
Quest Stages[edit]
<Alias=LocationHold>) is dynamically set by the game and will be filled in with the appropriate word(s) when seen in game.
- Not all Journal Entries may appear in your journal; which entries appear and which entries do not depends on the manner in which the quest is done.
- Stages are not always in order of progress. This is usually the case with quests that have multiple possible outcomes or quests where certain tasks may be done in any order. Some stages may therefore repeat objectives seen in other stages.
