Online:Fungal Grotto I
|
||||
|---|---|---|---|---|
| Group Dungeon | ||||
| Discoverable | Yes | |||
| Completion | Objective | |||
| Dungeon | Yes | |||
| # of Zones | 1 | |||
| Zone | ||||
| Varanis, Stonefalls | ||||
| Location | ||||
| Western Stonefalls | ||||
| Instanced Dungeon | ||||
| Min Level | 10 | |||
| Group Size | 4 | |||
| Bosses | 2 | |||
| Mini-Bosses | 3 | |||
| Veteran Speed Run Target | 15 mins | |||
| Loading Screen | ||||
 These extensive caverns in the volcanic rock beneath Stonefalls were once used for unknown purposes by the ancient Chimer, but were abandoned by the Elves long ago. Now they are the haunt of Goblins and other denizens of the underworld.
|
||||

Fungal Grotto I is a group dungeon found in western Stonefalls.

The cave is infested with goblins and dreugh, though the goblins are scared of something dark lurking deep within the grotto. In this version, Vila Theran wants you to clear the path to a shrine hidden within the grotto.
You can learn about its location from Mindil the Untested in Vulkhel Guard, Abzag the Monster in Daggerfall, or Kailstig the Axe in Davon's Watch.
Its dungeon sets are Dreugh King Slayer, Spider Cultist Cowl, and Viper's Sting.
Related Quests[edit]
- Fungal Grotto Objective: Explore the Fungal Grotto. / You braved the dangers of Fungal Grotto.
 Kings of the Grotto: Clear out an old grotto for a group of Mephala worshippers.
- One of the Undaunted: Join the group of adventurers called "The Undaunted".
 Pledge: Fungal Grotto I: Explore Fungal Grotto I and return Undaunted.
-
Fungal Grotto Pledge: Explore Fungal Grotto and return Undaunted.(disabled since Patch 2.6.4)
Characters[edit]
|
Enemies[edit]
Normal Enemies[edit]
- Dreugh
- Grotto Mudcrab Swarmer Minions
- Mudcrab
- Murkwater Butchers
- Murkwater Defenders
- Murkwater Durzogs
- Murkwater Hunters
- Murkwater Menders
- Murkwater Ravagers
- Murkwater War Guards
- Swarming Mudcrabs
Minibosses[edit]
- Tazkad the Packmaster, a goblin hunter
- Broodbirther, a large dreugh
- Clatterclaw, a giant mudcrab
Bosses[edit]
- War Chief Ozozai, the leader of the goblins
- Kra'gh the Dreugh King, leader of the dreugh
Layout[edit]
A dead, unnamed Spider Cultist can be found on the path leading to the dungeon. A Letter from Vila lies next to her corpse.
Inside the dungeon, you'll find Vila Theran and her cultists. Prayer of the Resolute and a Letter from Vila is located on the bench next to Theran. Another copy of the same letter is located beside a bedroll next to the dungeon's wayshrine. A group of goblins guards the tunnel leading into the dungeon proper.
A primitive cage with a dreugh inside it is located just beyond the tunnel, next to a group of goblins. Several of these cages are scattered throughout the dungeon. You can unlock them to have the dreugh attack the goblins. If you unlock the cage after killing the goblins, the dreugh will just attack you. The dreugh is always hostile, no matter when you unlock the cage. A chest can spawn at the western end of the creek down the hill from the cage.
Tazkad the Packmaster[edit]
Tazkad the Packmaster is the first mini boss you'll encounter inside Fungal Grotto I. He is entirely optional; you don't need to kill him to progress. He is accompanied by several durzogs and a few weaker goblins. Tazkad shouldn't give your group too much trouble. Interrupt him when he channels his snare and block when necessary.
The next room is full of goblins. A heavy sack can spawn by the tent to the right as you enter, and beside one of the tents to the left of the exit. Another heavy sack can spawn by the unlit brazier in the center of a row of three, located just beyond the primitive cage containing a dreugh. There is a cooking fire by the heavy sack spawn point near the entrance. There is a primitive cage at the eastern end of the room.
War Chief Ozozai[edit]
The next room is the last area you'll encounter hostile goblins and durzogs. A heavy sack can spawn beside a cart full of rocks right outside the entrance. There is a primitive cage to the west of this room's entrance. A chest can spawn on the hill behind the boss's ledge. A cooking fire is located south of the boss's perch, among several tents and a heavy sack spawn point. A chest can spawn east of the exit tunnel.
War Chief Ozozai is the first proper boss of Fungal Grotto I, and is flanked by two Murkwater Defenders. You must defeat him in order to progress. The War Chief will jump down once all of the goblins in the room have been killed. Make sure to block his heavy attack, and don't worry too much if he channels energy from the tip of his sword at you. The explosion doesn't hurt all that much on normal, but the healer should ensure nobody falls too low on health if they're targeted. The War Chief will close the gap if his target is 7 meters or more away from him. When he dies, Murkwater Goblins are supposed to leap from the scaffolding and cheer for you while you're on the related quest.
Broodbirther[edit]

Friendly goblins and durzogs line the tunnel ahead. Two cooking fires are just inside the entrance. A heavy sack can spawn near the cheese sack close to the entrance, and a chest can spawn just west of it, next to a weapon rack. A group of friendly goblins on the other side of the tunnel will charge into battle against the dreugh with you. They will help you shave down the adds, but they don't have a lot of health, and die easily. If any goblins or durzogs remain after the final boss has been defeated, they will follow you throughout that instance of Fungal Grotto I indefinitely; at least until you exit the dungeon. Any goblins that are following you will likely die by Kra'gh's claws.
Many groups skip the add pulls ahead in favor of jumping west, down the waterfall and swimming straight towards Kra'gh, the final boss.
The first group of enemies is a few dreugh and a group of swarming crabs. If you cross the bridge, you'll come across one blue dreugh and two swarms of crabs. A chest can spawn on the ledge overlooking the waterfall behind the furthest crab swarm, beyond one orange and one purple fungus stalk. The next mini boss is just ahead. Broodbirther is accompanied by two blue dreugh. Block when necessary, and try to get its companions out of the way. Broodbirther shouldn't give you too much trouble. Not much is special about it aside from the fact it will occasionally block to defend itself.
Two blue dreugh and one red dreugh are located upon the southern ledge, and guard the path towards the next mini boss. Head down the slope south of Broodbirther to approach the next island. If you head west at the bottom of that slope, you'll come across the shoreline by the river, where a heavy sack can spawn. Two red dreugh guard the bridge leading across the river to the mini boss's island. A heavy sack can spawn to the west of the bridge, between the bridge and the island leading up to Broodbirther. This sack spawn point is cleverly hidden upon a ledge on the wall. A chest can spawn on the southeastern slope, to the right of the bridge. To reach it, you'll need to jump in the river. You can climb back up to the island by heading west and climbing back up the shore on the side of the island. Two groups of Swarming Mudcrabs are on the other side of the bridge, and block the way to Clatterclaw.
Clatterclaw[edit]
Clatterclaw is a lot more difficult than Broodbirther is for inexperienced groups. It is initially surrounded by a large group of Swarming Mudcrabs. Clatterclaw will summon large groups of weak crabs called Grotto Mudcrab Swarmer Minions in a semi-circle around itself. You can easily be overwhelmed if you have a weak group, or are attempting to solo this boss. If you're going it alone, drop area of effect abilities onto the boss, drop damage shields and heal over time abilities, and let your DoTs take care of the small crabs while you focus on the boss. The small crabs will come to you, so don't worry about killing them all individually.
The final boss is just across the next bridge.
Kra'gh the Dreugh King[edit]
Kra'gh the Dreugh King is the final boss of Fungal Grotto I, and the namesake of this dungeon's monster set. Once you cross the bridge, the creature breaks out of the stone wall below the shrine to Mephala on the cliff above. The Scroll of Glorious Battle is located in front of a small cave just to the left of the bridge you crossed to get here (if you came the normal way). If you opted to jump down the waterfall and skip the last two mini bosses, you'll need to jump your way up a slope to the right of the bridge from Clatterclaw's domain to Kra'gh's. Keep moving forward and jumping and you should make it up the slope.
At 66 and 33% health, Kra'gh will run to the south and north respectively and dig up a small group of weak mudcrabs to assist him in battle. Kra'gh is also capable of dragging group members towards him using lightning. Watch out for his large area of effect ability, which originates beneath him and crawls outwards. Try not to stand in it, especially if hard mode is active. The damage isn't as worrying on normal, though. Block his heavy attack if he targets you with it; it will knock you back if you don't. Kra'gh's normal attacks include swiping with his talons and unleashing a flurry of hits with his electrically charged claws.
Books[edit]
- With Regards to the Ebony Blade — A Morag Tong memorandum on the Ebony Blade
Sets[edit]
| Set Name | Bonuses | Location(s) | Set Type |
|---|---|---|---|
| Spider Cultist Cowl |
2 items: Adds 15-657 Critical Chance |
Fungal Grotto | Light Armor |
| Viper's Sting |
2 items: Adds 15-657 Critical Chance |
Fungal Grotto | Medium Armor |
| Dreugh King Slayer |
2 items: Adds 3-129 Weapon and Spell Damage |
Fungal Grotto | Heavy Armor |
| Kra'gh |
1 item: Adds 34-1487 Offensive Penetration |
Fungal Grotto I | Monster Helm Sets |
Achievements[edit]
There are seven Achievements associated with this dungeon:
Notes[edit]
- Before dungeon scaling was introduced in Update 5, Normal Fungal Grotto was designed for levels 12–15, and Veteran Fungal Grotto was designed for Veteran Ranks 1–5.
- Prior to Update 12, Fungal Grotto I was only available in Normal mode, and Fungal Grotto II was only available in Veteran mode. These were named Fungal Grotto and Veteran Fungal Grotto respectively.
Gallery[edit]
-

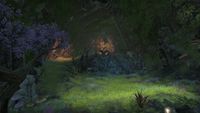
Entrance
-
Shrine of Mephala
-
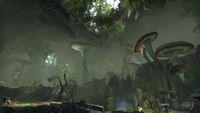
Dreugh caves
-
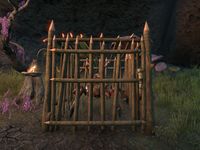
A Primitive Cage
-
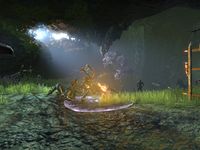
A freed dreugh fighting a group of goblins


Maps[edit]
|
A map of Fungal Grotto I
|
