Skyrim:Chillwind Depths
|
|||
|---|---|---|---|
| # of Zones | 1 | ||
| Clearable | Yes | ||
| Dungeon | Yes | ||
| Respawn Time | 10 days or 30 days | ||
| Level | Min: 18 | ||
| Occupants | |||
| Falmer, Frostbite Spider, Chaurus | |||
| Important Treasure | |||
| Advances in Lockpicking | |||
| Console Location Code(s) | |||
| ChillwindDepths01 | |||
| Region | |||
| Hjaalmarch | |||
| Location | |||
| South of Dragon Bridge | |||
| Special Features | |||
| # of Fishing SuppliesCC | 1 | ||
| Ore Veins | |||
| # of Iron | 1 | ||
| # of Orichalcum | 2 | ||
Chillwind Depths is a medium-sized cave south of Dragon Bridge occupied by Falmer, frostbite spiders, and chaurus.
It is on the border of Hjaalmarch and the Reach, and is the largest single source of bleeding crown, blisterwort, imp stool, Namira's rot, and white cap.
Walkthrough[edit]
Exterior[edit]
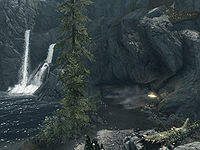
The cave sits next to a small waterfall and pond, explaining the water-filled channels within the cave. The pond contains slaughterfish and their accompanying eggs. The entrance to the cave is illuminated by a brazier, and samples of bleeding crown, mora tapinella, and lavender can be found growing in the area. A bear may be prowling the exterior of the cave.
Chillwind Depths[edit]
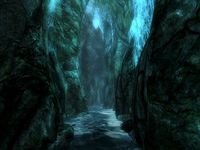
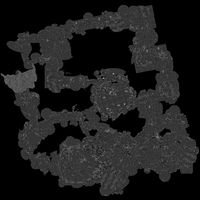
Chillwind Depths is inhabited by Falmer and infested with frostbite spiders. It is a system of mostly water-logged tunnels, a prime environment for many of the fungi found in Skyrim. The entrance is a downward slope lined with imp stool, Namira's rot, fly amanita, and bleeding crown. It leads down to a partially submerged narrow cavern. Foremost is a small campsite with the body of an adventurer by the campfire. The chest in his campsite has been looted, but there is a potion of healing, some cabbage soup, and a horker loaf on the small rock ledge. With the Fishing creation installed, this camp also has some Fishing Supplies. Fish from Underground waters can be caught here.
As you wade through the knee-deep water, heading south, notice the proliferation of spider webs. Indeed, where the path becomes extremely narrow, a short passage on the right opens up. This leads to a small nest where one frostbite spider is keeping watch over five web sacs containing spider eggs. There are also two burned corpses entangled in the webbing. At the back of the nest, a dense buildup of webbing can be cut through to reveal a battleaxe. There is also a cluster of blisterwort and fly amanita growing at the entrance of the passage and against the back wall.
Back in the main tunnel, continue south until the tunnel opens to a cavern. The trail leads out of the water, onto higher ground and into four waiting frostbite spiders. Numerous web sacs hang from the ceiling, and there are six clusters of blisterwort growing in this cavern. A cluster of Namira's rot is growing to the left on the shore, and a cluster of imp stool grows on the right. An accessible web sac is hanging from the western wall, and across from it, illuminated by lantern light and amid clusters of blisterwort, is the body of another unlucky adventurer. Fight your way uphill to the exit, another narrow tunnel heading northeast. Burnt corpses tangled in webbing line this short tunnel. Samples of blisterwort, Namira's rot, imp stool, and white cap also grow along the walls. More web sacs hang from above. The tunnel takes a sharp turn to the east, and the water begins to flow again. Here you face a fork in the path, with the choice of going left to the north or straight heading southeast. The path to the left heading north is lined with imp stool and fly amanita. The trail leads downward, becoming submerged, but with enough headroom to breathe. As the trail turns back to the east, it becomes totally submerged, but there is a short enough distance to the other end that waterbreathing is not necessary. You will surface in another water-filled grotto with roots hanging from the ceiling, but enough headroom to breathe. Immediately to your left, on the north wall, take a short dunk underwater to find a submerged apprentice-locked chest. The exit out is on the south wall, and is another fully submerged tunnel. It is swimmable without a breathing aid, and heads south then turns upwards to the west. This tunnel emerges back onto the main trail again, the same as if you had gone straight southeast, back at the fork. You may therefore choose to save yourself some swimming, get the loot from the locked submerged chest, backtrack to the main passage, and take the trail heading southeast. You will see the tunnel opening to the underwater passage on your right as you proceed.
A frostbite spider is a short distance ahead. Next, straight ahead, two Falmer are guarding the trail, each perched on a rocky outcrop. Samples of all the mushrooms are growing along this tunnel, and when the trail takes a slight turn to the west, glowing mushrooms are growing on the wall to your left. Another Falmer is patrolling here as well. This is also the entryway into the Falmer settlement. A pressure plate triggering a spear trap is just at the mouth of the cave. The next room is small, but contains an abundance of all the mushrooms, and given the baskets scattered about, apparently serves as a mushroom farm. A Falmer and a chaurus/spider are also here awaiting your arrival. Continuing on through another waterlogged narrow passage, you will encounter another Falmer and a frostbite spider; after disposing of them, you can mine an Orichalcum ore vein found on the left-hand side of the passage. As the passage turns to the north, the path forks into two: a lower path continuing straight ahead through the shallow water, and a rocky incline ascending along the right-hand wall. There is a Falmer waiting on the rocky ledge of the incline, and at least two more Falmer are straight ahead. Fighting your way through the water takes you through a very narrow passage to the Falmer camp. Fighting through here, while essentially bottle-necking your opponents, does not give you much room to maneuver, and leads to an all-out assault on the camp. A stealthier method is to take the rocky incline up and across the tunnel into a more secluded area of the camp with only a single Falmer hut. Here another Falmer is looking for you. In this campsite are two tables; the table on the right has three chaurus chitin and two iron ores, and the table on the left has a Falmer shield, two Falmer swords, and two Falmer helmets. Inside the hut is a potion. Among the various samples of mushrooms here, five samples of glowing mushrooms can be collected. There is also an Orichalcum ore vein on the north wall, across from the hut. Depending on your sneak level and the row you make up here, another Falmer and a chaurus may come to investigate. After all is clear, continue down the slope to the main camp.
The first structure you come to on the right is the chaurus corral with a leveled chaurus as sentry. Inside the corral are over eighty egg sacs containing chaurus eggs. The body of a prisoner floats in the shallow water. From the gate of the corral, turn left, heading northeast. (Going right takes you back out to the main passage, just below the ramp leading up.) Pick off at least four more Falmer as you make your way through the settlement, at least two of which are sniping at you from above on a rocky ledge. A Falmer chest is on the right, under a rocky ledge. Straight ahead are four prisoner holding pens. The first pen on the left holds the body of a man named Firir. Looting him results in some gold and a torn note in which he describes the horrors of this place and pleads for forgiveness from Eydis. The next pen holds another prisoner's body and some glowing mushrooms. The pen directly across is empty, other than some Namira's rot and imp stool. The last pen has an expert-locked Falmer chest. Turn back, heading south, but veer left onto the shore and up the incline where the two Falmer were shooting at you.
On this rise is another Falmer campsite. Other than a skeever charring over the fire, there is nothing of interest in this camp. From the top of the incline, make a hairpin turn, heading north to continue. From this position, you will witness a leveled Falmer performing some sort of ritual over the body of another prisoner. A Falmer hive is on the wall to the left, so keep an eye out for emerging Falmer. Slopes on either side of the stone table lead down to a sunken retention pond with numerous chaurus egg sacs and glowing mushrooms. The boss Falmer may retreat when he sees you, fleeing across the bridge to the far side of the cavern. After defeating him, continue down the narrow path to the boss campsite. A coin purse is on a rock shelf on the right. Ahead is a table with a copy of the Lockpicking skill book Advances in Lockpicking, an apothecary's satchel, a warhammer, and a helmet. To the left of the table is the boss Falmer chest. A potion is next to the chest. The path out is to the east, leading you to a small ledge. Jump down to the water below to find yourself back at the main entrance to the cave, by the first unfortunate adventurer's camp.
Notes[edit]
- A Solitude guard will sometimes remark, "The road to Whiterun's not safe these days. Lots of travelers just... disappear, south of Dragon Bridge. Can't find a trace of them." A map marker for Chillwind Depths will be added when this occurs.
- An Adventurer's Journal in an abandoned camp down along the river, just across from the main road, tells of the adventurer's curiosity regarding an attack on a trade caravan, and his intention to investigate, leading him to this cave. With the Fishing creation installed, this camp has some Fishing Supplies.
- There is a dead Redguard and Nord surrounded by Falmer arrows lying next to a wagon and a dead horse to the northeast across the river from the abandoned camp. The Redguard woman carries a Merchant's Journal referring to attacks on trade caravans.
- There is a pillar just inside the cave. You can circle around and jump onto this, then use Whirlwind Sprint to fly through the doorway across a small gap and loot the final room while avoiding most or all enemies in the cave.
- Chillwind Depths also appears in ESO.


