Online:Wayrest Sewers I
|
||||
|---|---|---|---|---|
| Group Dungeon | ||||
| Discoverable | Yes | |||
| Completion | Objective | |||
| Dungeon | Yes | |||
| # of Zones | 1 | |||
| Zone | ||||
| Menevia, Stormhaven | ||||
| Location | ||||
| Wayrest | ||||
| Instanced Dungeon | ||||
| Min Level | 16 | |||
| Group Size | 4 | |||
| Bosses | 3 | |||
| Mini-Bosses | 3 | |||
| Veteran Speed Run Target | 15 mins | |||
| Crafting Stations | ||||
|
||||
| Loading Screen | ||||
|
Wayrest is justifiably proud of the commodious modern sewers that drain the city's wastes into the Iliac Bay. But the curving conduits beneath the streets contain dark secrets unsuspected by those who walk in the light of day above.
|
||||
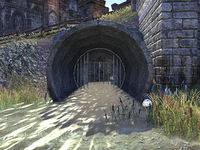
Wayrest Sewers I is a group dungeon found under the city of Wayrest in Stormhaven.
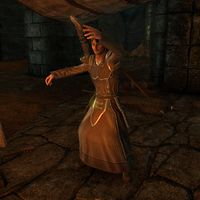
When you enter the sewers in the normal version, Investigator Irnand will request that you find and kill a rogue necromancer and his conspirators before they take over Wayrest above.
You can learn its location from Wandering Jakalor outside Elden Root, Lady Blade outside Wayrest, or Hranir Icy-Mane outside Mournhold.
Related Quests[edit]
- Wayrest Sewers Objective: Explore Wayrest Sewers. / You braved the dangers of the Wayrest Sewers.
 Deception in the Dark: Prevent an underground invasion of Wayrest.

 Pledge: Wayrest Sewers I: Explore Wayrest Sewers I and return Undaunted.
Wayrest Sewers Pledge: Explore Wayrest Sewers and return Undaunted.(disabled since Patch 2.6.4)
Characters[edit]
|
Enemies[edit]
Normal Enemies[edit]
- Fiendish Hallucination
- Mudcrabs
- Pellingare Bowman
- Pellingare Cutthroat
- Pellingare Henchman
- Pellingare Necromancer
- Pellingare Recruit
- Pellingare Sawbones
- Restless Souls
- Skeevers
- Vermin Feeder
Elite Enemies[edit]
Minibosses[edit]
- Slimecraw, a giant crocodile
- The Rat Whisperer, an eccentric man with control over skeevers
- Uulgarg the Hungry, an Orc mercenary
Bosses[edit]
- Investigator Garron, a former city investigator-turned necromancer who has turned on his comrades
- Varaine Pellingare, a nobleman who is plotting to take over Wayrest
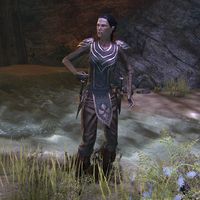
- Allene Pellingare, a noblewoman who is plotting to take over Wayrest
Boss Mechanics[edit]
Slimecraw[edit]
Investigator Garron[edit]
The Rat Whisperer[edit]
The Rat Whisperer spawns five skeevers every 13 seconds. The rats are weak and easily burned down by AoEs. While this mini boss isn't too difficult, an inexperienced player running solo might find themselves overwhelmed by rats. Apart from his rat summoning capabilities, he has all the abilities of your average Chillfiend.
- Ice Arrow
- A basic ranged attack that does minor frost damage.
- Summon Ice Barrier
- The enemy summons an Ice Barrier that absorbs projectiles fired at it until destroyed. The player should move so that there is a clear line of sight between themselves and the enemy.
- Winter's Reach
- The enemy releases an icy whirlwind in the direction it is facing. This whirlwind does moderate frost damage and roots all players that it hits. This spell can be interrupted or simply avoided.
- Void
- The enemy summons a purple orb from the sky that explodes when it hits the ground splitting into three projectiles dealing moderate magic damage. This skill then sends out magic AoEs across the floor called Void Bursts. This attack can be interrupted or simply avoided.
- Void Burst
- These AoEs are released after Void lands, the smaller AoEs deal moderate magic damage.
- Call Skeevers
- Occasionally, the boss will summon a large swarm of Skeevers to attack. They should be killed quickly to simplify the fight.
Uulgarg the Hungry[edit]
This boss is rather straightforward: break free if fear is applied to you, and try not to get cut down by his spinning maneuver.
- Slash
- A basic melee attack that does minor physical damage.
- Crushing Blow
- A heavy melee attack that does high physical damage. This attack must be dodged or blocked if possible.
- Berserker Frenzy
- The boss swings its weapon around dealing moderate physical damage over time around itself as indicated by a red circle.
- Terrifying Roar
- The boss shouts fearing all party members briefly. This can be broken free from.
Allene Pellingare[edit]
In veteran Wayrest Sewers I, hard mode is activated by interacting with the Scroll of Glorious Battle, which is located near the campfire in the southeast of the cavern. Completion of hard mode earns the Down the Gutter achievement. As a boss type enemy, Allene Pellingare is immune to all forms of crowd control effects.
- Strike
- A basic melee attack that does moderate physical damage.
- Penetrating Daggers
- A heavy melee attack that does very high physical damage and knocks the target down. This attack must be blocked by the tank or dodged by other roles at all costs especially on hard mode.
- Backstab
- The boss teleports onto a target dealing high physical damage. This attack is usually immediately followed by Razor Flourish. The high damage of these two attacks combined with their short cast times makes it likely that non tanks will die in two hits if they are not blocking or being healed. To prevent this, preemptively rolling immediately after getting hit by Backstab will help avoid the damage from Razor Flourish if it is cast by the boss.
- Razor Flourish
- The boss spins around dealing high physical damage around itself. This attack has a fast cast time with no red telegraph indicator but has a short range, so avoid standing too near the boss if possible.
- Summon Hallucinations
- At 75%, 50% and 25%, the boss disappears in puff of smoke and summons Fiendish Hallucinations to attack the party, with the amount of them increasing with each summoning. These should be killed quickly to simplify the fight.
- Ghost Burst
- After the final wave of bats are summoned, the boss will reappear in a ghostly shadowy form, dealing moderate magical damage in a short radius around her.
Layout[edit]
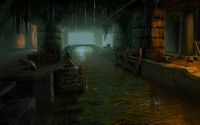
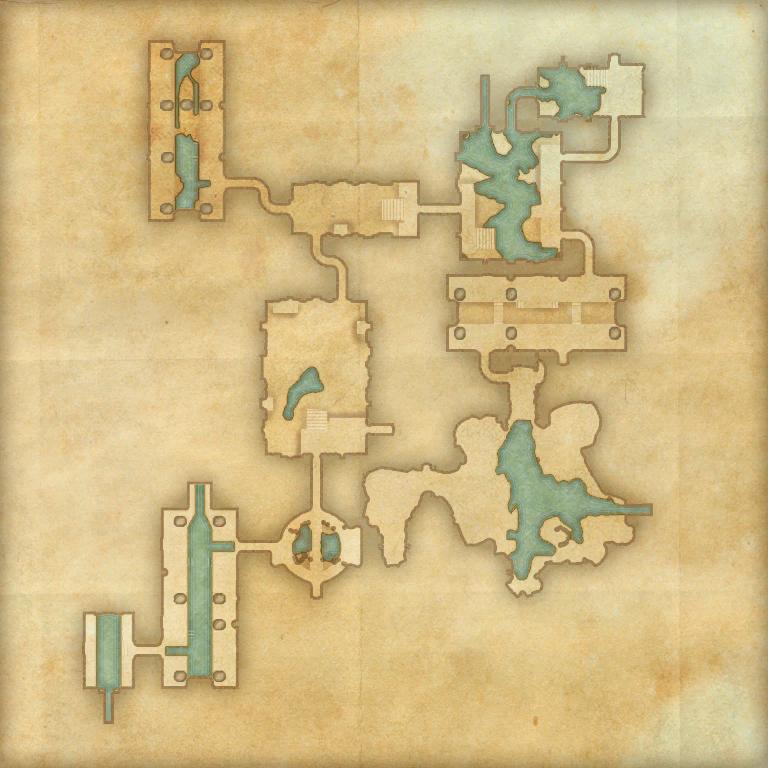
You enter a small room in the sewers. Investigator Irnand is leaning against a light in the northeast corner of the room. Heading east, you enter a long room with a canal running north-south. At the north end of the room, a bridge crosses the canal. The western and eastern walls are lined with groups of skeevers. Three crocodiles walk around in the canal below.
Continuing east, the short tunnel will open into a round room with a staircase leading down to a drain. The large crocodile, Slimecraw, waits below near a Foul Fishing Hole. A chest can spawn in the southern alcove. Another staircase across the way leads up to a small platform with some containers. A tunnel on the lower floor leads north to Investigator Garron's ritual site.
You enter the room on a large platform with stairs leading down to the ground floor. Immediately to your right is a group of eight members of Pellingare mercenaries. Ahead the necromancer is performing a ritual on a platform in the center of the room where The Art and the Madness v.1 rests on the altar. There are three more small platforms containing statues and altars west, north, and east of him. There is a group of four skeevers in the southwest corner of the room, and another group of eight Pellingare mercenaries waits just north of them on the ground floor. Investigator Lienne is tied up in northeast corner of the room near the exit. She can be reached stealthily and spoken to prior to fighting Investigator Garron, but she will tell you to kill him first, and the exit door will not open until he is defeated.
You'll head north from Investigator Garron's ritual site to reach Uulgarg the Hungry. As you walk through the tunnel, you'll find a notice on the wall. The tunnel brings you out on the other side of the room from Uulgarg. Directly in front of you is a group of skeevers, and to your left (heading west) is a tunnel to an optional and easily skipped miniboss: the Rat Whisperer. The madman and his disciples tend to an army of skeevers, which becomes apparent as you travel towards them. You'll encounter swaths of rodents in the tunnels leading up to him and in his chamber.
In addition to rats, you'll find three strong Crocodiles in this room (two are near the entrance, one is behind the boss). There are three vermin feeders in this chamber; one is right at the tunnel's exit, the second is across the room from the door, and the third is behind the boss and to the right. A heavy sack can spawn next to the Rat Whisperer, and The Piper is located on the ground beside him. When you're done in this room, you'll be forced to go back towards Uulgarg, as the Rat Whisperer's room is a dead end.
Uulgarg is located at the top of the stairs on the east end of the room, flanked by two Pellingare Cutthroats. At the base of the stairs, you'll face a group of Pellingare mercenaries. A heavy sack can spawn by the unusable cooking fire on the left, or up the stairs and to the left. The next boss, Varaine Pellingare, lies behind the door to the east.
You'll find yourself on a ledge in the next room. A chest can spawn on the right side of this ledge. If you jump down, you can use the ladder on the south side of the platform to get back up. Five weak, hostile mudcrabs lie beneath the wooden planks on the left side of the platform. Two skeevers loiter around an overturned boat in the northeast corner of the room.
When you jump down from the platform, Varaine will appear in the middle of the partially-flooded area of the room, declaring that he can't allow your meddling to continue. A heavy sack can spawn beside a wooden beam leaning against the eastern wall, behind Varaine's spawning position. A chest can spawn in the corner south and east of this sack, behind a boat that's leaning against the wall. Once Varaine is dead, you'll head through a door on the north side of the room. There are two tunnels on the northern wall: a dead end on the left and the exit on the right.
The room ahead contains a large group of Pellingare mercenaries. There's a foul fishing hole in the water to the right of the door, in the space lit by the sunlight filtering into the sewers from the world above. A chest can spawn in the rowboat by the stairs. Three skeevers are standing on a pile of crates at the top of the stairs, and a group of Pellingare mercenaries resides on the eastern half of the platform. A lore book can be found on the table near the working cooking fire.
There are more mercenaries in the hallway. Four skeevers and three mercenaries await you on the other side of the tunnel, where you'll find yourself on the platform opposite the one you stood upon when exiting Uulgarg's sanctum. The south half of the platform contains more mercenaries. A heavy sack can spawn on top of a crate here. Yet more mercenaries reside in the tunnel.
Five skeevers await you on the other side of the tunnel. You'll find yourself on the eastern end of a long platform in a room bisected by a dry canal. Another group of skeevers lies on the western end of the entrance platform, and a chest can spawn between a pillar and the wall near these skeevers. The platform on the south end of the room is inhabited by a swarm of Pellingare mercenaries. A heavy sack can spawn on the western end of this platform, atop a table by the campfire.
The tunnel ahead opens up into a natural cavern where you'll find the usual fare: skeevers and mercenaries. The final boss, Allene Pellingare, resides in the center of this room, amid the shallow pool lit by sunlight filtering in from the roof. A chest can spawn inside the rowboat at the entrance of this natural cavern. A group of mercenaries lies up the hill to the left of the entrance. There's a foul fishing hole across from this hill, to the south. Another chest can spawn in the empty space near the crates, and yet another can spawn southwest of Allene, in her upper-class (for a sewer) living quarters. A heavy sack can spawn in the fancy boat near Allene's living quarters, and a foul fishing hole can spawn in the water by the bow of the vessel. A heavy sack can spawn in the otherwise empty tunnel off to the west. The dungeon's exit is on the east side of this room.
Books[edit]
- BEWARE: Undercity Ruffians — A Wayrest guard notice warning against suspicious individuals in the sewer system
- The Art and the Madness v.1 by The Hollow Voice — On the necessity of fresh corpses for most necromancers
- The Piper — Townspeople lose their children to a mischievous piper
- Wayrest Sewers: A Short History by Hilaire Beanique — The first volume of a history of the sewers of Wayrest
Sets[edit]
| Set Name | Bonuses | Location(s) | Set Type |
|---|---|---|---|
| Combat Physician |
2 items: Adds 25-1096 Maximum Magicka |
Wayrest Sewers | Light Armor |
| Toothrow |
2 items: Adds 25-1096 Maximum Stamina |
Wayrest Sewers | Medium Armor |
| Sergeant's Mail |
2 items: Adds 28-1206 Maximum Health |
Wayrest Sewers | Heavy Armor |
| Slimecraw |
1 item: Adds 17-771 Critical Chance |
Wayrest Sewers I | Monster Helm Sets |
Achievements[edit]
There are seven achievements associated with this dungeon:
Notes[edit]
- Before dungeon scaling was introduced in Update 5, Normal Wayrest Sewers was designed for levels 20–23, and Veteran Wayrest Sewers was designed for Veteran Ranks 6–10.
- Prior to Update 12, Wayrest Sewers I was only available in Normal mode, and Wayrest Sewers II was only available in Veteran mode. These were named Wayrest Sewers and Veteran Wayrest Sewers respectively.
- The Rat Whisperer miniboss is in an easily missable side room, which may cause you to miss out on various in-game Achievements, especially in Veteran mode.
