Skyrim:Castle Volkihar
This article is about the dungeon portions of Castle Volkihar which contain enemies. For the portion of the castle inhabited by the Volkihar vampire clan, see Volkihar Keep.
|
|||
|---|---|---|---|
| Added by | Dawnguard | ||
| # of Zones | 4 | ||
| Clearable | No | ||
| Respawn Time | 10 days | ||
| Level | Min: 10 | ||
| Occupants | |||
| Death Hounds, Feral Vampire, Frostbite Spiders, Gargoyles, Skeevers, Skeletons | |||
| Important Treasure | |||
| De Rerum Dirennis A Hypothetical Treachery The Red Kitchen Reader Vampire Royal Armor |
|||
| Console Location Code(s) | |||
| DLC1VampireCastleDungeon01, DLC1VampireCastleDungeon02, DLC1VampireCastleZCell1, DLC1VampireCastleZCell2, DLC1VampireCastleExterior09 | |||
| Location | |||
| Northwest of Solitude | |||
| Special Features | |||
| # of Alchemy Labs | 3 | ||
| # of Arcane Enchanters | 1 | ||
| # of Cooking Pots/Spits | 1 | ||
| # of Fishing SuppliesCC | 1 | ||

Castle Volkihar is a large castle on an island far northwest of Solitude connected to Volkihar Keep. The dungeon areas of the castle, most of which contain enemies, include four interior zones: Volkihar Undercroft, Volkihar East Tower, Volkihar North Tower, and Volkihar Ruins including Valerica's Study, and two additional external zones: Volkihar Courtyard and Volkihar Balcony, which is the nearest fast-travel point to Valerica's study and the portal to the Soul Cairn.
Though you can travel to the island immediately upon installing Dawnguard, the dungeon areas of the castle are initially inaccessible due to the external door being locked and requiring a key. To reach the island, either hire the rowboat at Dawnstar or use the one at Icewater Jetty. Your other options are to swim or walk on the surface of the water using either a Potion of Waterwalking or Ahzidal's Boots of Waterwalking. If you accept Lord Harkon's gift at the end of Bloodline, you can also float over to the island in Vampire Lord form. If you swim, walk, or float to the island from Icewind Jetty, you may encounter two groups of three or four hostile skeletons on the way. These skeletons will rise out of the water and attack when they detect you.
The travel spawn point for Castle Volkihar is at the southwest end of the island, near a tower and the pier that returns you to Icewater Jetty. To reach the castle's entrance, walk northeast from the island pier. There will be a gate blocking your way which will not be opened until near the end of Bloodline. Once you have entered the castle during Bloodline and chosen whether to accept or reject Lord Harkon's gift, the castle will either be open or locked to you, respectively. If you rejected Lord Harkon's gift, you will be teleported out of the castle, and the door will remain locked until the start of the quest Chasing Echoes.
Related Quests[edit]
- Bloodline: Choose your side!
- Chasing Echoes: Explore Castle Volkihar.
Walkthrough[edit]
Exterior[edit]

If you accept Lord Harkon's gift, whenever you arrive at the castle on subsequent visits, you may find two or more hostile Dawnguard waiting near the travel spawn point at the southwest end of the island. If you have remained undetected, one of these Dawnguard may be patrolling the northwest shore of the island, while the other can usually be found on top of the tower.
With the Fishing Creation installed, some Fishing Supplies can be found at the pier, along with a bucket of skulls and a fishing rod. Fish that can be found in freezing waters can be found here. Follow the shoreline to the left of the castle until you reach a crumbling, disused dock, where there are several sunken boats and ships. The docks are guarded by four leveled skeletons armed with ancient Nord weapons, which may be honed. They are significantly tougher than typical skeletons; most are magic-users, and graphically they appear to be wearing armor. There are plenty of salmon that can be fished from the docks. Deep below the water is an overturned sunken ship with a broken keel. The hull has split open just enough to grant access below deck. Among some crates is an unlocked chest containing minor loot. Unless you are an Argonian, in order to reach the chest you will need to use a waterbreathing effect via a potion or enchantment. A light spell would also be a boon. To locate the ship, swim from the far end of the docks to the northwest. With Fishing, some vampire fish can be found swimming off the docks here. There are numerous stairs rising up from the docks to terraces far above. At the top is an entrance to Volkihar Undercroft, which is locked prior to starting the related quest.
Volkihar Undercroft[edit]

The entrance leads to a balcony, with stairs descending on the left. There is a skeever wandering this area, which will attack as soon as it is aware of you. You'll also find seven loose septims and some clam meat on the floor among the straw and bones. The stairs descend to a landing, with a barrel of ingredients with a woodcutter's axe stuck into the top by a stone railing. On the right are some crates and food sacks beside the wall. There is an unlocked wooden door in front of you to the north, with stairs leading down on the left to large double doors also to the north. The single door opens onto a balcony overlooking the old water cistern, which can be used to snipe those in the next room. The double doors lead into the same room at floor level. There are up to five death hounds and a feral vampire inhabiting this area. The feral vampire is carrying a journal fragment, which explains how she's been taking control of the keep's death hounds and promises revenge against the vampires living in the keep. If you return here after the quest, only the death hounds respawn.
The central third of the room is sunken, and was originally used to collect water for the cistern. There are stairs descending down into it at the far end. On either side are paths, with a stone bridge linking them near the balcony. There are alcoves on either side, with grating over water-filled tunnels. Just beyond the first alcove on the left is a barrel of ingredients. In the southeastern corner are four coffins and a dead draugr. You can loot the two closed coffins, the draugr, and a skeleton in one of the two open coffins. There is a large coin purse in the bottom of the other open coffin (see bugs). The first alcove on the right contains an adept-trapped chest, which triggers spears to thrust up from the grating in the floor. To avoid damage, either disarm it before opening the chest, or simply stand at the bottom of the stairs and not in the alcove. At the back of the room, stairs ascend to a higher level that continues around to the west. An alchemy lab is to the left of stairs up into another room, with a salt pile and a bottle of weak aversion to magic poison on top. To the right of the stairs is a set of shelves holding a pair of vampire gauntlets, a hide helmet, leather strips, a potion of minor healing, a salt pile, and a food sack. The room up the stairs has a small table and chair on the right, and a barrel of ingredients in the back right corner beside a narrow table against the rear wall. On the table is a copy of the Destruction skill book A Hypothetical Treachery, a copy of The Aetherium Wars, a random potion of magicka, and a rarely seen item of clutter, a bloody tankard. Under the table is a pair of vampire boots. To the left of the table is an upright coffin you can sleep if you are a vampire. To the left of the coffin is a small shelving unit that holds a small coin purse and a bear trap. On the left is a lever on a small balcony, with a path below heading west from the main room. There is a raised bridge blocking this lower path, which is operated by the lever.

The path heading west has an alcove on the left containing an iron dagger near a skeletal hand protruding from under grating in the wall. Once the bridge is lowered, the path continues to the middle of the next room, which features fire-hardened stakes in a partially flooded area around you. If you fall down, there is a passage leading back up in the northwest corner of the room. Take care however to avoid the stakes, as they can inflict a significant amount of damage. The passage has four bear traps along its length, and a skeever wandering the passage unless it has fallen afoul of one of the traps. Near the top of the passage is a skeletal magic-user armed with an ancient Nord weapon. There is another raised bridge in front of you to the west, and a path heading south past three strings of infected bones. If you are neither vampire nor werewolf, take special care, as you will risk a significant chance of contracting at least one disease by touching the bones. Once past the infected bones, the passage turns to the west, passing an easily avoided string of bone chimes and leading into a split-leveled room with piles of bones covering most of the floor and bookcases filled with ruined books flanking the doorway. Up to three death hounds inhabit this room, which has balconies on most sides. There are stairs rising to the south. As you enter the room, a trap door opens in the ceiling to allow more gory bones to fall to join the piles below.

The stairs lead up to a landing serving as a torture area, with shackles bolted to the wall, and blood splattered on the wall and floor below. Two small wardrobes contain a selection of fine clothes and boots, on top of which is a bottle of weak lingering poison, a phial of frostbite venom, a potion of cure disease, a potion of minor healing, two salt piles, some leather strips, and a woodcutter's axe. More stairs lead up to a passage heading east, which then turns north. At this point, you are faced with two thick walls of cobwebs that you need to hack or burn your way through to the north and east. The eastern webs conceal an adept-locked chest, while the northern webs block the passage where a giant frostbite spider lurks in a room containing a barrel of ingredients and the second lever needed to lower the previous raised bridge. A grating behind the lever looks down on the bridges. Before returning and taking this new path, there is a wooden door to the west that opens onto one of the balconies in the previous room. Opposite is another balcony that can be reached if you are a vampire lord using your Bats lesser power, or with at least two words of the Whirlwind Sprint dragon shout. You can also reach it by jumping from the bone pile in the northwest corner of the room. This balcony features a skeleton with a random potion of healing in its hand, with a medium coin purse and a knapsack beside it. At the other end of the balcony is an unlocked chest. Once you've looted these items, you can drop to the bone-filled room below and return to the partially flooded room to cross the recently lowered bridge. From here, make your way up several flights of stairs to a door leading outside to Volkihar Courtyard.
Volkihar Courtyard[edit]
Through the door are steps leading up into the courtyard, which has obviously been left untouched for countless years, as it was once the domain of Serana's mother Valerica. Serana will inform you that something is wrong with the large moondial on the ground, which is many paces wide and in the center of the courtyard. It appears three of the crests are missing, namely, the Full Moon, Half Moon, and Crescent Moon crests. Serana will inform you if questioned that the moondial was crafted for her mother by an elven artisan from an old sundial that was placed here by the previous occupants of the castle, and that it was special to her mother. There are many dead trees and gravestones around the edges of the courtyard, with stairs leading up to doors to the southeast, northeast, and west. The door to the west has collapsed due to a cave-in, allowing no access through there. In fact, the courtyard has suffered quite a bit of damage, which Serana will suggest was caused by her father, who likely went on a rampage when she and her mother left, blocking off anything which reminded him of his wife and daughter.

There are gargoyle statues near each of the exits from the courtyard, either above the doors or on the railings of the stairs leading to them, but none burst to life. There are many hanging moss growing from the limbs of the trees and down the walls that surround the courtyard. To the northwest is a small pool of water, with five tufts of spiky grass, four swamp fungal pods, and one patch of blisterwort fungus growing around the edge. In the middle of the pool is a large rock, with the missing half moon crest lying on it. There is a planter containing a deathbell plant and another with jazbay grapes at the top of stairs to the northeast, on either side of the door to Volkihar North Tower. To the right of the door are stairs leading up to a terrace with a large planter on your right containing a patch each of Namira's rot and blisterwort fungi. A wooden bench is to the left, and against the railing past the planter is a large round table and chairs, which would once have been a pleasant place to sit. Beside the table, the missing crescent moon crest lies on the ground. At the rear of this terrace is another cave-in, with piles of masonry and rubble. To the south is another planter, this one empty. Beside the planter are more stairs leading down to the door to Volkihar East Tower. The stairs across the courtyard to the west lead up to more terraces, with planters containing a canis root and another patch of blisterwort fungus at either end, as well as more tables and chairs. To the east are nine nightshade plants growing in a small walled garden, with the missing full moon crest among the vegetation.
During the related quest, Serana will stand by the moondial, allowing you to explore both of the towers unaccompanied. For more details on the courtyard, see Volkihar Courtyard.
Volkihar East Tower[edit]

You access this tower from Volkihar Courtyard, through the door to the east. It consists of only one room filled with rubble and crushed skeletons which cannot be looted. There are no enemies in this tower, only several flights of stairs leading up to the rear. At the very top of the stairs, partially buried by masonry that has crushed a skeleton, is a medium coin purse, an amethyst, a garnet, a sapphire, and eleven loose septims littering the steps. Down one flight of stairs and behind the rubble to the west is an unlocked wooden chest containing minor loot. There is nothing else of value in this tower.
Volkihar North Tower[edit]

This is the larger of the two towers accessible from the courtyard, through the door to the north. Through the door is a room containing empty furniture and stairs descending to the east. In front of you is a doorway out onto a balcony above a large room containing two skeletons. One is standing at the bottom of the stairs opposite, facing the balcony you're on, while the other is sitting on a bench in front of the fireplace below you to the left, facing away from you. The balcony is an ideal sniping point to deal with both of these foes. The stairs to the east lead down to a smaller room containing another skeleton sitting on a bench, with two small wardrobes containing a selection of fine clothes on either side of an adept-locked door. There is also a doorway to the west leading to the lower level of the room beneath the balcony.
Behind the locked door is a flight of stairs blocked by a cave-in, with a crushed skeleton beneath the masonry holding a silver jeweled necklace, and two gold ingots and a garnet on the stairs beside it. Through the doorway into the larger room, gargoyle statues sit in the northeast and northwest corners of the room. However, only the one in the northeast corner will burst to life and attack you when it detects your presence. To the left of this gargoyle is an unlocked wooden chest. Farther to the left, up the steps to the far north through the open double doors, more fallen masonry blocks more stairs, with an expert-locked chest among the rubble. Along the west wall to the right of the fireplace is a set of shelves, with a flawless garnet hidden among clutter on one of the shelves. Under a balcony in the southwest corner is a wall shelf holding a drum. This second balcony can be reached using either Whirlwind Sprint or the vampire lord Bats power, and features an unlocked chest among more fallen masonry.
Volkihar Ruins[edit]

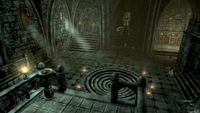
This zone cannot be accessed until you complete the moondial puzzle in the courtyard during the related quest. Upon replacing the three crests, a spiraling stairwell descends around the center of the dial to reveal a door, in similar fashion to the passages to Blackreach found using the attunement sphere on the Dwarven mechanisms at the end of Alftand, Mzinchaleft, and Raldbthar. Through the door at the bottom is a passage, with stairs leading up to a dead end. There are shelving units on either side holding a bottle of alto wine and two coin purses, one small and one medium. There is also a pull chain to the left, which opens a concealed door in front of you. (Note that if you are returning to the dungeon after having completed the associated quest, do NOT pull the chain again, as this will close the secret door, but not reopen it (see bugs).) There are three pieces of firewood on the floor behind the concealed door. The room beyond is used as some type of kitchen, with a bloody table in the middle covered with bones and gore. Around the room are several counters, wall shelves, and tables, all covered in gory detritus, as well as a total of six salt piles, a piece of canis root, a bowl of troll fat, and a woodcutter's axe. Hanging from the ceiling is a bunch of dried elves ear, a bunch of dried frost mirriam, and a garlic braid. In the middle of the east wall is an old extinguished fireplace containing three more pieces of firewood, with a cooking pot in front which can strangely still be used to cook. To the right is an alcove filled with unusable barrels, while to the left is a flight of blood-covered stairs that lead up to a door. During the related quest, Serana will start stating from this point onwards that "We're getting close, I'm sure of it".

Through the door is a large dining room containing a long run of tables placed end-to-end; seven skeletons sit at the tables, most of the tougher type that appear to be wearing armor. As soon as you enter the room, the room will light up as if there was a light source over the table, and the twin fires in the fireplaces to the east will also light. There are empty wine bottles on the table and scattered on the floor, along with several narrow tables and sets of shelves against the walls. A drum and flute are by the south wall, on or in front of a set of shelves. There are raised sections with stairs leading up to them at either end of the room. There is nothing of interest on the raised section to the north, only another blocked passage. On the southern section are some wooden benches and a small bookcase filled with ruined books. To the left of the bookcase is a flight of stairs leading up to a heavily vaulted room, with thin cobwebs and strings of infected bones hanging from the ceiling. On the far side of the room is a leveled gargoyle, with braziers on either side. As soon as you enter far enough into the room, these will light up, and the gargoyle will burst to life and attack. The only items of note in the room are a couple of leather strips; one is in the middle of the floor, and the other is on a narrow table to the right of a door in the southwestern corner. In the southeastern corner is another passage, but it is blocked just around the corner by fallen masonry.
The door in the southwest corner opens into another room, with several wall shelves on the wall opposite holding various animal and human skulls all the way up to a shelf high overhead holding the skull of a mammoth. To the right of this wall are wide stairs up to a raised section, where two armored skeletons sit on benches. To the right of the benches is a series of flights of stairs leading up. To the left is an adept-locked wooden door, which opens to a small cupboard containing a barrel of ingredients with some leather strips on top, as well as a set of shelves holding a steel dagger, an empty random soul gem, two lockpicks, four loose septims, and a cast iron pot hiding a sapphire, an amethyst, and a small coin purse.

As soon as you start climbing the long flight of stairs, rows of braziers on either side will light up. Around the corner to the left are two more strings of infected bones hanging from the ceiling, while two nearby desks against the wall hold seven loose septims on a plate, a random potion of healing, magicka, or stamina, a sapphire, and a flute. Above the desks is a small balcony, and nearby just out of sight are a couple of armored skeletons. To the right, in the southern corner, is a leveled gargoyle that will burst to life and attack as soon as you are near. The balcony can be reached by following the room to the right of the desks, passing under a fallen piece of masonry, and climbing the stairs beyond. At the top, on the right is an inert statue of a gargoyle, while on the left is an open door. There are more stairs ahead at the back of the room, but they only lead to two empty planters, with a balcony high above patrolled by at least one armored skeleton.
Through the door, on the right is a blocked stairway, while to the left is an open door. Past the open door, two small wardrobes against the left wall contain more fine clothes. Beyond the wardrobes in the southern corner are a small balcony and an adept-locked door. Through the locked door is the previous balcony above the desks, with an unlocked chest in the corner. Looking back at the door through which you originally entered this room, you will see a shield rack mounted above the door holding a banded iron shield and crossed iron greatswords. Against the right wall are more stairs leading up to an area with a chair and table holding a common book, a piece of leather, and some small shelves at the back of the table holding some rolls of paper, a scroll of fire storm, and two lockpicks. There is another common book on the floor, beside the chair. To the left of the table is a set of shelves holding a further seven common books and a lute. To the northwest is an open door into a larger room, with two long unlocked chests against the right wall, two doorways on the left wall, and a third doorway in the back right northern corner. Both of the small rooms on the left are bedrooms, but both beds have been broken and buried by falling masonry and are now unusable. The only item of interest in either room is a wardrobe containing fine clothes in the second room.
Through the door in the northern corner is a flight of stairs leading up to a door. The room beyond is another dining room, with several raised sections. There are three armored skeletons in this room. Behind the door to the left is a small wardrobe containing yet more fine clothes. To the right a set of stairs descends to the main part of the room, where two long wooden tables are arranged with chairs along either side. There is a blocked passage to the southeast, and a wider passage to the northwest that is also blocked. At the rear of the room is a raised section, with stairs along the rear wall leading up to it. At the top, on the left is a lowered wooden portcullis, while at the far end is another leveled gargoyle, with a pull chain behind it. As soon as you pull the chain, the gargoyle will burst to life and attack. There is also an armored skeleton through a door in the southern corner, standing on the small balcony over the two empty planters seen previously. On either side of the gargoyle and in an alcove to the east are several sets of shelves, desks, and a table and chairs, but these only hold clutter.

Once the gargoyle has been dealt with, you can pass under the now raised portcullis. A pull chain on the right operates it from this side. Wide stairs rise to the northwest, with an armored skeleton partway up the stairs, just past a large piece of masonry. There seems to be quite a lot of sunlight coming through windows along the right side of the stairs. As you near the top of the stairs, yet another leveled gargoyle will burst to life and attack. On the left is another lowered wooden portcullis and a chapel beyond, with the chain to operate it on the right. Ahead to the northwest is an expert-locked wooden door. Regardless of which route you take, you will end up in the same place. If you choose to raise the portcullis and enter the chapel, however, you will have to backtrack to complete the exploration, making the route through the expert-locked door preferable if you want to conveniently fully explore this area and collect all the treasure available.
The chapel has a walkway forming an arch overhead, with an armored skeleton patrolling back and forth across it. There are also balconies on both sides of the room with a skeleton on each, and underneath are two more armored skeletons sitting on benches. The chapel is in shambles, with pews piled up in two large heaps. Behind the pulpit is a wooden screen, with an unlocked chest behind it in the eastern corner, and a small cupboard opposite containing a few septims and clutter.

Through the expert-locked door is a passage leading up, around a corner, and into an armory. There are a total of twenty-five weapon racks on the walls, which hold fourteen ancient Nord weapons, a random enchanted bow, and a random enchanted two-handed melee weapon. There are four wooden benches down the center of the room backed by screens, and four sets of shelves holding three random potions of healing, magicka, or stamina, a draught of strength, two bottles of alto wine, and a bottle of wine. To the southwest is a short flight of stairs up to a third portcullis, again with the chain to the right. Past this is another blocked flight of stairs ahead, with a doorway on the left. Through this door is a passage that links the chapel, balconies, and raised walkway. The balcony on this side is right in front of the doorway, with the other balcony directly opposite, while the walkway can be reached to the left, and the chapel below can be accessed to the right. Any fighting is likely to alert all the skeletons to your presence. Once you've dealt with all foes and explored the chapel below, crossing the walkway leads to a passage and a series of stairs up to an unlocked door.
The room at the top has a row of tables laid end-to-end, with an unlootable skeleton laid out with various other bones and skulls. There is a long unlocked chest against the southwest wall, as well as several small tables and chairs and a few sets of shelves around the room, but the only item of interest is a random potion of healing, magicka, or stamina on a shelf against the northwest wall, to the left of yet another door. Through this door is a blocked passageway on the right, and stairs leading up on the left to large double doors.

These doors open into a large room with a high vaulted ceiling. Five gargoyle statues are seated in the room: one on the left, two in the middle, and two on the right. One of each of these will burst to life when approached, one of which is the highest level possible. Once they are dealt with, during the quest, Serana will wonder if you are at the top yet, and whether there is a secret entrance in the room. There is a long wooden table in the center of the room, with two iron daggers and an iron warhammer on top. In the southern corner are two unowned upright coffins, which you can sleep in if you are a vampire. Between the coffins is a small wardrobe containing fine clothes and featuring a set of shelves on top, with the shelves holding a set of the rare vampire royal armor and a silver sword; beside the wardrobe on the floor is a pair of vampire boots. In a small raised area against the rear wall are two sets of shelves filled with more empty wine bottles, with the shelves on the right also holding a scroll of conjure familiar. There are three pieces of firewood laid in what appears to be a fireplace, but if you turn the wall-mounted candlestick on the left, the fireplace wall will open to reveal another passage. Follow a series of flights of stairs as you climb, winding around with each flight, to a door at the top. Through the door is Valerica's Study.
Valerica's Study[edit]
Valerica's study is a large room on two levels, with a large circular indentation in the floor surrounded by candles in the center of the lower level. This is where the portal to the Soul Cairn opens during the quest Chasing Echoes. Stairs against the southeast wall lead up to the raised section in the northeast. After the death of Lord Harkon, if you choose to inform Valerica, she will again take up residence here.

In the western corner is a small library. A row of bookshelves against the rear wall must have been impressive, but time has ruined many of the books, leaving few books intact in addition to Valerica's journal:
- Books
-
- 2920, Sun's Dusk, v11 (two copies)
- Feyfolken I
- Feyfolken II
- Feyfolken III
Against the southwest wall to the left of the library is a long wooden table with a built-in alchemy lab. Also found on the table among bones and skulls both human and animal, including a dragon bone (see notes), are two bowls of normal bone meal and a stone bowl containing finely ground bone meal. This last item is not an ingredient, but will be found under the miscellaneous section of your character's inventory menu, and is needed to create a portal to the Soul Cairn. In the southern corner is a short flight of stairs ascending to a door leading outside onto the Volkihar Balcony, which is the nearest fast-travel location to the portal leading to the Soul Cairn. The first time you use the door, a map marker is added to your in-game map as a fast-travel point named Castle Volkihar Balcony. Against the southeast wall are two long unlocked chests, with wall shelves filled with candles above them, and a narrow wooden table between them holding three soul gem fragments and an elven dagger.
In the northern corner of the lower level are several sets of shelves, which hold:
- Ingredients (one sample, unless otherwise noted)
-
- Bear Claws
- Bee
- Berit's Ashes†
- Bone Meal (two)
† These are a unique bone meal, and can be used to create potions with the same effects as regular bone meal.
In addition, there is a copy of the Alchemy skill book De Rerum Dirennis on one of the shelves. In the eastern corner between the upper level and the stairs are more sets of shelves holding mostly clutter, two lockpicks, and a copy of the Sneak skill book The Red Kitchen Reader.

The stairs up to the upper level pass two small wardrobes containing a selection of fine clothes and boots, with two empty black soul gems, an empty and a filled common soul gem, an empty grand soul gem, and six soul gem fragments on top. Also on top and not to be confused with normal soul gem fragments is a stone bowl containing soul gem shards, which are needed to create a portal to the Soul Cairn.
At the top of the upper level, in the eastern corner is an alchemy lab, with a narrow table, a set of shelves, and a long table to the left along the northeast wall. In the northern corner is an arcane enchanter. In the northwest are stairs up to a balcony featuring six more sets of shelves. The shelves, tables, and alchemy lab hold the following ingredients:
- Ingredients (one sample, unless otherwise noted)
-
- Eye of Sabre Cat
- Falmer Ear (two)
- Fire Salts (three)
- Fly Amanita
- Frost Salts (two)
- Garlic
- Ice Wraith Teeth
- Imp Stool
In addition to these ingredients, there is a stone bowl containing a sample of purified void salts, which are not an ingredient, but will be found under the miscellaneous section of your character's inventory menu, and are needed to create a portal to the Soul Cairn. There is also a random potion or poison on top of the alchemy lab, and another on one of the long tables, with a potion of blood added to the table after Valerica returns and takes up residence in the castle.

A central balcony overlooks the portal area. The balcony lacks a railing along the front, and features a "portal vessel", which is where the three unique items needed to open the portal to the Soul Cairn are placed during the related quest. Once the portal is open, stairs will lead down from this balcony to the portal in the center of the lower area. The portal will remain open permanently.
Notes[edit]
- The room with the three gargoyles in Volkihar Ruins is one of the few places where the vampire royal armor can be obtained, and the only one that respawns.
- Valerica's Study is the only location in the game where you can acquire a dragon bone without defeating a dragon.
- After completing Dawnguard's main questline on the Volkihar side, it is possible to repair the path to Volkihar Courtyard from within Volkihar Keep by talking to Garan Marethi. This repair is free of charge, and adds a convenient entrance door to the courtyard for quicker access to all dungeon locations.
- If the Dawnguard eradicate the vampires who control the castle, picking up any items in the castle will still count as stealing.
Bugs[edit]
- If you return to Volkihar Ruins via the courtyard entrance and pull the first chain again, the door will close, with no way of reopening it except by reloading a previous save or exiting/entering the area.
- Followers are not able to enter the East Tower or North Tower due to unfinished navmeshes.
 The Unofficial Dawnguard Patch, version 2.1.1, fixes this bug.
- In the Undercroft is an open coffin containing a coin purse that you may be unable to interact with.
- Using the console command
tclenables you to reach the coin purse.
- When a gargoyle comes to life, there is the sound of an explosion, and chunks of stone fly into the air from where the gargoyle is sitting and land in front of it. If you have already completed the quest Chasing Echoes, and you reenter Castle Volkihar before everything respawns (perhaps to revisit the Soul Cairn), the explosion sound and flying stone chunks will happen again when you approach the places where the gargoyles used to be, despite the fact that they are no longer present. This does not affect anything else, but it may be surprising when it first happens.
- If you are revisiting the dungeon after completing the quest Chasing Echoes, when you enter the Undercroft, it is quite possible that Serana may magically appear as a follower. Be aware that if she does, and you use the dialogue option "Wait here", you will not subsequently be able to issue the command "Follow me". It will not appear as a dialogue option, and she will be left permanently wherever you told her to wait unless you reload a previous save game. ?
- Although the Dawnguard waiting at the travel spawn point will be immediately hostile upon detecting you, killing them may count as murder and may result in a bounty.
- Although the Castle is (ostensibly) within Haafingar Hold, crimes committed here may earn a bounty in Whiterun Hold.
Gallery[edit]
-
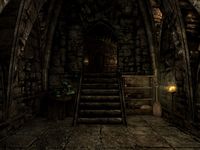
An alchemy lab next to the stairs leading to another room
-
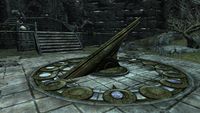
Unfinished moondial
-
Northeastern view of the courtyard
-
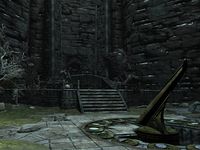
Western view of the courtyard
-

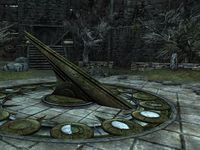
The finished moondial leading to Volkihar Ruins
-
Valerica's Study
-

The door leading to Volkihar Balcony


Maps[edit]

Volkihar Undercroft
|
|


- Skyrim-Places-Castles
- Skyrim-Places
- Skyrim-Places-Level 10
- Skyrim-Places-Alchemy Labs
- Skyrim-Places-Arcane Enchanters
- Skyrim-Places-Cooking Pots
- Skyrim-Places-Fishing Supplies
- Skyrim-Places-Discoverable
- Skyrim-Dawnguard
- Skyrim-Dawnguard-Places
- Skyrim-Dawnguard-Confirmed Bugs
- Skyrim-Bugs Fixed by the Unofficial Dawnguard Patch
- Skyrim-Confirmed Bugs
- Skyrim-Unconfirmed Bugs