Skyrim:The Staff of Hasedoki
| This page is currently being rewritten as part of the Skyrim Quest Redesign Project. The page is being rewritten and checked in several stages. All users are welcome to make changes to the page. If you make a change that is relevant to the project, please update this template accordingly, and make sure you have observed the project guidelines. Details
|
|
Quick Walkthrough[edit]
- Locate and read the Smuggler's Trade Notes at the bandit camp west of Dragonsreach (map).
- Obtain the Smuggler's Ledger from Modig Gilgar at his besieged cart near the Western Watchtower (map).
- Enter Brittleshin Pass and take the Staff of Hasedoki from Ivara of Olenveld.
Detailed Walkthrough[edit]
Smuggled Goods[edit]
Travel to an unmarked bandit camp located beneath a cliff, west of Dragonsreach (map). Once there, you must deal with the hostile bandits and locate the Smuggler's Trade Notes (not to be confused with the Smugglers' Note located nearby). Reading it will reveal that the smugglers were recently approached by an Orc looking to purchase the Staff of Hasedoki, a legendary artifact which they had recently sold to someone else. The smugglers sold this Orc the location of the buyers, planning to intercept and ambush him. Be wary if you are looting the camp, as opening the nearby chest will cause more bandits to spawn.

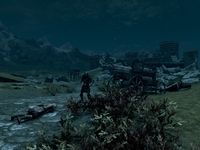
The ambush site is located along the road west of Whiterun, next to the ruined house near the Western Watchtower (map). The Orc in question, Modig Gilgar, will be found standing over the bodies of multiple bandits. He will turn hostile if you get too close, so you are left with the option to either kill him or pickpocket him to obtain the Smuggler's Ledger. Reading this will reveal the location of the buyers: Ivara of Olenveld and Lushak gra-Ragdam, located in Brittleshin Pass. Be sure to check Modig's cart for loot, including a copy of To Raise the Living as well as a container named Modig's Satchel which holds minor loot.
A Path to the Soul Cairn[edit]
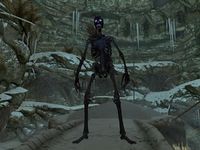
You must now venture to Brittleshin Pass, and enter either through its north or south entrance. Taking the southern approach will result in marginally fewer enemies to face. The enemies in question are bonemen, which appear in addition to the usual undead skeletons encountered in Brittleshin Pass.
You will need to make your way to the inner sanctum, where the boss level necromancer would usually be present. In his place, you will find Lushak gra-Ragdam and Ivara of Olenveld, two necromancers who will be hostile on sight. Beware Ivara, as she wields the Staff of Hasedoki. She can repeatedly use the staff to immobilize you. Once you've defeated them both, the remaining bonemen will disappear, leaving you free to loot and exit the cave. Lushak carries copies of Arkay the Enemy and The Black Arts On Trial, the latter being an Illusion skill book. Ivara carries copies of The Light and the Dark, Ivara's Notes, and Souls, Black and White, as well as the Staff itself. Reading her notes will reveal that the two necromancers traveled all the way from the island of Olenveld to open a portal to the Soul Cairn and offer Hasedoki's soul to earn the favor of the Ideal Masters. Loot his Staff from Ivara's corpse to end this plot and complete the quest.
The Staff creates a permanent 40-point ward protection while being held, and when cast it will ragdoll and forcefully knock targets backwards. (This includes you during your fight against Ivara.) If the target then dies within 60 seconds, they will be soul trapped.
Quest Stages[edit]
| The Staff of Hasedoki (ccBGSSSE045_Quest) | ||
|---|---|---|
| Stage | Finishes Quest | Journal Entry |
| 5 | On the road west of Whiterun I encountered and killed a hostile Orc besieged by bandits. On his body was a ledger that offered additional clues. According to the ledger, the current owners of the staff are two necromancers holed up in Brittleshin Pass. | |
| 10 | I've heard rumors of smugglers near Whiterun trading black market items. I should investigate the area to see what I can uncover.
Objective 10: Investigate the Smuggler's Den
|
|
| 20 | I've found a smuggler's note which may provide further information on their transactions.
Objective 20: Read the smuggler's trade notes
|
|
| 30 | I've found a smuggler's note which detailed the sale of a powerful staff to a necromancer somewhere west of Whiterun. While the location was not written in the note, it was apparently sold to an Orc who was interested in obtaining the staff. As the smuggler's planned to ambush and rob the Orc, I should go to the location and find out what happened.
Objective 30: Go to the site of the ambush
|
|
| 40 | On the road west of Whiterun I've encountered a hostile Orc besieged by bandits. It appears conversation is not an option.
Objective 40: Kill or pickpocket the Orc
|
|
| 45 | On the road west of Whiterun I encountered an Orc besieged by bandits. I've found a smuggler's ledger on his person that may tell me where he was headed.
Objective 55: Read the smuggler's ledger
|
|
| 50 | On the road west of Whiterun I encountered and killed an Orc besieged by bandits. I should check his body for clues on where he was headed.
Objective 50: Check the Orc's body for clues
|
|
| 60 | On the road west of Whiterun I encountered and killed a hostile Orc besieged by bandits. On his body was a ledger that offered additional clues. According to the ledger, the current owners of the staff are two necromancers holed up in Brittleshin Pass.
Objective 60: Find the necromancers in Brittleshin Pass
|
|
| 70 | I've killed the necromancer Ivara of Olenveld. | |
| 80 | I've killed the necromancer Lushak gra-Ragdam. | |
| 90 | Inside Brittleshin Pass I was attacked by two necromancers, Ivara of Olenveld and Lushak gra-Ragdam. In their possession was the artifact they purchased from the smugglers, the Staff of Hasedoki.
Objective 90: Retrieve the necromancer's staff
|
|
| 100 | Inside Brittleshin Pass I was attacked by two necromancers, Ivara of Olenveld and Lushak gra-Ragdam. In their possession was the artifact they purchased from the smugglers, the Staff of Hasedoki. | |
| 200 | Inside Brittleshin Pass I was attacked by two necromancers, Ivara of Olenveld and Lushak gra-Ragdam. In their possession was the artifact they purchased from the smugglers, the Staff of Hasedoki. After defeating them both, I retrieved the staff from the body of Ivara. | |
- Any text displayed in angle brackets (e.g.,
<Alias=LocationHold>) is dynamically set by the Radiant Quest system, and will be filled in with the appropriate word(s) when seen in game. - Not all Journal Entries may appear in your journal; which entries appear and which entries do not depends on the manner in which the quest is done.
- Stages are not always in order of progress. This is usually the case with quests that have multiple possible outcomes or quests where certain tasks may be done in any order. Some stages may therefore repeat objectives seen in other stages.
- If an entry is marked as "Finishes Quest" it means the quest disappears from the Active Quest list, but you may still receive new entries for that quest.
- On the PC, it is possible to use the console to advance through the quest by entering
setstage ccBGSSSE045_Quest stage, wherestageis the number of the stage you wish to complete. It is not possible to un-complete (i.e. go back) quest stages, but it is possible to clear all stages of the quest usingresetquest ccBGSSSE045_Quest.
Tip: Acquiring the staff early in legendary difficulty and/or survival mode[edit]
- Kill Modig Gilgar on day 2 when Ri'saad's caravan is packing up from Whiterun and moving down the road. They will cross paths with Modig Gilgar and he will immediately turn hostile towards them. Make sure Modig Gilgar spawns with a staff of Chain Lightning as it comes with a stagger of 1 which is quite handy to deal with Lushak gra-Ragdam and Ivara of Olenveld.
- Staff of Lightning holds about 12 charges and at PC level 3, needs about 8 greater soul gems to kill Ivara. Don't worry about Lushak as he will die with Chain lightning aoe.
- Player can use companion woodcutter chopping to farm the gold needed to prevent gaining experience and leveling up. You will still get some decent experience and get to level 3 by the time you purchase 8 greater soul gems.
- Once you have the equipment, head to Brittleshin pass (use Southern entrance) and kill the bonemen just before the necromancer area.
- Now, there seems to a blind spot at the entrance to the necromancer area as the necromancers and their minions will not follow you as long as you stay outside the entrance. Same applies to your follower too and he/she will get stuck at the entrance.
- Use staff of Chain lightning to continuously stagger and deal damage to Ivara and Lushak. Lushak will die first but Ivara will take some time to drop and start crawling.
- Once Ivara is in a downed state, summon a Familiar to attack as the regen on Ivara is higher than the 7 damage you are dealing with chain lightning (0.25 Legendary difficuly scaling and then further reduced by Ivara's 30% magic resistance). The familiar damage is not affected by difficulty and so will do a full +5 unarmed damage which greatly helps in killing Ivara.
- Loot Ivara's corpse and congratulations, you now have the Staff of Hasedoki as early as level 3
Notes[edit]
- Ivara, Lushak, and the three bonemen will spawn in Brittleshin Pass as soon as Modig Gilgar is killed or pickpocketed. Reading the ledger is optional. Brittleshin Pass is not reset by this. If you have not cleared it previously, Ivara will kill the necromancer boss, clearing the dungeon.
- Completing the quest will cause Modig Gilgar and his cart to immediately disappear.

