Skyrim:Driftshade Refuge
|
|||
|---|---|---|---|
| # of Zones | 2 | ||
| Clearable | Yes | ||
| Dungeon | Yes | ||
| Respawn Time | 10 days or 30 days | ||
| Level | Min: 6 | ||
| Occupants | |||
| Silver Hands, Werewolf | |||
| Important Treasure | |||
| 2920, Morning Star, v1 The Rear Guard Warrior |
|||
| Console Location Code(s) | |||
| DriftshadeSanctuaryExterior, DriftshadeSanctuary01, DriftshadeSanctuary02 | |||
| Region | |||
| Winterhold | |||
| Location | |||
| Southeast of Dawnstar Southwest of Frostflow Lighthouse |
|||
| Special Features | |||
| # of Forges/Anvils | 1 | ||
| # of Grindstones | 1 | ||
| # of Workbenches | 1 | ||
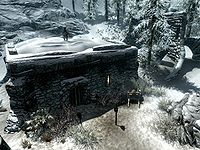
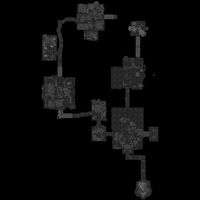
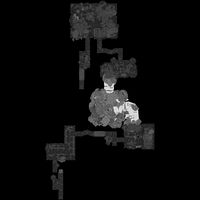
Driftshade Refuge is a medium-sized fort southeast of Dawnstar containing Silver Hands. It contains two zones: Driftshade Refuge and Driftshade Cellar.
The dilapidated fort, almost lost beneath snowdrifts, is now a base of command for the Silver Hand. Its remote location in the mountains and apparent disappearance from local memory are ideal for concealing activities. It was once a much larger fort, as seen by the broken walls a short distance from the only remaining intact building.
Related Quests[edit]
- Purity of Revenge: Retrieve the Fragments of Wuuthrad and wipe out the Silver Hand.
- Dungeon Delving: Do a favor for Jarl Korir by retrieving the Helm of Winterhold. (radiant)
- This location is one of many potential targets for one or more of the Radiant quests.
Walkthrough[edit]
Exterior[edit]
There are two Silver Hands on guard duty outside the fort. One has lookout duty atop the main building, while the other stands guard by the door. They will warn you against approaching the fort, and turn hostile if you choose to venture too close. To get to the archer on top of the building, you will need to go around the back, where a wooden ramp is located. There are a total of twenty-one snowberry bushes along the path leading up to the front entrance, with two more off to the left of the building, and two more near the cart around the back.
Driftshade Refuge[edit]
After following the stairs down from the entrance, you will come to a multi-junction room. There are two Silver Hands patrolling the middle corridor, which leads to a door that is held shut by a wooden bar on the other side. The eastern corridor has collapsed, so the only option is the western room. Before looting, you may wish to dispose of the Silver Hand in the adjoining room to the right. The first room holds only a deathbell on the table, and an apothecary's satchel on the top shelf of the second set of shelves from the right. The table to the right in the second room holds a few iron shields and an iron weapon, and a set of shelves to the left holds an assortment of iron weapons. The table to the far left holds a filled random soul gem and a random healing potion.
The next corridor leads to a large two-leveled room. Two more Silver Hands patrol here, one on the top level to the left, and the other straight ahead on the lower level. On the upper level there are several sets of shelves mostly holding ruined and burned books, however among these are several common books, a random potion of stamina and An Explorer's Guide to Skyrim, which may add map markers for some undiscovered locations. There is also a copy of Charwich-Koniinge, v2 in an open topped crate on the floor and to the left of the shelves are a pair of iron boots. On the lower level, there is a table holding a random potion of stamina and a copy of Forge, Hammer and Anvil. A bench in the opposite corner has a bottle of wine on top. To the west, in a darkened room is an adept-locked chest. There are stairs leading down to the north.
Halfway along the next corridor, there is an adept-locked door on the left. Behind the door is a makeshift bedroom with a Silver Hand sleeping in the leftmost bed. There are three other beds haphazardly strewn around the room, two end tables and an unlocked chest. On the shelves beside the bed with the bandit there is a random potion of healing and a cow hide. On a table in the corner there are three steel ingots, a pheasant roast, three garlic bulbs, a random potion of stamina, and a deer pelt. Two garlic braids hang from a cave-in blocked doorway in the north wall.
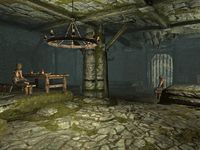
The corridor leads to the fort's dining and kitchen areas. There are two more Silver Hands here: one across the room by some raised metal spikes, and one to the left sitting at a table, which also holds a random potion of magicka. The table south of this holds an iron ingot, a random potion of regeneration, and a bottle of wine. The table in the southeast of the room has a medium coin purse on top and an unlocked chest beside it. The lever to lower the spikes is directly right of the door, beside the chest. To the south is the kitchen which holds a selection of food items on shelves and in barrels, including three rabbits and a pheasant hanging from racks, with a second pheasant on the floor beneath. Past the metal spikes in the dining room is the door to the cellar.
Driftshade Cellar[edit]
From the entrance, if you head forward, turn left, then left again, you will find some wheat on an end table, and a chest in the dark corner. The other direction leads to a wine cellar. A Silver Hand patrols the next section, past a spike wall. A pressure plate is in the middle of the corridor leading through to the Silver Hand, and on the other side of the trap is a pullbar for manual activation. The reason for this is a bed and chest in a hidden section behind the default position of the spike wall, just pull the handle and the wall will swing open and remain so. You will now have access to the chest.
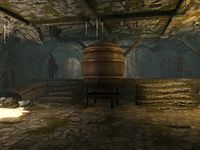
Past the trap is a small storage area, full of several pieces of iron and leather armor, iron weapons as well as minor potions of stamina and magicka. Down the stairs, there are a random sword and helmet on a table, and a door, which leads to what appear to be a room for brewing mead. There is a Silver Hand either side of the main boiler in the center of the room. Behind the boiler, on the raised section of the room, there is a shelf with minor potions of magicka and health, and a copy of the Light Armor skill book The Rear Guard and another set of shelves holding alto wine and wine against the south wall. There is a tunnel carved into the ice and rock to the north.
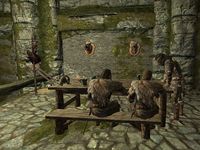
There are two more Silver Hands in the first room along the ice tunnel and two apprentice-locked cages, one holding a werewolf and three legs of goat and the other holding only a dead horse. You can attack and kill the werewolf in the cage before unlocking the cage, but it will be considered an assault. It will not be considered an assault if you unlock the cage and let the werewolf turn hostile. The next room is guarded by a Silver Hand, and is a torture room. There is more wine on shelves to your left as you enter and a dead werewolf lying in front of a rack. A second table is covered in bloody bones with an iron dagger found among them. After the corridor there is an open doorway into a large room, with stairs down into it on your right. Below you are two Silver Hands by a large fireplace opposite. Behind the fireplace are shelves holding two random skill potions, a coin purse, and an apothecary's satchel with some rarer ingredients. The room has seen better days with fallen masonry and crushed wooden furniture littering various corners of the room. To the south, below where you entered is a candlelit corridor leading to a door back to the refuge.
You enter into a small room with a lit brazier in front of you and a random potion of healing, both on a low table. On your left as you enter, on the south side, are stairs that lead to the final room.
Behind the barred door is a room with three Silver Hands. They usually gather by the table on the platform to the east with an iron helmet, a piece of mudcrab chitin, a copy of the One-handed skill book 2920, Morning Star, v1, and (if you are here during the quest Purity of Revenge) the fragments of Wuuthrad. On the table by the fireplace to the south is a copy of the Block skill book Warrior along with two common books and a coin purse, and behind this a cupboard. The opposite platform is devoid of loose items, but does hold the boss chest, where any items you are sent here to recover may be found. There are also a grindstone, an anvil, and a workbench on this platform.
To the south you'll encounter the previously encountered door that was barred at the beginning and you will find yourself at the first room that you've entered through.
Notes[edit]
- Three iron ore veins are near the fort: one north-northeast, one west, and one south-southeast. Two orichalcum ore veins are to the east among the rocks south of Frostflow Lighthouse.
- There are a few indicators in the game data that the fort was intended to be named Driftshade Sanctuary (the name of the location, the cells' editor IDs, etc.). The exact reason for the change is unknown. The only time the fort is named it is simply called "Driftshade", which offers no insight into the matter.
Bugs[edit]
- If the quest Dungeon Delving takes place here at the same time as Purity of Revenge, it may be impossible to complete both quests at once. ?
- After the dungeon respawns, the boss room will sometimes contain two sets of enemies: regular bandits and Silver Hand (even if the faction is eradicated). They will be hostile to their counterparts. This can be useful e.g. for obtaining two sets of boss loot at once. ?
