Online:The Mage (Celestial)
| The Mage (lore page) |
|||
|---|---|---|---|
| Location | Aetherian Archive Infinite Archive |
||
| Race | High Elf | Gender | Female |
| Health | Arc 2: 1,700,000 (Infinite Archive) |
Difficulty | |
| Reaction | Hostile | ||
| Other Information | |||
| Condition | Celestial | ||
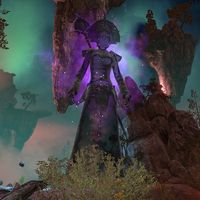
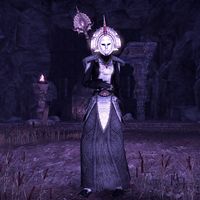
The Mage is the embodiment of the Mage Constellation. She appears as a large sorceress wearing a celestial-styled mask. The Firstmages refer to her as the Learned One.
By corrupting her Apex Stone, the Serpent drove the Mage into a physical form, where it split her into five aspects to corrupt them one by one. While the Serpent managed to corrupt one aspect now only known as the Lost One, Mahlia and Faryan have gone into hiding in the dungeons of Rkundzelft and Hircine's Haunt, respectively. The remaining two aspects, Ahlora and Valla, went to Belkarth to get the support of the Star-Gazers in stopping the Serpent's plans. During The Shattered and the Lost, you are tasked with investigating whether they are really aspects of the Mage, and how to help them in their endeavor. After you locate all the aspects, they reunite with the Lost One to once again become the Mage.
Still suffering from the Serpent's corruption of the Lost One, the Mage has withdrawn to the upper levels of the Aetherian Archive to contain the damage she causes.
Related Quests[edit]
 The Shattered and the Lost: Investigate two Altmer claiming to be aspects of the Mage.
 The Mage's Tower: Defeat the Celestial Mage to save her from the Serpent.
Skills and Abilities[edit]
- Chain Lightning
- The stone circle where the Mage stands is being ravaged by chain lightning. It is advised that ranged dps stand on the outside of the stone circle while melee dps stand on the Mage as to reduce the damage dealt by chain lightning.
- Conjured Mines
- The Mage will summon mines similar to those that may be summoned by the Sorcerer class. These deal a lot of damage when stepped on.
- Summon Conjured Reflection
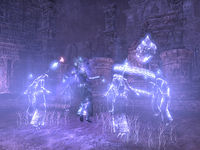
- The Mage will summon a Conjured Reflection, which looks like a miniature or mortal-sized version of herself. These reflections will set down a slowly expanding AoE that deals damage to those standing within, so burn them down as soon as they are summoned.
- Conjured Armory
- The Mage will summon a Conjured Axe which will begin to deal damage to one person in the group. It is advised that the tank taunts these axes when they're spawned and brings far away from the group. The area the group ended up after taking the teleportation pads to the tower's summit (the rock platform opposite of where the Mage was meditating before you killed the Firstmages she had turned on you) is a good spot. The tank must hold these axes in place and keep them taunted so they do not kill the other group members. On veteran difficulty, they all but one-shot most party members.
- Execute Phase
- The Mage will slam her staff down on the ground five times. When she does this, the group must roll dodge into the middle as close to The Mage as possible. Each slam will knock you back. After the 5 hits from her staff, she will begin channeling a devastating spell that will destroy your group if she is not killed. Focus all damage on The Mage and burn her down to avoid the one-hit kill and reap the rewards of Aetherian Archive.
Hard Mode Mechanics:
- Unstable Explosion
- The Mage's Storm Atronachs (which are spawned every ten to twenty seconds or so on hard mode) will enter execute phase when they reach 20% health, and begin spraying lightning everywhere. This attack is similar to Stormfist's enrage mechanic. For easy burning, the main tank should pull every atronach to the middle on the mage as soon as they are noticed. These storm atronachs must be focused by the stamina dps to be brought down as soon as possible when they reach 20%. They have a total of 2,875,839 health each.
- Meteors
- Meteors will constantly fall on the arena during hard mode, causing circular AoEs to appear on the ground. They must be blocked. Do not take your chances with rolling, as you either may not make it, or risk roll-dodging off the cliff and into the void.
Infinite Archive Attacks[edit]
- Chain Lightning
- The stone circle where the Mage stands is being ravaged by chain lightning. It is advised that ranged dps stand on the outside of the stone circle while melee dps stand on the Mage as to reduce the damage dealt by chain lightning.
- Conjured Mines
- The Mage will summon mines similar to those that may be summoned by the Sorcerer class. These deal a lot of damage when stepped on.
- Summon Conjured Reflection
- The Mage will summon a Conjured Reflection, which looks like a miniature or mortal-sized version of herself. These reflections will set down a slowly expanding AoE that deals damage to those standing within, so burn them down as soon as they are summoned.
- Conjured Armory
- The Mage will summon a weaker Conjured Axe which will begin to deal damage to one person in the group.
- Execute Phase
- The Mage will begin channeling a devastating spell that will destroy your group if she is not killed. Focus all damage on The Mage and burn her down to avoid the one-hit kill. Also spawns two Frost Atronachs.
Dialogue[edit]
The Shattered and the Lost[edit]
During Valla's flashback in the Apex Stone Room:
- The Mage: "You won't win, Malazar. I am too strong for you!"
- The Serpent: "You underestimate me, Valla. I have more tricks at my disposal than you could ever imagine. I have drawn you out of your Apex Stone and made you vulnerable. I know the power you wield. I am not fool enough to try to swallow you whole. But a piece at a time …."
- The Mage: "I will not let you do this. I will stop you!"
- The Serpent: "Protest as you will, but I have already won."
Aetherian Archive[edit]
Entering the first hallway:
- The Mage: "Turn back! I will not be responsible for your deaths!"
Climbing the first staircase:
- The Mage: "My magic will destroy you! It rages like a storm through this tower!"
Climbing the second set of stairs, before the lightning room:
- The Mage: "I came to this archive to contain the damage I could cause. My loss of control blasted all that you see into terrible existence. Why do you persist? Turn back!"
Heading past the first group of Firstmages:
- The Mage: "Why are you here? Are you like the Firstmages, seeking power? Mortals are such fools."
- The Mage: "I summoned these creatures, raised them to keep outsiders from reaching me. Stay back!"
Approaching the Foundation Stone Atronach:
- The Mage: "You are truly foolish to come farther. The Atronach gives way to no one."
Approaching Varlariel:
- The Mage: "Everything warps in my presence. Even these, the tower's gardens. They will shield me from you."
Climbing the final path to the Mage:
- The Mage: "The tower ahead is not meant for mortal eyes. Turn back, or perish."
- The Mage: "Mortals. No appreciation or understanding of what I do for them. I warned you to leave, and take no responsibility for what happens."
When you shatter the Aetherial Orbs on veteran difficulty:
- The Mage: "You don't know what you've done!"
- The Mage: "You will regret that."
- The Mage: "Do you wish for death? That shield was protecting this platform!"
When she floats down to fight you:
- The Mage: "You had the power to lay low the Firstmages. But my power is beyond theirs."
- The Mage: "Now, mortals, you will die."
Note that the Celestials' dialogue at the end of the Trial differs slightly depending on which other Craglorn Trials (Hel Ra Citadel and Sanctum Ophidia) the character has already completed, and The Warrior does not appear unless Hel Ra Citadel has been completed.
Only Aetherian Archive complete:
- The Mage: "My thoughts are my own again."
- The Thief: "It has been some time."
- The Mage: "I have words for the snake. Where is he?"
- The Thief: "Far from here. We will need your strength to reckon with him."
- The Mage: "To end him, you mean."
- The Thief: "Would you end the sun for lighting the sky? His death would only cause more peril. We will stop him, not murder him. And it will take all of us."
- The Mage: "Always the pragmatist."
Completed Hel Ra Citadel but NOT Sanctum Ophidia:
- The Mage: "Finally. My mind is my own."
- The Thief: "It has been too long."
- The Warrior: "You mean not long enough."
- The Mage: "I forget how quaint you are, Warrior. I have a fiery gift for the snake. Where is he?"
- The Thief: "He remains out in the world, wreaking havoc in this region."
- The Mage: "What do you propose we do?"
- The Warrior: "Let us slay him."
- The Thief: "The natural order must be restored. We contain the Serpent, not end him."
- The Mage: "Then we should return him to his Apex Stone."
- The Thief: "Agreed. Let us convene at the Stone."
Completed Sanctum Ophidia but NOT Hel Ra Citadel:
- The Mage: "I'm finally free. My mind is my own, again."
- The Thief: "At last."
- The Mage: "The snake—where is he? I'd like to fill him with holes. And I have just the spell to do it."
- The Thief: "Locked within his Apex Stone. All that's left is to free the Warrior from the Serpent's thrall."
Completed both Hel Ra Citadel and Sanctum Ophidia:
- The Mage: "My thoughts are my own again."
- The Thief: "It has been some time."
- The Warrior: "Not long enough."
- The Mage: "The Warrior—how quaint. Where is the snake? I owe him a fiery spell for this."
- The Thief: "Defeated—locked away in his Apex Stone, but his attention will turn elsewhere. We should depart."
Assaulting the Citadel[edit]
Once The Warrior is defeated, his weakened spectral form will appear and kneel at the platform in the center. The Mage may appear if she has previously been freed:
Completed Aetherian Archive but NOT Sanctum Ophidia:
- The Warrior: "My eyes are finally clear. My sword will claim the Serpent's neck."
- The Thief: "The Serpent belongs in the natural order. The three of us will contain him, not end him."
- The Mage: "Then we should return him to his Apex Stone. And seal it properly. Thrice—if we have to."
- The Warrior: "To the Serpent's Stone, then. Fall in behind me. The snake will learn his lesson."
Completed both the Aetherian Archive and Sanctum Ophidia:
- The Warrior: "The Serpent no longer clouds my mind. Eyes clear, my sword will claim his neck."
- The Thief: "The Serpent has been confined to his Apex Stone, and the natural order is restored. But his attention will turn elsewhere. We should depart."
- The Warrior: "Surprisingly efficient. For a Thief and a Mage. Fall in line behind me. I will take charge from here."
- The Mage: "How gracious of you."
- The Thief: "We should depart."
The Oldest Ghost[edit]
Once the Serpent has been stopped, the Mage may appear at the Apex Stone.
- The Serpent: "No! The mortals must perish!"
- The Mage: "The Serpent could not break this new seal with the blood of a thousand mortals. He will never return to this plane."
- The Thief: "The Warrior remains in his thrall. Even alone, that one will cause untold peril if left unchecked."
Completed both Hel Ra Citadel and Aetherian Archive:
- The Serpent: "No! The mortals must perish!"
- The Warrior: "It is done."
- The Mage: "The Serpent could not break this new seal with the blood of a thousand mortals. He will never return to this plane."
- The Thief: "But his attention will wander elsewhere. We should depart."
Combat Dialogue[edit]
- " My armory has a mind of its own."
- " I cannot control my creations!"
- " I warned you. These weapons will destroy you."
- " I cannot stop my armory from growing."
- " I cannot stop these weapons!"
Notes[edit]
- As a constellation, the Mage is usually referred to as male.
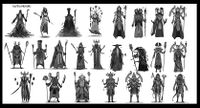
- Early concept art shows that the Mage was originally planned to be Ius, the God of Animals.
Bugs[edit]
- Rarely, during the battle against the Mage in Aetherian Archive, the Mage will begin repeatedly saying the dialogue lines about her Conjured Axes, without end, until she is killed. ?
- This bug, while hilarious, is harmless, and can be remedied by killing the Mage.
