Skyrim:Irkngthand
|
|||
|---|---|---|---|
| # of Zones | 4 | ||
| Clearable | No | ||
| Dungeon | Yes | ||
| Respawn Time | Never (storage is safe) | ||
| Level | Min: 12 | ||
| Occupants | |||
| Bandits, Dwarven Automatons, Falmer, Frostbite Spiders, Skeevers, Mercer Frey |
|||
| Important Treasure | |||
| Left Eye of the Falmer Right Eye of the Falmer |
|||
| Console Location Code(s) | |||
| IrkngthandExterior01, IrkngthandExterior02, IrkngthandExterior03, IrkngthandExterior04, Irkngthand01, Irkngthand02, Irkngthand03, Irkngthand04 | |||
| Region | |||
| The Pale | |||
| Location | |||
| West of Windhelm Northwest of Raldbthar |
|||
| Special Features | |||
| # of Alchemy Labs | 1 | ||
| # of Tanning Racks | 1 | ||
| # of Cooking Pots/Spits | 1 | ||
| Shadowmark | |||
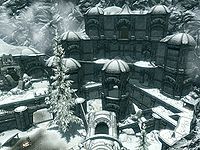
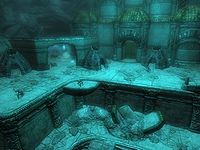
Irkngthand is a large Dwarven ruin west of Windhelm containing bandits, Dwarven automatons, Falmer, frostbite spiders, and skeevers. It contains four zones: Irkngthand Arcanex, Irkngthand Grand Cavern, Irkngthand Slave Pens, and Irkngthand Sanctuary.
Irkngthand is in a secluded area of Skyrim. The entrance can be reached via a dirt path south from Nightgate Inn in the Pale. The path soon diverges, with a branch to Tumble Arch Pass to the southwest, so take the eastern path when it splits. The entrance can also be reached by descending the mountain from the south and climbing along a series of wood bridges.
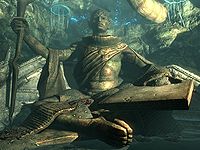
The courtyard of the ruin features a number of bandits and chests to loot. Entrance to the interior is impossible until you have started the Thieves Guild quest Blindsighted. The ruin contains a large statue depicting a Snow Elf before the race mutated into the Falmer.
Related Quests[edit]
- Blindsighted: Stop Mercer Frey.
- The Litany of Larceny: Find items for Delvin Mallory throughout the questline.
Walkthrough[edit]
Exterior[edit]
As you pass through the outer wall, a bandit will rise from a seat hidden just behind the bushes and next to a lean-to ahead, and warn you to not approach any closer. If you force hostilities, the bandits farther into the ruins will be alerted to your presence. Be careful if trying to stealthily kill the bandit, as there are another two bandits patrolling the ruins to the west who may spot you.
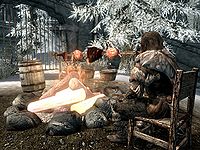
Also hidden by the bush, along with the chair, is a cooking spit, two bed rolls, and a food barrel, with two bottles of Nord mead in a pot over the fire, and two baked potatoes on the ground beside it. Progress is blocked by raised metal spikes, forcing you to go past the two patrolling bandits to bypass the gate. Under the fallen structure to the southwest is a table with an apprentice-locked chest, a large coin purse, a leveled potion of healing, a potion of minor healing, and a potion of minor stamina. The path narrows after doubling back on itself, and has a few traps. There is a bear trap against the wall to the right, another to the left of the path, and a final one to the right of the path, just before the stairs.
At the top of the stairs to the right is a bandit, who is usually sitting in a chair overlooking the entrance, but sometimes patrols to the top of the stairs from the chair. To the left of the stairs is a bed roll with a random healing potion and a random potion of magicka next to it. Past the bed roll, there is an alcove to the right with two bandits, two bed rolls, two food barrels, an unlocked chest, and a leveled potion of stamina on the table above the chest. There is a tower in the middle of the area from which it is possible to jump along the ruins and skip the next booby-trapped tunnel. The tunnel, lit by a torch, is fairly short, but beware of the Dwarven pressure plate. The plate, located in the center of the tunnel, activates a few spears from the wall on the right. There is a bandit patrolling the area after the tunnel, where the lever to lower the spikes at the entrance is located.
Past the patrolling bandit is a series of wooden stairs which ascend the cliff face and take you to the top of the ruins. Across the top of the ruins, linked by wooden platforms, is a bandit standing in a corner. Around the corner and across a wooden bridge is the bandit chief, sitting on a stone bench and looking along the path. Beside the bench is an unlocked chest and an adept-locked Dwarven wall chest. This is as far as you can go without having started the quest Blindsighted. It is possible to reach the door to the Arcanex by climbing and descending the mountain behind the ruin, but the door will be key-locked prior to the start of the quest. If Blindsighted has begun, there will be a pair of wooden bridges leading up to the Arcanex from the bandit chief's perch, and the door will be unlocked.
Irkngthand Arcanex[edit]
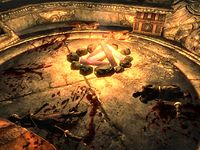
Inside the ruin, a brazier lights the entrance. A bench and two tables are on each side of the entrance chamber. Straight ahead is another table in the entrance to a large room featuring a bandit camp, with five dead bandits. The first three dead bandits are lying beside bed rolls, the fourth is on the first set of stairs after the fire, and the last is at the top of the same stairs. There are two bear traps near the fifth bandit.
By the bed roll to the right as you first come down the stairs is a random healing potion, and to the left, behind the campfire, is an expert-locked chest. If you return to the second highest level and follow it east and south, past four stone benches, you will find an adept-locked Dwarven chest hidden in the rubble. From the last dead bandit past the camp, walk west and north, staying on the same level, and past another four stone benches. There is a master-locked Dwarven chest hidden around the corner.
Just before the exit, to the southwest, is a Dwarven scuttle containing a leveled Dwarven sphere. There is also a broken Dwarven sphere just past the scuttle. Through the corridor is a room with more remnants of battle: two Dwarven spiders and a sphere. There is a scuttle on either side of the room, though only the far one contains a sphere. If you turn right after the next gate and follow the ledge to the end, you will find an unlocked Dwarven chest. Be careful, as you must pass another two scuttles with spheres, one in the wall to the right, and one on the level below. At the bottom of the stairs is another sphere waiting in the open, and against the south wall is another unlocked Dwarven chest.
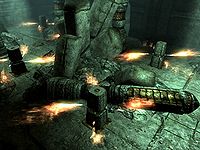
The next room contains a series of six rotating flamethrower pillars, each with four nozzles. The first two can be evaded by sticking to the walls, and the next three can be evaded by climbing over the rubble, but the last cannot be avoided, because it covers the gate you need to go through to continue. Take care while passing the pillars, as up to four leveled Dwarven spiders may emerge from scuttles in the walls. Past the gate, before the stairs around the corner, is an apprentice-locked Dwarven chest. In the next corridor, just before a lift to the right, is an apprentice-locked Dwarven chest on the wall near an alchemy lab set into a table. Strewn across the table are two flasks of Dwarven oil, a chaurus egg, two Falmer ears, a leveled potion of strength, and a random potion of healing, magicka, or stamina. Continuing north past a locked gate to the left, the corridor will ascend a short ramp and end in rubble. There is an unlocked Dwarven chest hidden in the rubble, with a Dwarven spider guarding it. The gate opens above the rubble in the previous room near the fourth flamethrower pillar, and the lift leads to the Grand Cavern.
Irkngthand Grand Cavern[edit]
Brynjolf and Karliah are waiting at the bottom of the stairs after the lift. You are forced into conversation with Karliah, after which you can start the chase through the doors, which are apprentice-trapped in the bottom left-hand corner. Opening them without first disarming the trap will trigger a swinging mace, the first of many traps set by Mercer Frey to delay and perhaps kill you.
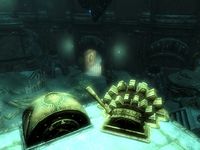
Past the doors, there are two broken Dwarven spiders lying on the floor, and on the stone table in the right-hand corner are three lockpicks and a bottle of Black-Briar Reserve, with a 'Guild' shadowmark etched into the top of the table. Along the corridor is another broken spider, and behind an expert-locked gate in the left-hand wall is a leveled potion of healing, a potion of strength, an amethyst, a sapphire, a gold ingot, a silver ingot, a Dwarven metal ingot, and an unlocked chest. Past the gate on the right wall is a bleeding crown fungus growing in an unlit lantern holder. In the next room, if you move to the grates and look south, you can observe Mercer stealthily killing two Falmer. Around a corner, another bleeding crown is on the right wall before a pair of closed doors. Through the doors and down the slope are some chaurus egg sacs, after which the corridor soon leads to a large room.
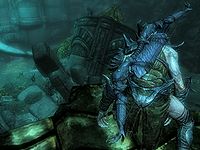
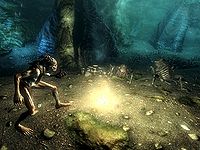
Upon entering the room, there is a leveled Falmer patrolling from a Falmer tent on your right down to the bottom of connecting stairs and back again. To progress, you need to find and activate two levers, then make your way through the Falmer camp. The first lever is to the left, over the rubble. Sticking to the higher walkway, there is an unlocked Falmer chest around the corner from where you entered. Inside the nearby first tent are five poisons, including three bottles of frostbite venom. There is a broken Dwarven door to the right as you continue along the path, and an empty Falmer tent on the opposite side. To the northwest of the empty tent is an expert-locked gate, behind which is a Dwemer ballista, aimed at a leveled Falmer below to the west; it is activated by a lever just below it. Past the locked room is the second lever next to an unlocked Dwarven chest. Both levers must be activated within a short time of each other, and can be checked by looking at the cogs on either side of the raised bars below. At the bottom of the connecting stairs down is a dead Falmer. There is also a broken Dwarven sphere in the rubble to the west, and to the north, behind a stone bench, is a novice-locked Dwarven chest.
There are two hidden spinning blades on the stone path leading to the Falmer camp, marked by stone outcroppings in the ground. The Falmer that the ballista pointed at is to the left, and another Falmer is to the right, above the fungus 'farm'. Two Dwarven spheres can be activated in this area, which the Falmer may accidentally do before you arrive. The two scuttles are on either side of the top level, in the farm section. There is also a Falmer pen to the west containing two skeevers beside the tunnel to the next area. In the farthest northwest corner of the room, on a pile of rocks to the right of a Dwarven scuttle, there is a difficult-to-spot healing potion.
In the 'farm' area to the north and northwest there are numerous harvestable fungal growths: five bleeding crown, four blisterwort, two fly amanita, two imp stool, four Namira's rot, and three white cap fungi. Also on the top level is an adept-locked Dwarven chest, hidden in the rubble to the right from the top of the stairs. Behind the lower-level tent to the southwest is an imp stool, while another imp stool is just before the tent on the higher level, and a blisterwort is behind it. There are two blisterwort lower down on the same side. There is a tanning rack by the higher tent, and on the table opposite, a sample of fly amanita, a glowing mushroom, two pieces of chaurus chitin, a sample of Namira's rot, and a skeever tail.
There is a bear trap around the corner in the tunnel to the next open section. There are two paths here, one high and one low. The high path starts to the left, with a short ramp up. As you turn around, a leveled Falmer will walk from the rubble behind the fallen Dwemer structure ahead and crouch down. If you follow the Dwemer-made ramp up and above the entrance to this chamber, you will find a table holding the following ingredients: a piece of chaurus chitin, a Falmer ear, two glowing mushrooms, a sample of fly amanita, a skeever tail, and a sample of bleeding crown fungus. From up here, you should be able to see the leveled Falmer guarding the path across the chamber. Looking west, there is one Falmer walking on the ground above the lower path, another Falmer above the Dwemer structure to the left, and another two on the Dwemer structure in the distance to the right. The two highest Falmer are difficult to reach, but they will both drop down to the ground if they detect you and are unable to target you.
If you wish to avoid most of the Falmer, take the lower path. It starts under an improvised bridge patrolled by a Falmer. Follow the winding path, and when it widens again past some fallen stonework, climb the rubble to the left to find a tent. Go around the tent to the right and loot the Falmer chest hidden there, then drop back down to the lower path. Otherwise, you can start by killing the Falmer behind the first structure and proceeding to the chest, then double back to the Dwemer ramp to take care of the rest. From the Dwemer ramp, drop down and then climb the rubble around the front of the first fallen structure. There is one Falmer here, patrolling across the improvised bridge to a tent. There is nothing inside the tent, but growing around it are two bleeding crown, a fly amanita, and two white cap fungi.
The first time you pass the fallen Dwemer structure to the left, the whole chamber will shake. The reason for this is soon apparent: a Dwemer tower at the far end of the chamber has just fallen down. Obviously, you will need to find another way forward, but first descend the steps by the fallen tower to find an adept-locked Dwarven chest in the middle of the rubble. To the left of the stairs is an ascending Dwemer ramp. There are two leveled Falmer patrolling here: one patrols the ramp, while the second patrols the flat section at the top. The second Falmer, a magic-user, carries a shaman's key.
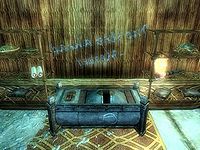
Through the pair of doors at the top of a second ramp is a tunnel. In an alcove to the right is a bleeding crown and a Namira's rot fungi. There are three bear traps down the stairs, one on each level. In the room at the bottom of the stairs, there is a dead Falmer lying beside an improvised campfire, over which is a charred skeever and a few ruined and burned books. There are also a few loose coins on the ground near the body and around the room. On a table near the body are two more charred skeever hides and four ruined books. There are several sets of metal shelves by the table holding various smeltable Dwemer metalwork, and hidden under the table are a scroll of Detect Life and a leveled potion of healing. Around this room there are four wall braziers, with a total of three bleeding crown and a fly amanita growing in them. There is a storeroom to the northwest containing three empty Dwarven chests, more smeltable Dwemer metal on shelves, and a burning torch. There are also two further scrolls of Detect Life in the storeroom: one on the left-hand shelf, and the other to the right behind the gate. There is an "Empty" shadowmark on the empty chest in the middle, and on the wall above is a message written by Mercer Frey. The message reads: One Step Ahead -Mercer, and it is laterally inverted (a mirror image).
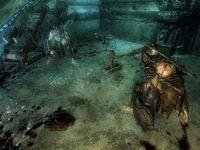
Through the unlocked gate to the southeast are two more bear traps, so avoid them before opening the doors into the next cavern. You can see that the path passes far overhead, but there is a Falmer camp to avoid or destroy first. There is a broken Dwarven sphere in front of you, and at the bottom of the stairs is a Dwarven centurion (see bugs) in a charging gantry. It will activate upon your approach, but not for the Falmer, even though they pass closer to it. There is a button to activate the centurion near the ground to the right next to the stairs; you can activate it to help thin the number of Falmer in the area. If Dawnguard is installed, there are several chaurus cocoonsDG by the stream. To safely avoid all of the Falmer in this area, you must first drop down to the ground on the right from the entrance stairs, then follow the stream (which contains two salmon) until it turns east. (Don't activate the centurion, as this will result in the winner of the resulting battle actively seeking you out.) When the stream turns east, move to the stairs to the south and ascend them. Follow the path to the east, keeping to the walls to prevent the skeevers in the pen from detecting you. Wait in the southeastern corner until the patrolling Falmer is on the ground level, then proceed upwards.
Those wishing to clear out the area can start by dropping down and activating the centurion. There are a total of five leveled Falmer in the area: two in the camp, one patrolling the stream, one on the other side of the camp, and one patrolling the path beyond and above that. In addition, there are two skeevers in a pen to the southeast, between the final two Falmer. Two of the tents in the camp contain hay piles, and there are three harvestable salmon to the north. To the south, across the stream, are six chaurus egg sacs in front of another fungus farm. Growing in the farm area are four Namira's rot, three blisterwort, three imp stool, two white cap, two fly amanita, and one bleeding crown fungi.
On the other side of the path is a bleeding crown fungus, and another is at the bottom of the stairs just beyond the skeever pen. Ascend the stairs, but be careful on the second set to the left, where a tripwire on the top step activates a claw trap hidden behind the pillar to the left. The tripwire can be avoided by staying to the right of the stairs. Over to the left is the next set of stairs, with a dead Falmer lying at the bottom, and a fly amanita fungus to the right. Follow the stairs up, then take the bridge across the cavern, looting another dead Falmer in the process. Just before you leave the bridge, look to the southeast and observe the frostbite spiders in a room filled with cobwebs. In the short corridor that follows are three bear traps. The first is in the middle, the second to the left after that, and the third has apparently killed a Falmer, who is lying on top of it.
As you exit the corridor, stop again. Two leveled Falmer should appear and start patrolling across the flat section below to the southeast. You can observe their paths and sneak past if you wish. On the flat section, to the right of the right-hand tent is an unlocked Falmer chest and a skeleton that can be looted. Between the left-hand tent and the door to the Slave Pens is an unlocked high-leveled Dwarven wall chest. Opposite the door are the two Falmer killed by Mercer: one on an outcropping, and another to the right and farther away. There are three frostbite spiders and one spider egg sac in the spider room.
Irkngthand Slave Pens[edit]
This zone is filled with a misty fog, and is in a rather more decrepit state than the previous zones. In the first room, you will find a Dwarven spider by a short set of ascending stairs which lead to an apprentice-locked gate. The only things of interest behind the gate are a silver ingot, an orichalcum ingot, and several pieces of smeltable Dwemer metal. Directly south of the stairs is a single glowing mushroom growing on the wall, with another three growing farther to the east. Underneath the three mushrooms is a broken Dwarven sphere, and in the rubble to the left is an unlocked Dwarven chest.
East of the stairs are more stairs; descend them, but watch out for the bone chimes at the top. If you make it to the lever undetected, you can use it to activate a spinning blade trap, which may kill or injure the two leveled Falmer in the torture room on the level below. You can even watch the deed through the grated fence. Don't forget to turn it off before entering the torture chamber. There is a dead thief on one of the racks in the room, who carries a note about a captivating discovery. On the table are three salt piles, a Dwarven dagger and sword, a weak poison, three bottles of frostbite venom, a weak lingering poison, a lingering stamina poison, two weak aversion to fire poisons, a potion of minor healing, and a leather strip. To the right of the table is an unlocked Dwarven chest.
There are bone chimes on either side of the exit, but they are of no consequence unless you are trying to sneak past the previous two Falmer. Spread around the next corner are three pressure plates, which activate three different flame spouts: one points east, one south, and the last northwest. There are two skeletons, one lootable, in the room to the left by the fallen gate.
Around the corner past the brazier and fallen gate is a heavily guarded Falmer camp. It is almost impossible to sneak through here with followers, as they will not take the shortcut which requires dropping down off a rock; instead, they will attempt to go through the camp to reach the same area. There is a hay pile in each tent, and two unlocked Falmer chests: one in the first tent on the left, and the other in the third tent on the right. There is a charred skeever over the fire, and some bone chimes hanging from the roof. The bone chimes are merely for decoration, as some of them cannot be reached.
Behind the right-hand tents is another fungus farm, with four white cap, four fly amanita, four Namira's rot, three imp stool, one bleeding crown, and one blisterwort fungi. There is another charred skeever over the campfire by the last tent, and a gate to proceed further. To the north is a table with a dead chaurus, four pieces of chaurus chitin, a Falmer helmet, and a blood-soaked Falmer shield. To the east are four chaurus egg sacs outside an expert-locked gate to the same section as the previous unlocked gate. There is a total of thirty-eight chaurus egg sacs and a chaurus cocoonDG in the pen and just inside the tunnel to the southeast. There are a further fourteen chaurus egg sacs through the tunnel, and two imp stool and two fly amanita fungi at the other end between the pipes.
Around the pipes is yet another Falmer camp; however, this one is possible to bypass. Stick to the wall on the right and follow the raised path, where you will find an apprentice-locked Falmer chest against the right-hand wall, then continue down to where there are two chaurus or chaurus huntersDG. Stick to the left, and quickly move through the glow of the fire when the chaurus have wandered away and are looking elsewhere. There are three Falmer in the first part of the camp: the first is in the tent to the left, the second stands by a Falmer totem to the southwest, and the third is in a line beyond the second. There are two imp stool fungus on either side of the entrance to the camp, and a single spider's egg sac in the cobwebbed area. There is one glowing mushroom on the wall beside the second Falmer, and another on the wall by the ramp down to the second part of the camp.
If you stick to the western wall to the right of this ramp and climb the pipes, they can be followed to the end, where you will find a "Thieves Cache" shadowmark. The reason for this is two potions on the ground below: a leveled healing potion, and a leveled strength potion. There is another chaurus cocoonDG by the potions. The pipes cannot be used to get followers across the camp stealthily as, once again, they will not jump off the end. The tent to the left of the descending ramp, behind a campfire, contains an expert-locked Falmer chest. Around the next campfire where the chaurus are, there are six white cap fungus, and eight glowing mushrooms on the walls around the camp.
At the end of the second part of the camp and the beginning of the third part, you will find twenty-three chaurus egg sacs, as well as four glowing mushrooms on the walls. There are two more Falmer hiding behind the pillar overlooking the third part of the camp, so beware. This time, your followers will follow you over the drop. To the right of the gate is a leveled-locked Dwarven chest, while the descending tunnel beyond the gate leads to the door to the Sanctuary.
Irkngthand Sanctuary[edit]
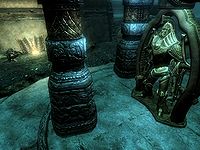
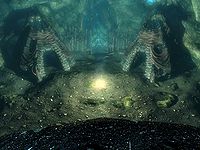
Other than the impressive statue of a Snow Elf, there are only two dead Falmer to be found in this small zone. You will be forced into conversation with Mercer Frey after which he will start attacking you. He will approach for battle and then disappear in a burst of red light and approach again. Staying back near where you entered this room allows you to watch where he reappears and approaches you again. The room shakes during battle, and once Frey is defeated, the water level will start rising. There is a set of stairs that loops around the back of the statue, but leads nowhere. The exit tunnel is only available after Mercer Frey is dead, and is above the statue's head. The water level rising will allow you to enter a tunnel leading to Bronze Water Cave.
Following the quest Blindsighted, the Sanctuary becomes inaccessible from Irkngthand, instead becoming accessible from Bronze Water Cave.
Notes[edit]
- One corundum ore vein is outside the entrance to the ruin, outside the stone wall near the rock face, 20-25 steps directly west.
- Followers may not enter the interior of Irkngthand, even after you have completed the related quests. They will wait outside the doors to the Arcanex.
- It's possible to reach the door to the Arcanex before the related quest by carefully falling down the mountain behind it. However, the door will be locked and require an unobtainable key.
- There are three Shadowmarks found here:
- a "Guild" shadowmark on top of a table in front of the entrance to the Grand Cavern
- an "Empty" shadowmark on a chest in the southwestern room of the Grand Cavern (the same room as the mirrored message)
- a "Cache" shadowmark on top of some pipes at the end of the Slave Pens
Bugs[edit]
- Irkngthand Slave Pens has a one-way drop that will prevent you from being able to leave if you have already completed the Thieves Guild quest Blindsighted.
The Unofficial Skyrim Patch, version 1.2.5, fixes this bug.
- The
tclconsole command can be used. - It is possible to reach the top of the cliff again, but you need to have the Whirlwind Sprint dragon shout. Facing away from the door to the Sanctuary, climb the Falmer tent to your left, jumping repeatedly and working your way up to the top. Once you are at the top, aim at the part of the cliff nearest you (there is a small recess in the cliff edge). Get as close as possible to the cliff edge without falling in height, and use the Whirlwind Sprint Shout. If you do it correctly, you will land on the edge of the cliff.
- One of the bandits in Raldbthar carries a key called the "Irkngthand Consortium Key". However, no such area exists, and the aforementioned key doesn't open anything.
The Unofficial Skyrim Patch, version 2.0.8, addresses this issue. The bandit will carry the Raldbthar Key instead.
- The potions near the Cache shadowmark are intended to be sitting on the shelf on either side of the mark, but due to their placement, they will normally fall to the ground below before you get there. (details)
- The Dwarven centurion may already be destroyed upon entering the chamber.
- Skyrim-Places-Dwarven Ruins
- Skyrim-Places
- Skyrim-Places-Level 12
- Featured Articles
- Skyrim-Places-The Pale
- Skyrim-Places-Alchemy Labs
- Skyrim-Places-Tanning Racks
- Skyrim-Places-Cooking Pots
- Skyrim-Places-Safe
- Skyrim-Places-Discoverable
- Skyrim-Places-Falmer Hives
- Skyrim-Places-Dwarven Automaton Sites
- Skyrim-Bugs Fixed by the Unofficial Skyrim Patch
- Skyrim-Confirmed Bugs
