Online:The Gray Council
|
||||||||||||||||||
Quick Walkthrough[edit]
- Travel to Grayhome Island and talk to Gwendis.
- Find and deactivate the blue crystals around the island.
- Enter Grayhome Castle and drink the Dream-Walk Potion.
- Talk to Exarchs Ulfra and Tzinghalis.
- Find and talk to Rada al-Saran.
- Find Verandis' study and look for information.
- Reach the study in the real world and read Verandis's Journal.
- Collect the Reliquary and find the Ritual Chamber.
- Complete the ritual and watch what happens.
- Defend yourself from the Exarch.
- Meet with Count Verandis Ravenwatch outside the chamber.
- Speak with Gwendis.
Detailed Walkthrough[edit]
Heading to Grayhome[edit]
Previously, your investigation into the Gray Host's past in Bangkorai becomes awkward when Gwendis' mentor Count Verandis Ravenwatch appeared to have a connection to them. Searching Ravenwatch Castle only lead to the discovery of a warm letter from Rada al-Saran inviting his brother to come back home to his family in their new home. Needless to say, Gwendis needs answers and will be waiting for you in the courtyard behind the castle. Talking with her, she quickly explains her plan to follow the map that was part of the letter to Grayhome Island and search for the truth no matter what it is. After agreeing to accompany her you can ask for a refresher on what happened previously before traveling on the cart.
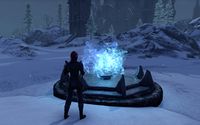
You will reappear on the edge of a stone dock. Further inland it looks icy and desolate. In the distance Grayhome Castle looms. Talking with Gwendis will have her suggest surveying the island before tackling the castle: "The Gray Host may be gone, but they could have left traps. And who knows what kind of wildlife lives here." After agreeing, Gwendis will begin to run along the dock until she stops near a blue crystal set in a stone platform which begins to glow as she approaches.
- Gwendis: "What is that thing? Did it just pulse at me?"
Talking with Gwendis, she will have a hunch that the crystal is part of a ward rather than a trap. She has seen a similar set up before and asks you to deactivate it and any others you find around the island. Once you deactivate the crystal, you won't appear to come to harm:
- Gwendis: "Well done! Let's go deal with the rest of the ward crystals."
There are three more crystals to find and they are all in tower structures to the east, north and west of your current location. If you try and enter the castle beforehand, you will be unable to. To avoid fighting, follow the paths; otherwise you will have to contend with Grayhome's icy and undead wildlife like the Death Hounds, Vampiric Bears, Sabre Cats and Ice Wraiths. While the north tower has no additional defenses, the crystal to the east and west are guarded by a Gargoyle. When the last crystal is deactivated, Gwendis will detect something.
- Gwendis: "That was definitely a rumble! Let's go check the castle."
Approaching the massive doors to the castle, you will see a singular red-hued Spectral Assassin standing at the steps. Once this has been defeated, you have clear access to the castle.
- Gwendis: "The way looks clear. Let's see if we can get inside!"
Once inside, you'll find the interior dusty and covered in cobwebs. Despite this Gwendis remarks it still looks good.
- Gwendis: "I hate to admit it, but this place is impressive."
In the distance you may notice more spectral figures in the room beyond, as well as glowing red magical mines which appear on the floor. At this point, you can pick up the Spectral Assassins book which can be found on a bench before talking to Gwendis about what to do next.
The Dream-Walk[edit]
The next step of Gwendis' plan is what she terms ... unconventional. She further explains the use of blood in spells and the fact that she has some of Verandis' blood: "By putting a drop of his blood in this potion, we can dream-walk and access any memories Verandis has of this place." If you have previously completed Dream-Walk Into Darkness this is what Verandis had you use back then. After you drink the potion she places on the table, you will slowly fall to the ground and black out. When you come to, the world has a purple hue and the castle looks to be pristine. A woman walks up to you and greets you as Verandis.
- Steward Faustine: "Exarch Verandis. While we have your crates moved to your study, Exarchs Tzinghalis and Ulfra would like a word."
You have the option of talking to Faustine and asking her some questions before heading further in. She will be kind enough to explain where you can find Tzinghalis and Ulfra. Tzinghalis is upstairs in his laboratory while Ulfra is at the western balcony. You can speak with them in either order. You will also learn that Verandis was himself an Exarch of the Council in this particular time, but does not wish to be addressed by the title, preferring just a generic "Lord Ravenwatch".
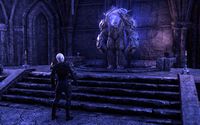
Tzinghalis' laboratory is in the northwest corner of the upper level. When you enter he can be found gazing up at a Stone Husk. Speaking with Tzinghalis, it is revealed that the Husk is one of Verandis' own creations and its original purpose was as a vessel to resurrect mortals. Your response to his query about the discontinuation of your experiments after a terrible failure is met with derision: "Cost? Bah! What cost? Mortals are as cheap and plentiful as grains of sand on a beach! Once you mastered your creation, you'd be able to resurrect them at will. [...] Wouldn't that bring about the peace you crave?" Continuing to speak with him about his own research, Tzinghalis will mention his success with a "strange relic" Rada al-Saran discovered beneath the Reach.
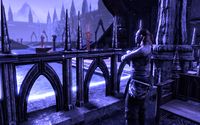
The eastern balcony is on the lower level, and it is one of the few places where there are significant amounts of natural light. Ulfra will be looking out over the courtyard. Talk with her to see what she has to say to you. The Nord Werewolf will warn you not to continue your perpetual argument with Rada when you see him: "[...] He needs to remain focused. I'll never understand your obsession with sheep, Verandis. There are hunters and prey. We are hunters. Your sympathy for prey borders on the insane." As you continue to talk with her, Ulfra reveals her disdain for Verandis and openly wonders why Rada hadn't dealt with him years before.
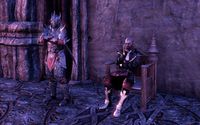
As you walk around you also have the option of speaking with other Gray Host members, who consistently find Verandis' attitude towards mortals strange. They also give contextual clues that this memory comes from before the Gray Host's defeat at Bangkorai. After speaking with both Exarchs, you will need to introduce yourself to Rada who can now be found in the room on the upper level with the blood fountain. He will be sitting on a throne watching his fellows enjoy themselves and notices your arrival:
- Rada al-Saran: "Verandis, my friend. At long last."
Through your conversation with Rada al-Saran, you learn that the ruling Gray Council was the brainchild of Verandis and that the Gray Host has existed for centuries at the time of the memory. You also greet Rada by asking if he considered your suggestion of parlaying with Empress Hestra instead of fighting her. While he is touched by Verandis' concern, he does not see an alliance as benefiting both sides. "[...]King Styriche and our Gray Host could crush this Empress Hestra and her armies in a day. I know you worry for our people, Verandis, but you need not." At your rebuttal that the mortals are dangerous through sheer numbers, Rada is willing to compromise: "I will say this: If the mortals do not move against us, we will not move against them. But I cannot protect your precious mortals from themselves."
As you reply, Steward Faustine will arrive behind you:
- Steward Faustine: "Lord Verandis, I apologize for the delay. The study is ready for you."
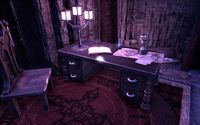
Before you leave, you have the option to continue speaking with Rada al-Saran. This is recommended as it gives a window into the relationship between Rada and Verandis. Afterwards, you head to Verandis' Study to see what clues can be found in his personal belongings. From the blood fountain room, turn right and head down the corridor until you reach the interactable door. Once inside, you will notice a highlighted book on the desk. Attempt to read it, however, and you will instead hear a voice:
- Gwendis: "Easy, friend. It's time to wake up. Find the dream-walk potion and drink it."
A potion vial similar to the one you first drank from appears on the desk. Once you drink the potion you will curl up into a ball and wake up.
To the Study[edit]
Gwendis will be beside you and can explain what happened: trying to read a book within a Dream-Walk is a bad idea. She will then ask what you learned about Verandis. Upon learning he was pushing for peace between the Gray Host and mortals, she will be reassured: "Then … he didn't lie to me. He's still the man I know and trust. He left out a few things, of course, but I'll deal with that another time." But she'll want to explore the study and see if he left anything there and asks you to lead her there. As previously mentioned, red magicka mines will appear on the ground and should not be walked on to avoid damage. You will also need to deal with the ghostly protectors who have been left to guard the halls. These include the Spectral Archers, Assassins, Bodyguard and Sentinels. A fun fact: they were based on Verandis' work which was "improved" on by Tzinghalis. Created from the life energy of vampires and werewolves, when left alone they stagger around and clutch at their heads in agony.
Entering the study upstairs, Gwendis will remark:
- Gwendis: "After all this time, his scent still lingers in this place."
You have a lucky break and find that the journal is still on the desk. Upon reading it, you find that it details Verandis' experiments with resurrecting mortals using the Stone Husks. His secondary goal was to use the finalized ritual to free vampire souls from Coldharbour. However, his first test subject was driven insane in process of resurrection. He further speculates on modifying the ritual by using his own essence in a reliquary as a stabilizer. However, his last entry shows that he completely rejected his previous ideas, but left his Reliquary as reminder of his failures.
After you have finished reading, you can take Verandis's Journal with you while Gwendis asks you:
- Gwendis: "Did you find the journal? What's it say?"
Completing the Ritual[edit]
At this point, the quest begins to branch depending on if your character has completed the Rivenspire Zone storyline. If you have completed The Crown of Shornhelm then you have completed the Rivenspire Zone. Talk to Gwendis and hand the book over. She will flip through while commenting on the relative simplicity of the ritual. You will also learn—and this should come as no surprise— that he has decided to permanently part ways with the rest of the Council. She will then have an idea: vampire souls go to Coldharbour when they die and you need someone to question about the Gray Host. Why not use the ritual to summon one back to Nirn?
If you haven't completed Rivenspire, then she will suggest one of the Gray Council. "Who cares what the ritual does to them? We have to interrogate them and find some weakness. Some way to stop the Gray Host." However if you have completed Rivenspire, Gwendis will have a different reaction and you know who she means. This is a chance to bring Verandis back home. "Verandis gave his life for Rivenspire and what was his reward? Coldharbour and an eternity of torment at the hands of Molag Bal! This will work. It has to!" In either branch she will ask you to find his hidden Reliquary downstairs in the armory and to meet her in the ritual chamber afterwards.
The armory mentioned in the journal is the large room in the center of the lower level. If you visited there during the Dream-Walk then you would have seen a Gray Host squad going through a combat drill lead by one of the Exarchs. On the eastern wall is an ancient chest, inside you will find Verandis's Reliquary. You can then head to the ritual chamber which is in the northernmost room. You may have to fight several more spectral enemies and a Gargoyle on the way there.
Once there, you will find that Gwendis has set up the ritual chamber and is looking up at the Stone Husk in the stone circle.
- Gwendis: "That's a stone husk, all right. Light the candles to begin the ritual."
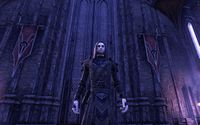
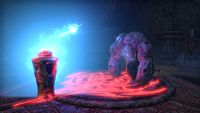
Light the four candles which surround the Stone Husk and the floor on the stone circle will be covered in the red sigil seen back in Viridian Watch. At Gwendis' prompting, place Verandis' Reliquary and observe what happens. An orb of blue light will fly out of the urn and hit the Husk which bursts open to reveal the newly summoned vampire from Coldharbour. At this quest stage the completion status of the Rivenspire storyline will decide who is summoned back. If Gwendis was trying to summon a random Gray Host exarch to interrogate, Exarch Turvon will be summoned. However, if she was aiming to bring back Verandis, she will succeed and Count Ravenwatch will stand dazed in the stone circle. However, you will face the same problem in both cases:
|
|
|
|
|
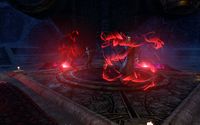
They will both be maddened with hunger by the resurrection and immediately try and feed on you. In this fight, both vampires are elite enemies with slightly more health than the Gargoyles you previously faced on the island. Their basic attack is the ranged magical attack Fright Force, as well as a massive circular AOE attack which can be dodged or moved out of. There are also unique fight mechanics involved, at the start of the fight a ring of red mines will be summoned around the summoning platform. Secondly, when the vampire is reduced to 2/3 and 1/3 of their health, they will become invunerable and summon a Bloodknight Specter which must be defeated to remove the vampire's shield. This will also drain some of your own health. During this fight Gwendis will assist while trying to convince the other vampire to stop without much success.
When you have reduced them to zero health, there will be a flash of bright light.
|
|
|
The Exarch is drawn back to Coldharbour as he is defeated. Count Verandis enters the chamber behind you.
|
The light fades and Verandis slowly puts his staff down, having calmed. |
In both branches of the quest, you can watch the reunion between Gwendis and Count Verandis. In the case of having summoned Exarch Turvon, Verandis will have been alerted to the disabling of the island's wards as he was the one who originally placed them. If you instead brought Verandis back from Coldharbour, he will apologize for attacking you and speculates that the "The process … doesn't leave one in their right mind." In both cases, Gwendis will tell him that they need to talk and Verandis will agree. He then asks to talk to both of you outside the chamber.
As you follow them out, a glowing chest will have spawned near the door. This is the loot you earned from the previous fight, collect it if you wish and meet the pair just outside the door. Talk to Verandis about what you have discovered and witnessed. If you just helped Gwendis with her inquiries, he will apologize for causing you trouble but in the case you also rescued him he will be deeply grateful. He further explains that he had not told Gwendis about his past with the Gray Host as it was "ancient history" and he did not think they would return. But with recent developments and the return of Rada al-Saran, he will pledge to assist you in discovering their plans and asks you to await the call: "When the time comes, House Ravenwatch will send for you."
Speaking with Gwendis once more, she'll have overheard Verandis' promise to help. While she is still hurt by the lack of trust, Gwendis feels they can work through it together. She will thank you once more for helping her find the truth and hands you some gold and the Reliquary of Dark Designs memento. This in turn completes the Ravenwatch Collaborator achievement. To leave the island, navigate your way out of the castle and head back to the dock. The dingy will bring you back to the courtyard outside Castle Ravenwatch.
Quest Stages[edit]
| The Gray Council | |
|---|---|
| Finishes Quest | Journal Entry |
| Gwendis and I need to travel to the secret island of Grayhome, using the map on the back of Rada al-Saran's letter to Verandis. The journey begins with the cart waiting for us at Ravenwatch Castle.
Objective: Travel to Grayhome
|
|
| We arrived on the secret Gray Host island. I should speak to Gwendis and find out what she wants to do now.
Objective: Talk to Gwendis
|
|
| Gwendis wants to survey the island for traps and wildlife before we approach the castle. I should follow her.
Objective: Follow Gwendis
|
|
| We discovered an odd-looking crystal. When Gwendis approached, it pulsed. I should ask her what she thinks about this.
Objective: Talk to Gwendis
|
|
| Gwendis thinks this crystal might be part of some sort of ward protecting the castle. She's seen something like this before. She asked me to try to deactivate the crystal.
Objective: Deactivate the Crystal
|
|
| Gwendis believes I successfully deactivated the first crystal. She thinks she sees more up ahead. I need to deactivate those as well before we can safely enter the castle.
Objective: Deactivate the Western Crystal
Objective: Deactivate the Northern Crystal
Objective: Deactivate the Eastern Crystal
|
|
| When I deactivated the last crystal, there was an audible rumble. We should check the front door and see if we can enter the castle now.
Objective: Investigate the Castle
|
|
| We entered the ancient Gray Host castle. I should talk to Gwendis about where we should begin our search.
Objective: Talk to Gwendis
|
|
| I must drink the dream-walk potion mixed with a vial of Verandis Ravenwatch's blood so I can experience Verandis's memories of this place and discover the truth of his connection.
Objective: Drink the Dream-Walk Potion
|
|
| My journey through Verandis's memories begins. I arrived at the castle. The steward instructed me to speak with Verandis's fellow exarchs while his study is prepared.
Objective: Talk to Exarch Ulfra
Objective: Talk to Exarch Tzinghalis
Optional Step: Talk to Steward Faustine
|
|
| My journey through Verandis's memories continues. As Verandis, I spoke with both Exarch Ulfra and Exarch Tzinghalis. Now, I need to seek out Rada al-Saran.
Objective: Talk to Rada al-Saran
|
|
| My journey through Verandis's memories continues. The steward moved Verandis's personal belongings to the study prepared for him. I should find it and see what clues it might hold.
Objective: Find Verandis's Study
Optional Step: Talk to Rada al-Saran
|
|
| My journey through Verandis's memories continues. I entered Verandis's study. Now I should read Verandis's journal. Maybe they will give me more insight into his connection to the Gray Host.
Objective: Read Verandis's Journal
|
|
| I attempted to read Verandis's notes, but could not. I heard Gwendis call out to me from the real world. I should find the dream-walk potion in the dream and drink it to wake up.
Objective: Drink the Dream-Walk Potion
|
|
| I exited the dream-walk. Now I should tell Gwendis what I learned about Verandis and his ties to the Gray Host.
Objective: Talk to Gwendis
|
|
| In Verandis's memories, there was a journal in his study. I need to find the same study in the present and see if the ancient journal is still there.
Objective: Read Verandis's Journal
|
|
| Verandis's journal mentions a ritual involving stone husks. Apparently, when he attempted the ritual on a mortal, it drove her mad. I should tell Gwendis what I learned.
Objective: Talk to Gwendis
|
|
| Gwendis wants to use Verandis's ritual to try to resurrect a member of the Gray Council so she can interrogate them. I need to find the reliquary Verandis filled with some of his life essence and hid in the armory.
Objective: Retrieve Verandis's Reliquary
|
|
| I found Verandis's reliquary. Now I should meet Gwendis in the ritual chamber.
Objective: Enter the Ritual Chamber
|
|
| Gwendis prepared all elements of the ritual while I gathered the reliquary. I should do whatever she tells me to complete the ritual.
Objective: Complete the Ritual
|
|
| The ritual seems to be working. I should get ready for whatever happens next.
Objective: Observe the Ritual
|
|
| The vampire we resurrected is mad with hunger. Gwendis and I must subdue him before he kills us both.
Objective: Defeat the Exarch
|
|
| I should give Gwendis and Verandis a moment to catch up.
Objective: Observe the Reunion
|
|
| I should head out of the ritual chamber and see what Count Verandis has to say.
Objective: Meet Verandis Outside
|
|
| I should speak to Count Verandis Ravenwatch and learn what I can about all that transpired.
Objective: Talk to Count Verandis Ravenwatch
|
|
| I should speak to Gwendis about everything we learned during our investigation.
Objective: Talk to Gwendis
|
|
| Now that we finished investigating the Gray Host and Verandis's connection to them, I need to give Gwendis and Verandis time to catch up and figure out our next move against Rada al-Saran. I should see if she needs anything else in the meantime.
Objective: Talk to Gwendis
|
|
<Alias=LocationHold>) is dynamically set by the game and will be filled in with the appropriate word(s) when seen in game.
- Not all Journal Entries may appear in your journal; which entries appear and which entries do not depends on the manner in which the quest is done.
- Stages are not always in order of progress. This is usually the case with quests that have multiple possible outcomes or quests where certain tasks may be done in any order. Some stages may therefore repeat objectives seen in other stages.
