Skyrim:Speaking With Silence
|
Quick Walkthrough[edit]
- Meet Mercer Frey outside Snow Veil Sanctum.
- Enter the Sanctum with Mercer.
- Find Karliah.
- Speak to Karliah.
Detailed Walkthrough[edit]
Where the End Began...[edit]
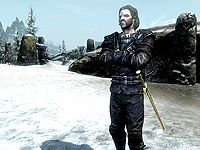
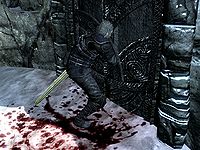
Journey to Snow Veil Sanctum, which is northeast of Windhelm. When you arrive you will find an abandoned camp near the entrance along with a dead horse. Continuing onward, you will see Mercer Frey waiting outside the ruin's entrance. As you approach, Mercer will initiate a conversation with you: "Good, you're finally here. I've scouted the ruins and I'm certain Karliah is still inside." Asking if he saw Karliah, he will tell you: "No, I found her horse. Don't worry, I've taken care of it... she won't be using it to escape. Let's get moving, I want to catch her inside while she's distracted. Take the lead." If you choose to question his methods, he will sarcastically reply: "I'm sorry, I was under the impression I was in charge. You're leading and I'm following. Does that seem clear to you?" Once you finally agree with his plan, he will continue: "Just make certain you keep your eyes open. Karliah is as sharp as a blade. The last thing I need is you blundering into a trap and warning her that we're here." At this point, he will act as a temporary follower.
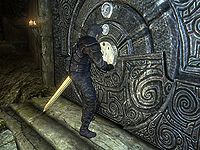
Making your way towards the door to the Snow Veil Catacombs, you will soon realize that the door itself is locked and cannot be opened without a key. You must then wait for Mercer to open the door, and while he is opening the door, he will provide a running commentary: "They say that these ancient Nordic burial mounds are sometimes impenetrable. This one doesn't look too difficult. Quite simple really, I don't know what the fuss is about these locks. All it takes is a bit of know-how and a lot of skill." After Mercer has managed to unlock the door, he will say: "That should do it. After you."
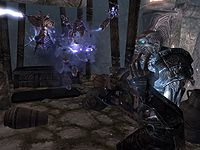
Continue inside the ruin with Mercer, who will comment about the surroundings: "The stench in here... this place smells of death. Be on your guard." Inside the ruins, you will face multiple leveled draugr as well as several traps along the way. In the first room, you will find a dead draugr as well as several urns and a trapped chest. If not disarmed, opening the chest triggers draugr to awaken and attack you. Also pulling a chain located to the right side of the room will open one of the two gates containing minor loot.
Continue into the next room where several more draugr lie dead on the floor. Mercer will warn you of a spike trap that is triggered when pulling the chain: "Pull the chain over there, and watch out for the spikes. Looks like Karliah reset all of the traps." Proceeding onward into the corridor, several sleeping draugr can be found along the way, who will awaken and attack you as you pass. There is also an adept-locked door located to the right of the corridor containing minor loot. Some bear traps are located along the corridor as well. As you approach a fire trap, Mercer will again warn you by saying: "There's two more of them ahead." Continuing along the corridor, there is a metal gate which needs to be opened. To open the gate, there is a chain located to the left in an alcove. Moving forward, an apprentice-locked door straight ahead leads to a small room which has a perch where you can take out a few of the draugr found in the next chamber.
A potion for health, magicka, and stamina are hidden behind the table on your left upon entering this room.
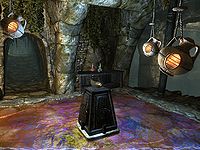
Proceeding back you will come across a room with several bone chimes. Mercer will warn: "Bone chimes... clever. Rigged to wake the draugr I'd bet. Don't blunder into any of them." Once you make it across to the other side of the room, there is a chain on the right-hand side of the metal gate. Moving onward down several flights of stairs, you will come to the large chamber seen before in the other room. Upon entering, several draugr will awaken if you haven't already taken them out. If you choose to go up the flight of stairs directly ahead of you, you will come across a room containing a model ship which is needed for the quest The Litany of Larceny. The ship is located on a pedestal, which upon removing, will trigger a fire trap surrounding it. To proceed forward, there is a flight of stairs located to the right of the chamber which leads overhead to the next zone: Snow Veil Sanctum.
...and the Beginning Ends[edit]
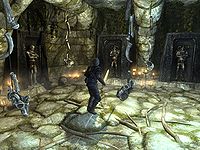
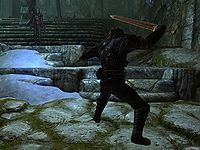
As you enter the next zone, you will encounter several leveled draugr who will awaken and attack you. Continuing along the corridor, there is a chain located to the left which opens the metal gate in front. As you proceed forward, Mercer will comment: "We're on the right track. She's been through here as well." Before the flight of stairs, you will find a leveled draugr wandering the nearby area. As you continue, you will come across a wooden double-door which leads onto another large chamber. Mercer will advise you about the door ahead: "That door up ahead... looks perfect for hiding an ambush. Be ready." Once you enter the chamber, multiple leveled draugr will awaken and begin to ambush you and Mercer. At higher levels, a dragon priest may spawn by the word wall for the Disarm shout. Also located in this chamber is a copy of the Light Armor skill book Ice and Chitin which can be found on a table. Proceed to the left of the chamber where another metal gate is closed. The chain for this gate is located to the right of the gate itself. As you make your way along the short corridor, you will come across several more bear traps before you are confronted by a Nordic puzzle door. It is not necessary to decipher it, as Mercer will open it, providing another commentary: "Ah, it's one of the infamous Nordic puzzle doors. How quaint. Without the matching claw, they're normally impossible to open. And since I'm certain Karliah already did away with it, we're on our own. Fortunately, these doors have a weakness if you know how to exploit it. Quite simple, really. Karliah's close. I'm certain of it. Now let's get moving." Once Mercer opens the door and you step through into the next chamber, Karliah will shoot you with a poisoned arrow and the scene fades to black. In a cutscene, you lay immobile but cognizant as you witness a conversation between Karliah and Mercer, in which you learn that it was in fact Mercer who killed Gallus.
Mercer: "Do you honestly think your arrow will reach me before my blade finds your heart?"
Karliah: "Give me a reason to try."
Mercer: "You're a clever girl, Karliah. Buying Goldenglow Estate and funding Honningbrew Meadery was inspired."
Karliah: "'To ensure an enemy's defeat, you must first undermine his allies.' It was the first lesson Gallus taught us."
Mercer: "You always were a quick study."
Karliah: "Not quick enough, otherwise Gallus would still be alive."
Mercer: "Gallus had his wealth and he had you. All he had to do was look the other way."
Karliah: "Did you forget the Oath we took as Nightingales? Did you expect him to simply ignore your methods?"
Mercer: "Enough of this mindless banter! Come, Karliah. It's time for you and Gallus to become reunited!"
Karliah: "I'm no fool, Mercer. Crossing blades with you would be a death sentence. But I can promise the next time we meet, it will be your undoing."
Karliah then disappears using an invisibility potion. Mercer will then approach you as you lie on the ground, saying aloud: "How interesting. It appears Gallus's history has repeated itself. Karliah has provided me with the means to be rid of you, and this ancient tomb becomes your final resting place. But do you know what intrigues me the most? The fact that this was all possible because of you. Farewell. I'll be certain to give Brynjolf your regards." He will then stab you and walk away, leaving you to die in the sanctum.
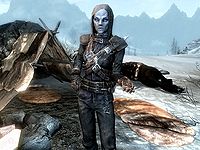
As you regain consciousness, you will find yourself outside of the Snow Veil Sanctum. As you get up, you will notice Karliah approaching saying, "Easy, easy. Don't get up so quickly. How are you feeling?" Exclaiming that she shot you, she will correct you: "No, I saved your life. My arrow was tipped with a unique paralytic poison. It slowed your heart and kept you from bleeding out. Had I intended to kill you, we wouldn't be having this conversation." As you ask Karliah why she saved you, she will explain: "My original intention was to use that arrow on Mercer, but I never had a clear shot. I made a split second decision to get you out of the way and it prevented your death." After a while, you will learn that she had hoped to capture Mercer alive and to bring him to justice for what he has done. Karliah will go on to say that she managed to acquire Gallus' encoded journal and asks that you travel to Winterhold and speak to Enthir about getting its contents translated, which starts the next quest.
Notes[edit]
- You are unable to take any followers or summons with you into the ruins.
- You can still use any conjuration spells inside the ruins.
- At any time between meeting Mercer outside Snow Veil Sanctum and triggering the cutscene, Mercer Frey will follow you on your travels as an 'unofficial' follower. Unfortunately, you can't give him orders such as "Wait Here", etc. and you can't make him carry your gear, but he is a fast, invincible killing machine.
- Before going on other adventures with Mercer Frey when he joins you as a follower, you should first activate then Enter/Exit the door to the Snow Veil Catacombs. If not, he will always detect you... thus making your Sneak perk bonus for kills (Backstab, Deadly Aim, Assassin's Blade) useless.
- Triggering the fire traps surrounding the model ship may cause it to be thrown from the pedestal to a place where it is difficult or impossible to reach. The telekinesis spell can be used to safely obtain the ship.
- You cannot avoid being hit by Karliah's arrow, as it is a scripted event.
- Unlike other Thieves Guild main quests, it is very hard, if not impossible, to remain hidden and avoid combat in this quest. Mercer is a poor infiltrator and will charge at almost every enemy he comes across, blowing your cover and spoiling the chance to deliver sneak attacks. You can't tell him to wait and the only way to keep him behind is to use paralyze spell/potions on him.
Bugs[edit]
- If your follower blocks Mercer's way to Snow Veil Sanctum's door, Mercer may stop and not continue to the door. Only Mercer can open the door and hence the followers should be ordered to stay out of the way to Snow Veil Sanctum.
- Just prior to the puzzle-lock door is a grille door which is raised and lowered by a chain on either side. After Mercer has opened the puzzle-lock door, it is possible to lower the grille door with Mercer on the other side (walk under the door until Mercer is on the other side, walk back under the door and quickly pull the chain). By trapping Mercer away from Karliah the quest will halt partway through the cut scene that follows after you proceed to Karliah's chamber. The only way to proceed at this point is through a reload.
- Mercer will sometimes not open the puzzle-ring lock. Try waiting for an hour and walk back to the gate; it should reset and he should begin to walk slowly towards the puzzle.
- If you get stuck in the puzzle-lock door in the cut-scene and you can't see Mercer talking to Karliah and she's just standing there without talking, use your wait function to wait for 2-3 hours. Mercer should appear and draw his sword, and you should be able to complete the scene.
- Sometimes Mercer just stands there and refuses to go near the door.
- Standing very close to him makes him back up, hence you can shepherd him to the door and he can still open it.
- You can also reload and make sure that Mercer is behind you. Then the cut-scene will happen as it should.
- If you've attacked Mercer while in Snow Veil Sanctum, he may turn hostile once more as you approach the final puzzle door, but he will be invincible. (Reparations may also start at a random time unrelated to when you attacked him.)
In the console, type
prid 22651and hit Enter, then typeStopCombatAlarmOnActor. This should cause Mercer to resume normal behavior.- If reloading a previous save is not an option: Try waiting near or speaking with Mercer. If you are unable to wait due to enemies being near by and/or he attacks when you attempt to speak with him, exit Snow Veil Sanctum. Once outside, try to wait and/or speak to him again. If you can wait and/or he no longer attacks when you speak with him the bug should be clear. Reenter Snow Veil Sanctum and approach the final puzzle door and the quest should continue as normal.
Quest Stages[edit]
| Speaking With Silence (TG05) | ||
|---|---|---|
| Stage | Finishes Quest | Journal Entry |
| 10 | I'm on my way to meet Mercer Frey at the ruins of Snow Veil Sanctum, Karliah's last known location. Together, Mercer and I intend to hunt her down and make her pay for Gallus's murder.
Objective 10: Meet Mercer Frey outside Snow Veil Sanctum
|
|
| 20 |
Objective 20: Enter Snow Veil Sanctum
|
|
| 60 |
Objective 50: Speak to Karliah
|
|
| 200 | The tables have unexpectedly turned, and Mercer Frey has been revealed as Gallus's killer. I now find myself in Karliah's care after Mercer tried to murder me, claiming I'd outlasted my usefulness by witnessing their conversation. I've also discovered that Mercer, Gallus and Karliah were members of some sort of group calling themselves "The Nightingales" - guardians in service to the goddess Nocturnal. What they're protecting or what this has to do with the Guild is still a mystery to me. | |
| Unknown |
Objective 35: Find Karliah
|
|
- The following empty quest stages were omitted from the table: 0, 1, 30, 35, 40, 45, 50.
- Any text displayed in angle brackets (e.g.,
<Alias=LocationHold>) is dynamically set by the Radiant Quest system, and will be filled in with the appropriate word(s) when seen in game. - Not all Journal Entries may appear in your journal; which entries appear and which entries do not depends on the manner in which the quest is done.
- Stages are not always in order of progress. This is usually the case with quests that have multiple possible outcomes or quests where certain tasks may be done in any order. Some stages may therefore repeat objectives seen in other stages.
- If an entry is marked as "Finishes Quest" it means the quest disappears from the Active Quest list, but you may still receive new entries for that quest.
- On the PC, it is possible to use the console to advance through the quest by entering
setstage TG05 stage, wherestageis the number of the stage you wish to complete. It is not possible to un-complete (i.e. go back) quest stages, but it is possible to clear all stages of the quest usingresetquest TG05.
| Prev: Scoundrel's Folly | Up: Thieves Guild | Next: Hard Answers |

