Skyrim:Ironbind Barrow
|
|||
|---|---|---|---|
| # of Zones | 1 | ||
| Clearable | Yes | ||
| Dungeon | Yes | ||
| Respawn Time | Never (storage is safe) | ||
| Level | Min: 6 | ||
| Occupants | |||
| Draugr, Frostbite Spiders, Skeevers, Skeletons, Warlord Gathrik | |||
| Important Treasure | |||
| Steel Battleaxe of Fiery Souls | |||
| Console Location Code(s) | |||
| IronbindBarrow01 | |||
| Region | |||
| None (see bugs) | |||
| Location | |||
| Southwest of Winterhold North of Nightgate Inn |
|||
| Special Features | |||
| Word Wall | Become Ethereal | ||
| Ore Veins | |||
| # of Moonstone | 1 | ||
| # of Silver | 1 | ||
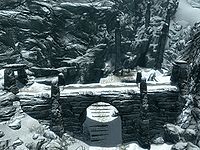
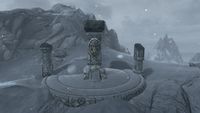
Ironbind Barrow is a small Nordic ruin southwest of Winterhold containing draugr and the tomb of Warlord Gathrik. It contains only one zone, Ironbind Barrow.
Its word wall teaches part of the Become Ethereal dragon shout.
Related Quests[edit]
- Coming of Age: Help a daring adventurer and her companion retrieve their riches.
Walkthrough[edit]
Exterior: Camp[edit]
The path to the barrow is a short distance along the path east from Nightgate Inn. Just before the left-hand path to Wayward Pass is a dirt path that cuts back to the northwest. There are two stone pillars near the start of the dirt path, one having fallen over and leaning against the other. There are two snowberry plants along the path, and a corundum ore vein to the left along the rock face from the last upright stone pillar.
After you pass under the arch, turn right, head up the stairs, turn around, and head over the arch; there is a random potion and a chest lying in wait. Now head over to the camp, where a lean-to covering a bedroll, a campfire, and the adventurers Salma and Beem-Ja wait. They are wary of their own limited combat skills, and are deliberating over whether to tempt fate by raiding the barrow anyway. Once you arrive, they become more willing to enter the barrow.
Salma: "How can you just sit here and wait? We should be in there!"
Beem-Ja: "We must gather our strength. Who knows what's inside?"
Salma: "Treasure, that's what! Get off your scaly rump and let's go."
Beem-Ja: "Hush, Salma. We aren't alone."
You cannot enter the barrow without them; if you enter without agreeing to accompany them, they will join you regardless. Salma's plan is simple: "Let's clear the place out first. Then we'll gather our loot." This means that they charge headlong into the barrow, not waiting for you. They cannot be killed by the enemies in the barrow, but they do ensure that this is one place where it is pointless to try to sneak up on enemies. They do not rush too far ahead of you, but instead wait after each section of the barrow for you to catch up, before heading off once again.
There is one chance to perform a stealthy clear of the room; timed correctly, you can use the pull chain just on the other side of the portcullis to close it before they get through.
Ironbind Barrow[edit]
The tunnel you enter is frozen. There are two frostbite spiders around the corner, but they won't detect you until you move forward. There is also a silver ore vein around the corner, by the far wall. Down the tunnel are another two frostbite spiders. There are eleven spider eggs lying in this chamber, and a web sac hanging from the wall to the right. The next chamber holds a giant frostbite spider; it is on a ledge at the back of the chamber, but quickly makes its way down to attack you. There is nothing else to loot here.
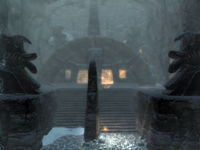
The path continues northwest, and opens up to reveal a hidden Nordic ruin, Gathrik's tomb. Climb the rubble to the left as you emerge, and you will find a moonstone ore vein. Ascend the stairs and enter the well-lit area, where there is a gate blocking your path. To the right is a chest in an alcove, and in an alcove to the left there is a handle, which, when pulled, raises the gate.
There are two draugr in the next room, both inside sarcophagi. If you enter the room just enough for your fellow adventurers to move, they will continue onward, not alerting the draugr. Once you have reached the floor grate in the middle of the room, the draugr will emerge and start looking for you. Facing west when on the grate, there is an unlocked chest under the bottom of the wall. To the left of the grate is a leveled potion of defense. On the table opposite the entrance, there is a hide shield, a scaled helmet, a leveled strength potion, a potion of minor healing, and some wine.
The path forward is in the northeast corner and immediately turns west, passing a sideboard on your right holding a two-handed weapon and a goat hide. The corridor descends a flight of stairs before opening into a wider corridor heading north. There is a skeever in front of a closed metal gate. Before this gate, there is an alcove to the west containing an unlocked chest with a pressure plate in front of the chest, which activates a spear trap from the left-hand wall. Beside the chest is a random helmet. Beyond the gate, the path descends another flight of stairs, where two more skeevers will be alerted to your presence, before the path opens into a room with two draugr, one leveled draugr on the same level who will come charging at you, and another on the lower level, who is an archer. Across the bridge are shelves holding a potion of minor healing. The shelves to the right hold a piece of leather, leather strips, and a random leveled potion. There is another piece of leather, a garnet, a random filled soul gem, and a random shield on a stone table between the two sets of shelves. To the right is an adept-locked chest.
Follow the path through the gate below until you reach a room with a large fire. There are two draugr here. In the rubble on the other side of the room is a potion of minor healing and a potion of health. To the left of the double doors, themselves situated to the east of the fire, is a set of shelves, which contain a potion of healing and a random potion. Another set of shelves farther to the left against the north wall hold a potion. There is also a chain to the west of the fire; this opens the grate in the floor above from the room with the first two draugr encountered in the barrow. A few skeletal remains fall down, together with anything you may have left on the grate.
Through the double doors is a corridor which is similar to the corridors found before puzzle doors. There is a random enchanted helmet on a pedestal. Be careful when retrieving this helmet, because once it is removed from the pedestal, spears will shoot up from holes all around the base of the pedestal, and some more will thrust down from above. Removing the helmet causes the gate blocking your progress to lift, but there is also a chain hanging above you that activates the gate, if you don't feel confident of evading the spears. There is also a lever that activates the gate on the other side, which you can use to close the gate behind yourself.
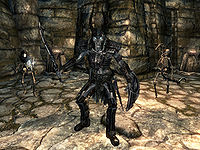
Around the corner in the next corridor is an iron door which opens to the main chamber of the barrow. Three skeletons and Warlord Gathrik await to pounce on unwary, unprepared adventurers. On the walkways on either side of the room, archer skeletons patrol, while a mage skeleton is down the stairs. Warlord Gathrik sits in his throne, opposite the entrance, but facing away. Gathrik's throne faces a word wall, which holds a word for the Become Ethereal shout. The boss chest is to the left of the word wall, and around the back of the throne is the unique weapon Steel Battleaxe of Fiery Souls, a random shield, and two random potions: one potion of the healer, and one potion of strength.
There is a gate to the east at the bottom of the stairs; a chain to the right opens it. There is also a soul gem, a one-handed weapon, and a satchel to the left, on the floor. Follow the winding stairs all the way up, and locate the door to the overlook.
Exterior: Ironbind Overlook[edit]
This is an exterior zone. Open the door by raising the bar to reveal a landscape view of Winterhold to the north, and the Pale to the southwest. There is a chest that can be looted to your left.
If you follow the "path" eastward up the mountain (toward the dragon lair marker on your compass), you should come across a small Dwemer ruin. It is guarded by two ice wraiths. All that remains are three pillars; on top of the middle pillar is a collection of seven random potions and poisons (see notes). There are two chests and a random enchanted warhammer at the base of the pillar. Slightly north of the pillars is a quicksilver ore vein.
Notes[edit]
- An easy way to retrieve the potions is to use Telekinesis while standing higher up the mountainside looking down on the top of the pillar, using either short blasts to pull them off the top of the pillar and letting them drop below for collection, or drawing them to you individually. Using the Unrelenting Force shout will spread them down the mountainside, where they can be found as far afield as the Great Lift at Alftand.
- Another method is to use the Whirlwind Sprint shout to land on top of the pillar. Jump repeatedly while climbing up the mountainside behind the pillars until you have a good vantage point looking down at the potions. Using the Whirlwind Sprint shout (at one-word strength) can land you on top of the pillar with the potions.
Bugs[edit]
- Although geographically located in the hold of Winterhold, Ironbind Barrow does not have a hold assigned as its parent location in the game data, making it unavailable for any radiant quests specific to a hold.
The Unofficial Skyrim Patch, version 1.3.1, fixes this bug.
- Beem-Ja may appear without his clothes when he enters the barrow.
The Unofficial Skyrim Patch, version 1.3.1, fixes this bug.
- The helmet trap that opens the door only reacts to direct interactions. If you shoot the helmet off the pedestal with an arrow, the door will not open.
- You'll have to use the pull chain above and behind the pedestal to continue.
- Sometimes, the Steel Battleaxe of Fiery Souls and the shield will be hovering in the air. This occurs when you are of a high enough level for Warlord Gathrik to be a dragon priest. When he gets off the throne, these items will be thrown into space.
The Unofficial Skyrim Patch, version 1.3.2, fixes this bug.
- The word wall in this dungeon may not give you its word.
- Salma may not leave after you kill Beem-Ja, instead staying near him and looking at him continuously. ?
In the console, click on Salma, then enter `disable` followed by `enable`. She'll deliver a final line then leave.
- Leave the barrow. When you return, she'll be gone.
- The area outside the dungeon features dungeon music instead of environmental music. ?
- Skyrim-Places-Nordic Ruins
- Skyrim-Places
- Skyrim-Places-Level 6
- Skyrim-Places-None
- Skyrim-Places-Moonstone Veins
- Skyrim-Places-Silver Veins
- Skyrim-Places-Word Walls
- Skyrim-Places-Clearable
- Skyrim-Places-Safe
- Skyrim-Places-Discoverable
- Skyrim-Places-Draugr Crypts
- Skyrim-Bugs Fixed by the Unofficial Skyrim Patch
- Skyrim-Confirmed Bugs
- Skyrim-Unconfirmed Bugs
