Skyrim:Liar's Retreat (quest)
| This page is currently being rewritten as part of the Skyrim Quest Redesign Project. The page is being rewritten and checked in several stages. All users are welcome to make changes to the page. If you make a change that is relevant to the project, please update this template accordingly, and make sure you have observed the project guidelines. |
|

Invasion of the Falmer
|
|||||||||||||
Quick Walkthrough[edit]
Note: This quest does not appear in your journal.
- Investigate what happened at Liar's Retreat.
- Discover the Falmer nest.
- Find Rahd and claim his Longhammer.
- Take the blame for the Falmer attack.
Detailed Walkthrough[edit]
A Falmer Invasion[edit]
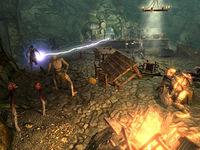
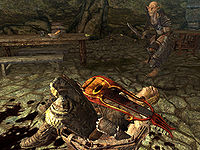
Liar's Retreat is a remote bandit cave in the mountains between Karthwasten and Cliffside Retreat, a long distance southwest from Solitude. The peaceful exterior resembles a normal bandit hideout, but as you enter you will quickly realize that the human inhabitants got more than they bargained for when they moved in. From a small pedestal near the entrance door, you will witness several intruding Falmer battling the bandits, and emerging victorious. After passing over the bloodbath, you'll find more dead bandits everywhere, suggesting that you might best prepare yourself for a huge wave of attacking Falmer as you slowly crawl down to a homemade tavern, now soaked in blood. Fight all the Falmer and take a look around; the deceased bartender lies behind the bar, wearing the semi-rare tavern clothes, and a slaughtered bandit bard poignantly clutches his lute.
Take the northwestern exit and start investigating the private chambers; a cowardly bandit has barricaded the southernmost room and guards some minor loot there from within. The next blood-soaked room contains more dead bodies, while the third room holds a locked chest containing more minor loot. Head east and you will find yourself in the kitchen behind the bar, where plenty of ingredients and potions can be gathered. Backtrack a bit and notice the hole in the wall leading into a Falmer den—the Falmer seemingly broke through at this point to ambush the bandits.
Claim the Longhammer[edit]
Head into the bluish-tinted tunnel and step over yet another dead bandit. Before long, cobwebs will cover all the walls and a frostbite spider will attack, along with another Falmer. Proceed through the tunnels until you reach a lit torch on the ground. As you approach the next chamber, a few Falmer guarding some imprisoned bandits will attack. In the panic, the bandits will escape from the pens, kill their captors, and then turn on you.
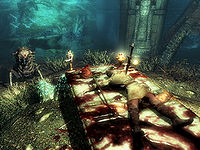
Proceed through the northern tunnel and follow it as it bends. You will arrive in a chamber filled with Dwemer architecture and machinery, now used for human sacrifices by the Falmer. You will face a chaurus reaper and two Falmer enemies. After the battle, examine the area for some minor treasure, then head to the sacrificial altar in the middle where you will find Rahd, a dead Breton, lying next to The Longhammer, one of the most powerful unique weapons in the game. Claim it and leave the same way you came.
As you travel back through Liar's Retreat, more frostbite spiders will spawn in the spider nest, so be wary. When you return to the tavern area just before the entrance, a group of bandits will enter from outside to be shocked at the grisly scene. The bandit chief will call out to the fallen Rahd with the words: "Hey, Longhammer, set us up with a round of... what in Oblivion happened in here?" When the bandits discover you, they will assume you were responsible for the massacre, and attack immediately. Finish up this final fight, and escape with your prize.
Bugs[edit]
- There is an inaudible conversation between a Falmer, a male Orc and a female bandit. The conversation is scripted to start playing the moment you pass the natural small window between two caves, but all characters are too far from you for subtitles to appear, and will usually only be heard if you are very close to the window and have your volume turned up.
-
- Orc: "Take the money, just let us go..."
- Bandit: "Shut up or they'll kill us, you idiot! Once they're gone I'll pick the lock..."
- Bandit: (moments later) "Come on... there! I got it, let's go!"
- Orc: "Take the money, just let us go..."
- The hammer may be found under the table and inaccessible, rather than on it.
The Unofficial Skyrim Patch, version 2.0.4, fixes this bug.
- The hammer may be clipping into the ground and hence invisible. Circling the table with the cursor on the ground next to it while watching for the sudden appearance of the Interact prompt may be the only way to find and loot it.
Quest Stages[edit]
- All of the quest stages are empty: 0, 10, 20, 30, 31, 50, 80, 81, 100.
- Any text displayed in angle brackets (e.g.,
<Alias=LocationHold>) is dynamically set by the Radiant Quest system, and will be filled in with the appropriate word(s) when seen in game. - Not all Journal Entries may appear in your journal; which entries appear and which entries do not depends on the manner in which the quest is done.
- Stages are not always in order of progress. This is usually the case with quests that have multiple possible outcomes or quests where certain tasks may be done in any order. Some stages may therefore repeat objectives seen in other stages.
- If an entry is marked as "Finishes Quest" it means the quest disappears from the Active Quest list, but you may still receive new entries for that quest.
- On the PC, it is possible to use the console to advance through the quest by entering
setstage dunLiarsRetreatQST stage, wherestageis the number of the stage you wish to complete. It is not possible to un-complete (i.e. go back) quest stages, but it is possible to clear all stages of the quest usingresetquest dunLiarsRetreatQST.

