Oblivion:Ceyatatar
|
|||
|---|---|---|---|
| # of Zones | 3 | ||
| # of Welkynd Stones | 5 | ||
| # of Varla Stones | 0 | ||
| Occupants | |||
| Conjurers, Daedra (1 boss-level Conjurer) |
|||
| Important Treasure | |||
| 1 boss-level Ayleid Cask 01 2 boss-level Ayleid Casks 02 |
|||
| Console Location Code(s) | |||
| CeyatatarExterior, Ceyatatar, Ceyatatar02, Ceyatatar03 | |||
| Region | |||
| Great Forest | |||
| Location | |||
| Southwest of the Imperial City, North of the Gold Road | |||

Ceyatatar is a medium-sized Ayleid ruin between the Imperial City and Skingrad containing conjurers. It contains three zones: Ceyatatar, Ceyatatar Gorigarlas, and Ceyatatar Gorihame.
Notes[edit]
- To the southwest of Ceyatatar in the Great Forest is a trap door (view on map) with a minor loot chest next to it. The trap door is labeled Trap Door to Ceyatatar Gorihame. This is actually a back entrance to Ceyatatar Gorihame (Out on the Zone 3 map below). Until you've worked your way through from the front door, it only gives access to a small tunnel. From here you can access one of Ceyatatar's boss-level Ayleid Casks chests and a restoration Ayleid Chest. If you have passed through the ruins and opened the rock pillar door using the push block, you will find the entrance closed upon subsequent visits through the trap door. This is a glitch that can be circumvented by loading the autosave or saving in place and reloading. This is a good way to farm rare loot such as leveled alchemy equipment or spell tomes.
- Ceyatatar is described in the book Glories and Laments, according to which Ceyatatar translates into "Shadow of the Fatherwoods". However, the Ceyatatar described in Glories and Laments bears little resemblance to the Ceyatatar that you actually explore.
- According to The Song of Pelinal, v 3, Ceyatatar was the site of a duel between Hadhuul the Fire King and Pelinal Whitestrake. Like many others it ended in victory for the Divine Crusader.
- Ceyatatar also appears in ESO.
Exterior[edit]


- The exterior is located at coordinates: Tamriel -7, 7
- This location's map marker (M on map) is named Ceyatatar (editor name CeyatatarMapMarker). The entrance door is E of the marker, 100 feet away.
- A trap door to Ceyatatar Gorihame is located in the forest to the southwest (map).
- 0-4 Conjurer Enemies (each 33% probability Conjurer, 67% Daedra) are near the entrance
- The following plants can be found near the entrance: 12 Green Stain Cup plants, 17 Monkshood plants, 1 Motherwort plant, 49 Steel-Blue Entoloma plants, 7 Summer Bolete plants, and 11 Viper's Bugloss plants
-
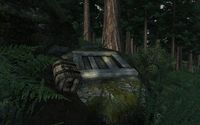
Trap door exit

Zone 1: Ceyatatar[edit]

You will enter this zone at the entrance (Out) and work your way through to door C to reach the remainder of the dungeon. The only notable obstacle along the way (besides the usual enemies) is the cave-in trap at T, which can be avoided by using the other (northern) corridor to get from the main room to the exit. The southernmost room in this area, containing a waterfall, boss-level Ayleid Cask (B), and dead treasure hunter (H) can only be accessed using the underwater door at D from Ceyatatar Gorigarlas. The unreachable upper part of the waterfall contains nothing of value.
Occupants:
Treasure:
- 1 boss-level Ayleid Cask 01 (Conjurer variety) at location B on map
- 1 Ayleid Coffer
- 1 Restoration Ayleid Chest
- The following alchemy equipment will always be found: 2 Novice Alembics and 2 Novice Mortar & Pestles
- The following ingredients will always be found: 2 samples of Bonemeal, 1 Clouded Funnel Cap, 1 Daedra Heart, 1 Motherwort Sprig, and 1 Wisp Stalk Caps
- Some of the above items are clustered at the following locations:
- At F: 1 Bonemeal, 1 Motherwort Sprig, 1 Novice Alembic, 1 Novice Mortar & Pestle, and 1 Wisp Stalk Caps
- At G: 1 Bonemeal, 1 Clouded Funnel Cap, 1 Daedra Heart, 1 Novice Alembic, and 1 Novice Mortar & Pestle
Traps:
- 1 Cave In trap at location T on map
Doors and Gates:
- There are three doors in/out of this zone
- 1 door (at Out) leads outside
- 2 doors (at C and D) lead to the zone Ceyatatar Gorigarlas
Other:
- 1 Dead Treasure Hunter (carries light armor, one weapon, unenchanted loot) at location H on map
- 1 bedroll at b
Zone 2: Ceyatatar Gorigarlas[edit]


You enter this small zone through door C, and door E provides access to the third and final zone of Ceyatatar. In the middle of this area is a water-filled trench. At the western end of the trench is a tunnel that leads to a previously unreachable area in the first zone (D); it requires swimming underwater, but can be done without Water Breathing abilities. This gives you access to a small room with a waterfall, containing a boss-level Ayleid Cask and dead treasure hunter.
Occupants:
Doors and Gates:
- There are three doors in/out of this zone
- 2 doors (at C and D) lead to the zone Ceyatatar
- 1 door (at E) leads to the zone Ceyatatar Gorihame
Zone 3: Ceyatatar Gorihame[edit]


You enter this zone through door E (unless you stumbled upon the trap door prematurely, in which case you enter through the exit at Out and only have access to one small chamber; see notes). To exit through the trap door at Out you will have to open the hidden door at I using the adjacent "Press Block" (cyan dot). This zone contains three prisoner cells, all of which are locked. The turn handles outside of the cells do not open the doors; they only release poison gas (traps T) into the captives' cells. Opening the cell gates at H and K may be worthwhile for the Dead Captive and Ayleid Coffer, respectively. However, gate J does not provide access to any items.
Occupants:
- 1 boss-level Conjurer at location A on map
- 1 Conjurer Enemy (each 50% probability Conjurer, 50% Daedra)
- 2 Daedra
Treasure:
- 2 boss-level Ayleid Casks 02 (Conjurer variety) at locations B on map
- 1 Ayleid Coffer
- 1 Ayleid Reliquary
- 2 Restoration Ayleid Chests
- 5 Welkynd Stones (two of which are in brackets on the central pillars; the other three are on an altar, in the brazier, and on the ground)
- The following alchemy equipment will always be found: 1 Novice Alembic, 1 Novice Calcinator, 1 Novice Mortar & Pestle, and 1 Novice Retort
- The other following items will always be found: 1 empty lesser soul gem and 1 empty petty soul gem
- Some of the above items are clustered at the following locations:
- At F: 1 Novice Alembic, 1 Novice Calcinator, 1 Novice Mortar & Pestle, 1 Novice Retort, and 1 Welkynd Stone
- At G: 2 Welkynd Stones, 1 empty lesser soul gem, and 1 empty petty soul gem
Traps:
- 3 Gas traps at locations T on map. These traps are only activated if you turn the turn handles (cyan dots) outside the gates.
Doors and Gates:
- There are two doors in/out of this zone:
- The door at E leads to the zone Ceyatatar Gorigarlas
- The trapdoor at Out leads outside
- 3 Gates at H, J, and K (all locked)
- 1 Hidden Door at I, opened using the adjacent "Press Block" (cyan dot on map)
Other:
- 1 Dead Captive (carries light armor greaves and gauntlets, 10% chance jewelry, all possibly enchanted) at location L on map