Online:Blood, Books, and Steel
| This page is currently being rewritten as part of the Online Quest Project. The page is being both written and checked. All users are welcome to make changes to the page. If you make a change that is relevant to the project, please update this template accordingly, and make sure you have observed the project guidelines. Detail
Quick Summary: not written
Quest Stages: not written |
|
||||||||||||||||
Quick Walkthrough[edit]
- Speak with Squire Rayan.
- Travel to the Spire of the Crimson Coin.
- Speak with Dame Madach
- Find a femur and an executioner's stand to create a weapon.
- Restore the waterwheel
- Assemble the hammer
- Travel to the tower
- Defeat Bloodmage Cassel
Detailed Walkthrough[edit]
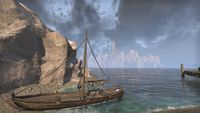
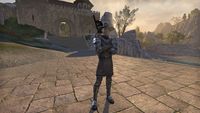
While traveling on the southeastern coast of High Isle, you will come across Squire Rayan in need of aid for Dame Madach. Speaking to Rayan will have him explain their quest to kill Bloodmage Cassel, but his Dame forbade him to continue on into his lair. However, he has decided to disobey her, and requests you join him. Agreeing will have you cross the water to the Spire of the Crimson Coin to face what Rayan expects is a lich.
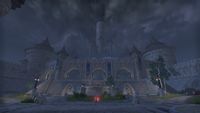
Not far from the entrance you will encounter Dame Madach as the Bloodmage is retreating. Madach will be happy to have your aid, and see it as a sign of growth that Rayan chose to aid her despite her orders. She will tell you to help Rayan in executing the plan he devised before they initially departed as she keeps the battle with Cassel going. Rayan will fill you in on a plan to create a weapon to destroy his phylactery by retrieving objects from around the site.
First you will travel to the sanctuary gardens to obtain a femur, a large bone to serve as a weapon handle. After finding one, the next desired item is an executioner's block, conveniently located to the west in the prison warrens. This gives you the pieces for a rudimentary hammer, still unassembled. Your next task will be assembling it. Squire Rayan will claim that the water is imbued with the magic of the heart of the tower, so restoring a waterwheel to dip the hammer in will be beneficial. After the waterwheel is restored, your next stop is the spire's smithy, to take advantage of its tools. You make your makeshift hammer, and then use the water to imbue it with the ability to destroy the phylactery.
Weapon assembled, you then proceed into the spire itself, only to see Dame Madach fall to the lich's magic. As the lich retreats from your party once more, Madach reveals she was dying from a wasting disease, and she knew this mission would be her end. With her dying breath, she passes on her quest, her hat, and her knighthood to her squire, confident his plan will still succeed. Sir Rayan will assure her as she passes on that he will not fail.
Sir Rayan asks that you join him for the ascent up the spire to end Cassel once and for all. At the top you will find Cassel safeguarding his phylactery personally. Although Cassel will specifically request that you focus on the phylactery, you can kill Cassel first without much difficulty, before destroying the phylactery. Once the phylactery is destroyed, a grim apparition will briefly appear, cursing your actions before dissipating. Sir Rayan will declare the mission is a success, and return to High Isle.
Meeting with Sir Rayan on the shore will have him recap your accomplishments together, before discussing his next course of action: Recovering Dame Madach's body. Although you will offer to help, he will declare this is a quest he must do alone. He will then give you your reward while declaring he will do all he can to carry on her legacy and to bring honor to the Order of the Albatross.
Quest Stages[edit]
| Blood, Books, and Steel | |
|---|---|
| Finishes Quest | Journal Entry |
| I should head inside the spire and find what awaits us within.
Objective: Enter the Spire of the Crimson Coin
|
|
| The squire and I need to search the spire to find Dame Madach.
Objective: Find Dame Madach
|
|
| We found Dame Madach. I should talk to her.
Objective: Talk to Dame Madach
|
|
| It seems that Squire Rayan has an idea. I should follow him and see what he has on his mind.
Objective: Talk to Squire Rayan
|
|
| To destroy the tower's heart, we need to assemble the weapon Squire Rayan spoke of. I should find the first part in the statuary hall, within the spire's gardens.
Objective: Enter the Tower Gardens
|
|
| Rayan believes the best place to look for bones is the statuary gardens hall, to the northwest. We should make our way there.
Objective: Enter the Statuary Hall
|
|
| Somewhere among the statuary we need to find a useable ancient bone for this mystical weapon.
Objective: Find a Bone for the Hilt
Hidden Objective: Enter the Statuary Hall
Hidden Objective: Sigil Trap Warning
Hidden Objective: Dame Has Hat
Hidden Objective: Hat on Ground
Hidden Objective: Hat in Inventory
Hidden Objective: Destroy the Phylactery
Hidden Objective: Kill Bloodmagus Cassel
|
|
| We've acquired a bone for the hilt of the hammer. Squire Rayan suggests we head for the prison warrens on the north side of the tower. There we can find a suitable head for the weapon.
Objective: Find the Entrance to the Prison Warrens
Optional Step: Talk to Squire Rayan
|
|
| I've found the entrance to the warrens. Now to head inside.
Objective: Enter the Prison Warrens
|
|
| Somewhere within the prison warrens is an old executioner's stand. Rayan believes a block will work as the head for this unusual hammer.
Objective: Find an Executioner's Block
|
|
| The waters around the spire must have something to do with turning the bloodmage's power against itself. We need to find the water mill southeast of the tower.
Objective: Reach the Mill
|
|
| We reached the mill. Now I just have to get it turning again.
Objective: Unstick the Waterwheel Lever
|
|
| The waterwheel is once again turning. Rayan says we can assemble the weapon at the smithy to the southwest of the tower.
Objective: Reach the Blacksmith Shop
|
|
| We've found the smithy. We should find the means to complete the weapon inside. Time to head in.
Objective: Enter the Blacksmith Shop
|
|
| We arrived at the blacksmith's shop. I need to assemble the hammer using one of the workbenches.
Objective: Assemble the Bone Hammer
|
|
| Now that I have the hammer assembled, I need to imbue it with the water we siphoned from the bloodmage's heart.
Objective: Imbue the Hammer
|
|
| We have the imbued hammer! Now to take it into the tower and confront the bloodmage.
Objective: Enter the Tower
|
|
| We've entered the tower. Squire Rayan ran ahead to find Dame Madach. I should follow.
Objective: Find Dame Madach
|
|
| Dame Madach is fighting the bloodmage! I should see if I can lend some assistance.
Objective: Aid Dame Madach
|
|
| Dame Madach has been badly wounded. I should speak with her and check on her condition.
Objective: Talk to Dame Madach
|
|
| Rayan, newly knighted by the late Dame Madach, wants to put an end to the bloodmage. I should help him find Bloodmage Cassel's phylactery.
Objective: Find Upper Sanctum
|
|
| We made it to the bloodmage's inner chambers. I need to use the bone hammer we spent so much time creating to destroy the phylactery.
Objective: Destroy the Phylactery
|
|
| Sir Rayan and I have destroyed Bloodmage Cassel once and for all. He said he'd be leaving the spire and returning to shore. I should meet him there.
Objective: Find Sir Rayan Back on Shore
|
|
| I should talk to Sir Rayan.
Objective: Talk to Sir Rayan
|
|
| Though Dame Madach lost her life, Sir Rayan and I destroyed the bloodmage's phylactery and survived the spire. I should see how the new knight is doing. | |
<Alias=LocationHold>) is dynamically set by the game and will be filled in with the appropriate word(s) when seen in game.
- Not all Journal Entries may appear in your journal; which entries appear and which entries do not depends on the manner in which the quest is done.
- Stages are not always in order of progress. This is usually the case with quests that have multiple possible outcomes or quests where certain tasks may be done in any order. Some stages may therefore repeat objectives seen in other stages.


