Blades:The Trickster (quest)
| This article could benefit from an image of: event interior See Help:Images for information on how to upload images. Please remove this template from the page when finished. |
Contents |
|

Objectives[edit]
- Defeat the Trickster.
Walkthrough[edit]
Before you begin, ensure that you can deal cleaving or fire damage, or optimally both. Enemies within are immune to all other types of damage, so you will deliver the most damage by using a cleaving weapon enchanted with fire. The Golden Saints in this quest can deal Shock and Fire damage; the Dark Seducers Poison damage; and the Tricksters Shock damage.
You will start the quest in a small room, containing only the exit and food. Head forward through the corridor, in which you'll find food and perhaps a small breakable. When you follow the corridor rightwards, the Golden Saint in the next room may detect you and run around the wall, so be prepared for this encounter as you round the corner. If you reach the end of the corridor without this happening, the Golden Saint will be patrolling in the room. Head to the opposite corner of the room and press the button trigger in the pillar to open the first secret, forward and to the right of the entrance to the room, or ahead and slightly rightwards of the trigger.
Head forward and into the secret area. You will find food, and may find breakables inside. It opens into a small room in which you may encounter a random one of the optional bosses: a Dark Seducer, a Golden Saint, or the Real Trickster. It will also contain a Silver, Wooden, or Golden Chest. Once you've dispatched the boss and claimed the chest, exit and follow the corridors to the next room. As with the previous, this corridor will contain food and breakables of various sizes. It opens into a room patrolled by both a Dark Seducer and Golden Saint, and careless timing may result in both coming after you at once. Artful timing, conversely, may allow you to skip fighting one or both altogether. Another button trigger will be on the far side of the jutting wall on the opposite side of the room, opening a secret area to the right of the room's entrance.
The secret area's corridor may contain food, and it opens into a small room containing either of the Dark Seducer, Golden Saint, or Real Trickster optional bosses not encountered in the previous secret area, as well as a wooden golden chest not in the other areas. Once the boss has been dispatched, continue to the next corridor. It will contain food, breakables, and a patrolling Golden Saint. It opens into a room containing two patrolling Dark Seducers, either or both of whom can be avoided if timed well, and various breakables and food. A third secret area to the left of the entrance is opened by a button trigger on the wall to the right, and its corridor can contain breakables of various size as well as food. It opens into a relatively large room in which you will find the last of the three optional bosses and chests.
Finally, proceed through the long corridors until you reach the final room, in which stands the Trickster.
Enemies[edit]
- Golden Saints
- 3 standard
- 1 secret boss
- Dark Seducers
- 3 standard
- 1 secret boss
- The Trickster
- 1 boss
- The Real Trickster
- 1 secret boss
Gallery[edit]
-
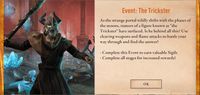
As the strange portal wildly shifts with the phases of the moons, rumors of a figure known as "the Trickster" have surfaced. Is he behind all this? Use cleaving weapons and flame attacks to battle your way through and find the answer!
- Complete this Event to earn valuable Sigils- Complete all stages for increased rewards!
