Shivering:Baiting the Trap
|
Quick Walkthrough[edit]
- Decide the fate of the adventurers.
- Receive their loot.
- Fight the Knights of Order.
- Return to Sheogorath.
Detailed Walkthrough[edit]
The Lucky First[edit]
After having cleared Xedilian of Grummites, you will be approached by the dungeon master, Kiliban Nyrandil, who will thank you for repairing the Resonator of Judgment. Unfortunately, the Resonator has already drawn the attention of three adventurers, Lewin the Rogue, Syndelius the Mage and Grommok gro-Barak, and Kiliban tasks you with deciding their fate. If you haven't read the Manual of Xedilian, Kiliban can explain what's going on:
- "The Resonator works by drawing adventurers to itself with a sort of magical "siren's call". Sheogorath uses the Resonator to find the "cream of the crop" as he calls them; the best of the worst to populate the Isles. Quite clever, eh? As the adventurers make their way through Xedilian's chambers, they will encounter choices that you make in these control platforms. Each chamber presents two options. When you push the appropriate button, an event will unfold for the adventurers to experience. One is physically harmful... usually lethal traps or creatures... something relished by the residents of Dementia. The other choice is more mental. They are designed to make the adventurers lose their grip on reality, much like the residents of Mania."
Follow Kiliban around to each observation room. At each one, you will have the option of either Mania (resulting in insanity) or Dementia (resulting in death), which you express by pressing the smiling push-block on the right or the frowning one on the left, respectively.
Chamber of Conversion[edit]
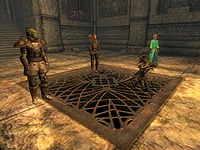
From your elevated position in the initial observation room, you can see a small, immobile and seemingly harmless Gnarl standing in the first chamber. A few moments later, the three greedy adventurers will arrive in the room, seemingly surprised with the fact that their first obstacle is nothing more than the tiny creature. While the adventurers taunt it, Kiliban explains what you must do:
- "At the touch of a button, you can cause a large group of tiny Gnarls to appear and attack the adventurers. Or, if you're feeling merciful, we can have the group terrorized by a seemingly lowly Gnarl that instantly grows to twice their size! The hallucinogenic spore gas we release into the chamber will help lull the victims into believing the creature means to kill them. Don't worry, its bark is far worse than its bite."
If you choose "Giant Gnarl", the prospect of certain death will drive Lewin the Rogue insane. Choosing "Gnarl Swarm", on the other hand, will release numerous small Gnarls, which will kill Lewin before being driven back. Regardless of your choice, the remaining two adventurers will proceed to the next chamber.
Chamber of Avarice[edit]
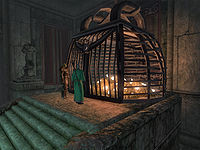
In the second observation room, you watch as Syndelius and Grommok enter the chamber and are presented with a pile of treasure, locked behind a gate. As the two remaining "visitors" attempt in vain to open the cage, Kiliban once again describes the devious choices available to you:
- "The second chamber of Xedilian is the Chamber of Avarice. The adventurers will have to overcome their feelings of greed as they set their eyes upon the huge piles of treasure locked behind that gate. You may choose to spring a fire trap and cause them great harm as they stand before the gate. Or, you can fill the chamber with hundreds of keys and watch them frantically search for the correct one. Always a crowd pleaser."
You can then choose to activate a "Fire Trap" or to "Drop Keys." If you choose to the latter, Syndelius is driven insane by the multitude of keys released, none of which open the gate. Alternately, the "Fire Trap" option will cause two large fire blasts to kill Syndelius when Grommok touches the gate. In either case, Grommok will continue into the final chamber alone.
Chamber of Anathema[edit]
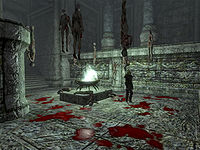
In the third and final observation room, you watch the last standing adventurer, a severely shaken Grommok gro-Barak, enter a blood-soaked room filled with all manner of cadavers. While Grommok desperately tries to calm himself, Kiliban will tell you what is in store for him:
- "The third chamber of Xedilian is the Chamber of Anathema. Its contents are designed to make sure it's the final encounter. The adventurers will be subject to horrors beyond their imagination... visions of repugnance, death and malevolence reside in this room. If you wish to bring ruin to your victims, you may choose to animate some of the corpses and watch as they satiate their hunger. Or, we can create the illusion of the adventurer dying and his spirit rising from his corpse. Good fun to be had by all! Then, just as suddenly as we kill him, we revive the adventurer. There are few minds that can stand this type of torture."
Your options are either to "Raise the Dead" or to create a "Ghost Illusion." The second choice will enact an out-of-body-experience upon Grommok, who, tormented by visions of his own demise, will be driven crazy. The "Raise the Dead" option animates the surrounding corpses who proceed to kill the hapless Orc.
Spoils of Madness[edit]
Once the adventurers are either dead, or proper residents of the Isles, Kiliban will greet you once again, but this time with gifts:
- "As is the tradition, you are to be rewarded a focus crystal as a token of your fine work. I'll have it sent to the palace placed in the main hall, if you wish to take a look at it. Oh yes... of course. It seems a most unusual weapon was recovered from the Orc warrior, Grommok. Never seen anything like it, but perhaps his journal can give you some useful information. Beyond that, take whatever you need from the recovery chest... you've earned it! You're free to go at any time of course, just up that hallway. Good luck to you!"
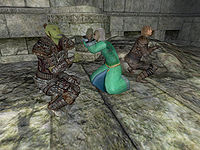
Kiliban will then hand you Grommok's journal and enchanted sword (a unique artifact that is actually two swords in one, the fire enchanted Dawnfang during the day, and the frost enchanted Duskfang at night). The "recovery chest" Kiliban mentioned is located in this same room and contains the Talisman of Abetment as well as some random loot the adventurers had on them. A more twisted, less material reward is available to players who chose to drive their victims insane rather than into the grave: Any surviving adventurers can be found in a large holding cell shortly after exiting the final observation room. Once you finish collecting the goodies (or admiring your handiwork), you can head for the exit.
Too Much of a Good Thing...[edit]
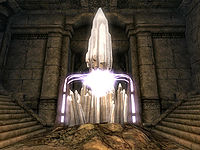
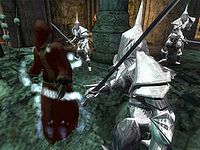
Unfortunately, the reactivated resonator seems to work too well. On your way to the exit, it attracts a group of three bizarre crystaline knights that immediately attack. Kiliban, who is still essential and unkillable, will help you fend off this new threat. Survive the fight, then speak to Kiliban for more details:
- "You've not heard the legends? How could that be? Those "beings" as you call them aren't beings at all. They are the soulless abominations known as the Knights of Order. Their attraction to the Resonator isn't surprising; it was built from one of the obelisks that dot the Isles they seem to have an affinity for. You must proceed to Sheogorath at once and tell him the Knights have returned! Quickly now... go!"
Kiliban's description of the Knights of Order, and subsequent suggestion that you return to Sheogorath's Palace to inform the Madgod about their appearance, triggers the end of this quest, and the beginning of Understanding Madness.
Notes[edit]
- If you exit Xedilian before talking to Kiliban about the Knights of Order, you will be unable to finish the quest until you return and speak with him. If you got close, but failed to actually speak with him, he may have followed you out into the wilderness and you may need to wait for him to catch up with you.
- After you complete the quest, you are no longer able to operate Xedilian. If you want to see all the possible outcomes, save before you do anything.
- If the Knights of Order come close enough to the cell, any of the adventures that were driven insane rather than killed will try to attack them through the bars. If Grommok is one of them, he will be seen to still have his sword. Although it appears to be Dawnfang/Duskfang, it is actually a unique weapon called "Grommok's Blade".
- From the Unofficial Shivering Isles Patch 1.5.8: "If the player chooses to spare Grommok during "Baiting the Trap," his sword will now be removed from his inventory, since it's ostensibly given to the player."
- The three adventurers are removed from the game after this quest finishes, whether you killed them or drove them mad.
- Upon successfully completing the quest, a trophy of a Focus Crystal will appear on a pedestal in Sheogorath's Palace.
An achievement will be unlocked upon speaking to Kiliban after having dealt with the Knights of Order.
Journal Entries[edit]
| Baiting the Trap (SE03A) | ||
|---|---|---|
| Stage | Finishes Quest | Journal Entry |
| 5 | I should now make my way back to New Sheoth and report my success to Sheogorath. | |
| 10 | I've met Kiliban Nyrandil inside one of the many observation rooms of Xedilian. It also appears that Xedilian has its first visitors, a group of adventurers. It's up to me to decide whether to allow Xedilian to kill them or drive them insane. | |
| 12 | (Sets off the Idle Chatter which remains until button press) | |
| 15 | (One of these two options will appear depending on which button you pressed) I've unleashed the Gnarl Swarm on the adventurers in Xedilian. Unable to survive their onslaught, Lewin the Rogue has been slain. I should make my way to the next observation room and choose how the adventurers will encounter their next obstacle. or |
|
| 18 | (Sets off the Idle Chatter which remains until button press) | |
| 20 | (One of these two options will appear depending on which button you pressed) Using a huge pile of treasure as bait, I lured the two remaining adventurers into a fire trap. Syndelius the Mage didn't survive the blast, leaving only their leader, Grommok. I should make my way to the last observation room and choose how the stubborn Orc will encounter his final obstacle. or |
|
| 47 | (Sets off the Idle Chatter which remains until button press) | |
| 50 | (One of these two options will appear depending on which button you pressed) I've caused the death of the remaining Orc adventurer, Grommok, by animating the zombies in the final room of Xedilian. Now that all of the adventurers have been dealt with, I should speak to Kiliban. or |
|
| 55 | Kiliban Nyrandil has told me to meet him in Xedilian's reception chamber where I can recover the defeated adventurer's gear. I should use the final transport pad and make my way there now. | |
| 60 | I've received some items and gold from Kiliban Nyrandil that had belonged to the adventurers. I can now safely report back to Sheogorath that Xedilian is in full operation. | |
| 70 | Before exiting Xedilian, I was attacked by three unusual beings in equally strange armor. I should ask Kiliban if he knows anything about them. | |
| 200 | Kiliban explained the identity of the strange beings, calling them Knights of Order. He seemed very dismayed and wishes me to hasten to Sheogorath and report their presence. | |
- Notes
- Not all Journal Entries may appear in your journal; which entries appear and which entries do not depends on the manner in which the quest is done.
- Stages are not always in order of progress. This is usually the case with quests that have multiple possible outcomes or quests where certain tasks may be done in random order.
- If an entry is marked as "Finishes Quest" it means the quest disappears from the Active Quest list, but you may still receive new entries for that quest.
It is possible to use the console to advance through the quest by entering
setstage SE03A stage, wherestageis the number of the stage you wish to complete. It is not possible to un-complete (i.e. go back) quest stages. See SetStage for more information.
| Prev: A Better Mousetrap | Up: Main Quest | Next: Understanding Madness |

