Shivering:Ebrocca
|
|||
|---|---|---|---|
| # of Zones | 6 | ||
| Occupants | |||
| Undead Clanfather Malifant, Bregor the Cremator |
|||
| Important Treasure | |||
| Din's Ashes, Slaughterfish Scale Charm 1 boss-level Chest |
|||
| Console Location Code(s) | |||
| XPEbroccaExterior, XPEbrocca01, XPEbrocca02, XPEbrocca03, XPEbrocca04, XPEbrocca05, XPEbrocca06 | |||
| Region | |||
| Mania | |||
| Location | |||
| East-southeast of Highcross, due north of New Sheoth | |||
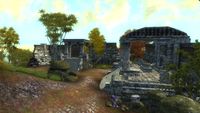
Ebrocca is a very large ruin north of New Sheoth containing undead and a unique NPC (quest-related). It contains six zones: Ebrocca, Descenia, Ebrocca, Duwane, Ebrocca, Sepechra, Ebrocca, Masse, Ebrocca, Fiele, and Ebrocca, Crematorium.
Ebrocca is one of the youngest ruins in the Shivering Isles, being only 1,000 years old. The history of Ebrocca is quite interesting. Apparently Ardwe Malifant, the clanfather of a Bosmer family, built it as a final resting place for his deceased mother. However, his mother's death must have driven him into insanity, because he built it in the Shivering Isles instead of Skyrim, where his family had expected it. The site was built to last, with numerous security systems and magics to revive the caretaker put in place. Ardwe then systematically killed off all of his relatives.
Related Quests[edit]
- The Museum of Oddities: Una Armina wants you to find "Oddities" for her museum.
Notes[edit]
- For more information on Ebrocca, see the Lore article.
Exterior[edit]
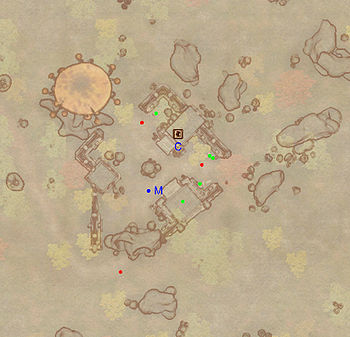
- The exterior is located at coordinates: SEWorld 11, 14
- This location's map marker (M on map) is named Ebrocca. The entrance door is NNE of the marker, 80 feet away.
- 3 Undead are near the entrance
- 1 Chest (Wilderness; non-respawning) is near the entrance
- 4 Coffins 01 are near the entrance
- The following plants can be found near the entrance: 1 Alocasia plant, 2 Hydnum Azure plants, 4 Red Kelp plants, 3 Mushroom Tree Sapling plants, and 9 Worm's Head plants
Zone 1: Ebrocca, Descenia[edit]
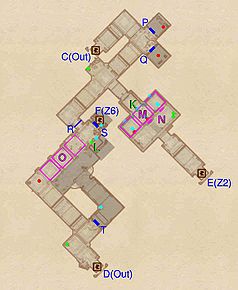
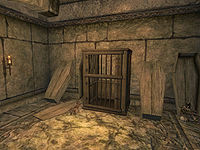
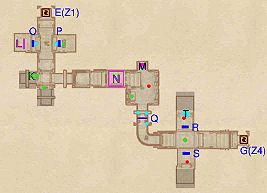
Clanfather Malifant wanted to make sure his family's mausoleum was impregnable, and the extent of his defenses are immediately palpable. As soon as you enter from door C (Out) the secret walls at P and Q will open and two enemies will rush to attack you. Neither of the two revealed areas holds anything of value, but the one to the northeast contains an unusual cage. Ignore the passage on the left and press on, picking the lock of door R until you arrive in a corridor with 3 trapped floors opening and closing at regular intervals (O). Try to make the enemy at the end fall down, as there are spike pits just below. Move the leather shields (L) out of the way and press the push block underneath. This will open up the secret wall at S and allow you to enter the crematorium through door F. Jump or run across the trapped floors and proceed along the corridor until you reach door D (Out). Don't worry if you fall down: simply follow the corridors and open the secret wall at T with the push-block nearby. Exit to find yourself at the bottom of a pit, loot the chest and head back inside.
Backtrack all the way to the intersect at the beginning of this zone, and this time head southeast. Here you will find a set of three push-blocks mounted on horizontal blocks of stone protruding from the wall, and at the start of a complex trap with plenty of falls (M), so bring a good amount of healing potions or a restoration spell and take note of the various healing urns strategically placed on the way down. Head to the one on the left and press it. The floor will open up below you and after taking minimal damage, you will find yourself in a small room with a chest and a push-block. Press it and you will fall in a larger room with three push-blocks; this time hit the one on the right for access to a chest. Fall again to a second large room and hit the central push-block to loot a chest. Once you fall for the last time, head to door E, leading to Ebrocca, Duwane. All the other push-blocks would have landed you in a room with either an enemy or a set of dart traps (N).
Occupants:
- 4 Undead
- 2 Undead (special list; no Flesh Atronachs)
Treasure:
- 1 Chest (Healing)
- 1 Coffin 01
- 1 Urn
- 6 Urns (Healing)
- 3 Urns 02
- The following ingredients will always be found: 1 Blister Pod Cap, 2 Bone Shards, 2 Elytra Ichors, 2 Flame Stalks, and 1 Watcher's Eye
- The other following items will always be found: 4 Leather Shields and 1 Iron Claymore
- Some of the above items are clustered at the following locations:
- At K: 1 Blister Pod Cap, 2 Elytra Ichors, and 2 Flame Stalks
- At L: 1 Chest (Healing), 1 Iron Claymore, and 2 Leather Shields
Traps:
- 9 Darts traps at location N on map
- 3 Trapped Floors (open and close on set time intervals; drop into Spike Pit traps) at O
- 18 Trapped Floor traps at M (6 levels of traps, 3 traps per level)
Doors and Gates:
- There are four doors in/out of this zone
- 2 doors (at C and D) lead outside
- 1 door (at E) leads to the zone Ebrocca, Duwane
- 1 door (at F) leads to the zone Ebrocca, Crematorium
- 1 Metal Door at R (locked, opened by Ebrocca Descenia Key)
- 4 Secret Walls at P, Q, S, and T
Zone 2: Ebrocca, Duwane[edit]
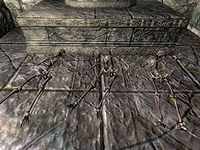
Upon entering, you will see two secret walls (O and P) to the west and east respectively, with push-blocks nearby. Only open P, however, which holds a chest, as O will reveal a set of dart traps (L). Loot the area at K and proceed until you find a curious trap at N. Once you press the push-block, darts will rain down on you, but so will a flawless diamond and various gold coins. In the next room, next to a chest is a strange spectacle: three skeletons holding each others' hands and with two bouquets of flowers nearby. Once you arrive at gate Q, don't be fooled into pressing either of the two push-blocks nearby: they will simply activate the scalon statue trap behind you (M). Instead, activate the push-block underneath said statue. Once you reach the urn in the final corridor, be ready for a fight, as the secret walls at R and S will open to reveal two enemies. In the alcove to the north is a dead Wood Elf (T), carrying a Sealed Correspondence which sheds some light on the actions of Clanfather Malifant. Head to Ebrocca, Masse through door G.
Occupants:
- 1 Undead
- 2 Undead (special list; no Flesh Atronachs)
Treasure:
- 1 Chest
- 1 Coffin 01
- 1 Urn
- 1 Urn (Healing)
- 2 Urns 02 (1 locked)
- The other following items will always be found: 1 Flawed Pearl, 1 Flawed Topaz, 1 Iron Helmet, and 1 Iron Battle Axe
- At location N, after pressing the button and staying out of the way of the Darts trap, 1 Flawless Diamond and a number of gold coins will sprinkle down with the darts.
- Some of the above items are clustered at location K: 1 Coffin 01, 1 Flawed Pearl, 1 Flawed Topaz, and 1 Urn (Healing)
Traps:
- 5 Darts traps at locations L and N on map
- 1 Scalon Statue trap at M
- 1 Trapped Floor trap at N (Opens ceiling to reveal Darts trap)
Doors and Gates:
- There are two doors in/out of this zone
- 1 door (at E) leads to the zone Ebrocca, Descenia
- 1 door (at G) leads to the zone Ebrocca, Masse
- 1 Metal Gate (Initially closed bar gate) at Q
- 4 Secret Walls at O, P, R, and S
Other:
- 1 Dead Wood Elf at location T on map
Zone 3: Ebrocca, Sepechra[edit]
The Sephecra is the private sanctuary of Clanfather Malifant, but unlike the other zones does not provide as much trouble in terms of traps and enemies. The Clanfather is visible almost immediately when you emerge from door H, but to enter the room, you will have to stand between the two bar gates at V and wait for the one behind you to close before the one in front will open. Once you've defeated Malifant, he will be resurrected by the hunger statues at Q, and on his second death, the secret walls at S, T and U will all open. Head either north or south and loop around the corridor, looking through every coffin (O, P, K) for any loot. Once you're done, proceed east to enter the private quarters of the Clanfather. A boss chest (B) sits in the southeast corner, while a few items are found on the table to the north (L) and near the bed (M and N).
When you're done, you will be unable to backtrack to the previous zone. Although the buttons (cyan dots on map) on the north and southwest corners of the corridors are set to open both gate V and that behind it, the latter is scripted to shut down as soon as the former opens; effectively locking you in. Instead, press the push-block above Malifant's bed to trigger the trapped floor at R. Jump first on a ledge and then on the chest to minimize damage and activate the nearby push-block to open another trapped floor (R). Repeat the procedure and head for door I to Ebrocca, Fiele.
Occupants:
- Clanfather Malifant at location A on map
- 3 Undead
Treasure:
- 1 boss-level Chest (Undead variety) at location B on map
- 2 Chests (Healing)
- 17 Coffins 01
- 1 Jewelry Box (contains 50% chance jewelry, 50% silver nugget, gold change; non-respawning; locked)
- 2 Urns (Healing)
- The following books will always be found: 1 Brief Journal, 2 From Frog to Man, 2 Guide to New Sheoth, 1 Letter Draft, 1 Myths of Sheogorath, 2 The Blessings of Sheogorath, 1 The Living Woods, 2 The Predecessors, 2 The Shivering Bestiary, 2 The Standing Stones, and 1 Yellowed Copy
- The other following items will always be found: 2 Lockpicks, 1 Repair Hammer, 3 Alocasia Fruits, and 1 Mort Flesh
- Some of the above items are clustered at the following locations:
- At K: 4 Coffins 01
- At L: 3 Alocasia Fruits, 1 Urn (Healing), 1 From Frog to Man, 1 Guide to New Sheoth, 1 Letter Draft, 1 The Blessings of Sheogorath, 1 The Predecessors, 1 The Shivering Bestiary, 1 The Standing Stones, and 1 Yellowed Copy
- At M: 1 From Frog to Man, 1 Guide to New Sheoth, 1 The Blessings of Sheogorath, 1 The Predecessors, 1 The Shivering Bestiary, and 1 The Standing Stones
- At N: 1 Coffin 01, 1 Jewelry Box (contains 50% chance jewelry, 50% silver nugget, gold change; non-respawning; locked), 1 Brief Journal, 1 Myths of Sheogorath, and 1 The Living Woods
- At O: 3 Coffins 01 and 1 Repair Hammer
- At P: 1 Coffin 01, 2 Lockpicks, and 1 Mort Flesh
Traps:
- 4 Hunger Statue traps at locations Q on map
- 2 Trapped Floor traps at R
Doors and Gates:
- There are two doors in/out of this zone
- 1 door (at H) leads to the zone Ebrocca, Masse
- 1 door (at I) leads to the zone Ebrocca, Fiele
- 1 Metal Gate (Initially closed bar gate) at V
- 9 Secret Walls, in groups of 3 at S, T, U
Other:
- 1 bed at location b on map
Zone 4: Ebrocca, Masse[edit]
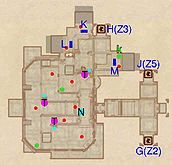
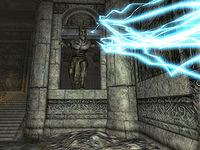
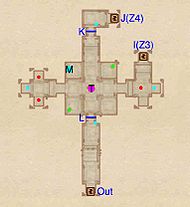
Immediately in front of you once you enter is door J leading to Ebrocca, Fiele, however, for more efficient adventuring, ignore it and head west instead. The next room is on three levels and quite complex, with a good deal of enemies likely to detect you and gang up on you. Two of these will charge at you immediately, and you'll most probably wind up fighting with the other four in quick succession. Furthermore, the secret walls at L, K and M will sometimes lower once you enter the zone and the three enemies behind them may also become embroiled in the fight. Head up the set of stairs in the northwestern corner and avoid the unfriendly fire from the hunger statue (T) trap shooting at you from the opposite ledge. Locate the switch (cyan dot on map) at the base of nearby statue trap to switch it off. When you jump the gap, this statue will start firing at you from behind, so hurry up the stairs for another switch. When you reach the bridge with the Dead Courier at N, the Sheogorath statue trap (T) will start firing at you so climb to the highest level of the room. From here you can control the Sheogorath trap via the push-block behind it. When the fight is over, head over to the chest (k) in the eastern alcove, as it contains the Ebrocca Sepechra key needed to access Ebrocca, Sephecra through door H.
Occupants:
- 6 Undead
- 3 Undead (special list; no Flesh Atronachs)
Treasure:
- 1 Chest (contains Ebrocca Sepechra Key) at location k on map
- 2 Urns (Healing)
Traps:
- 3 Hunger Statue traps at locations T on map
Doors and Gates:
- There are three doors in/out of this zone
- 1 door (at G) leads to the zone Ebrocca, Duwane
- 1 door (at H) leads to the zone Ebrocca, Sepechra (locked, key required, opened by Ebrocca Sepechra Key)
- 1 door (at J) leads to the zone Ebrocca, Fiele
- 3 Secret Walls at K, L, and M
Other:
- 1 Dead Courier at location N on map
Zone 5: Ebrocca, Fiele[edit]
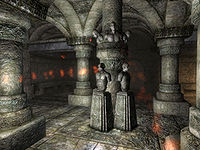
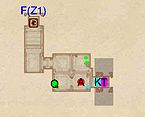
This level is no more than a transit zone, but still holds its dangers. If you chose the short path back in Ebrocca, Masse, you will arrive from door J and will have to push the button (cyan dot on map) to open the gate at K. Upon entering from Ebrocca, Sepechra through door I, you will immediately be facing an enemy, so prepare for a fight. The push-block in the alcove also opens the gate at K, giving you access to a bit of backtracking if needed. In both cases, enter the central room and brave a massive "hunger-style" trap made of several busts placed around a column to loot the two chests and the Dead Traveler (M). Head west, kill the two enemies and press the push-block, which will open the gate at L. Door Out will take you to a secondary exit of Ebrocca, located to the southeast of the main entry.
Occupants:
- 3 Undead
Treasure:
- 1 Chest
- 1 Chest (Healing)
- The other following items will always be found: 1 Diamond
Traps:
- 1 Tortured Statue at location T on map
Doors and Gates:
- There are three doors in/out of this zone
- 1 door (at Out) leads outside
- 1 door (at I) leads to the zone Ebrocca, Sepechra
- 1 door (at J) leads to the zone Ebrocca, Masse
- 2 Metal Gates (Initially closed bar gate) at K and L
Other:
- 1 Dead Traveler at location M on map
Zone 6: Ebrocca, Crematorium[edit]
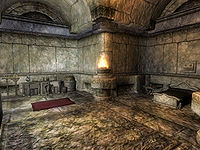
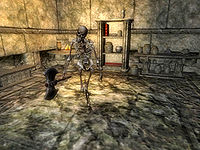
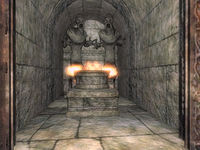
The crematorium is only accessible by a switch hidden under a leather shield in the first area. This zone is where Clanfather Malifant turned his family members' remains to ashes and to guard this precious structure he left his powerful guard Bregor the Cremator (A), who is the only inhabitant of this zone. Once you've dispatched him, loot the area of its various coffins and urns, which may hold some jewelry. In particular, the gilded urn at Q contains the unique Din's Ashes, which are needed for the quest The Museum of Oddities. The table in the corner holds the Ebrocca Descenia Key, some jewelry and the Crematory Instructions, a guide on how to use the crematorium yourself: place any type of bone (including Fractured Humeri, Shambles Skulls, and Bone Shards) inside the retort (K) and activate the two hunger statues (T) by pressing the push-block nearby. Everything inside is now turned into ashen remains.
Occupants:
- Bregor the Cremator at location A on map
Treasure:
- 1 Gilded Urn (contains Din's Ashes and Slaughterfish Scale Charm; non-respawning) at location Q on map
- 3 Coffins 01
- 6 Crematory Urns
- Ebrocca Descenia Key
- The other following items will always be found: 1 Emerald, 1 Flawed Pearl, 1 Crematory Instructions, 1 The Madness of Pelagius, and 1 Ashen Remains
- Some of the above items are clustered at the following locations:
- At Q: 1 Ashen Remains, 6 Crematory Urns, 1 Gilded Urn, 1 Emerald, 1 Flawed Pearl, 1 Crematory Instructions, and Ebrocca Descenia Key
Traps:
- 2 Hunger Statue traps at location T on map
Doors and Gates:
- There is one door (at F) in/out of this zone, leading to the zone Ebrocca, Descenia
Other:
- 1 Crematory Retort at location K on map
Bugs[edit]
- After killing the Clanfather, do not reenter Ebrocca, Sepechra after the dungeon resets. The surrounding walls are scripted to close when you pass a trigger point, and to open once you kill him. However, while the former script will reset, the latter script will not. Therefore, you will be trapped in the Clanfather's 'arena' permanently.
- There is a way to get around this. If you save the game after entering the "arena" then reload that save, all the walls will be down (and the holes in the floor will be open).
The Unofficial Shivering Isles Patch fixes this bug.
