Online:The Usurper Queen
| This page is currently being rewritten as part of the Online Quest Project. The page is being both written and checked. All users are welcome to make changes to the page. If you make a change that is relevant to the project, please update this template accordingly, and make sure you have observed the project guidelines. Detail
Quick Summary: written by Vyraesi, not checked
Quest Stages: written by Talyyn, not checked |
|

Quick Walkthrough[edit]
- Speak to Abnur Tharn in Riverhold.
- (Optional) Accept Abnur Tharn's invitation of a tour of Rimmen.
- Attend the meeting at Rimmen Palace.
- Escape the Rimmen Palace sewers.
- Make your way through the Desert Wind Caverns.
- Defeat Lieutenant Lepida.
- Talk to her spirit and listen to Zumog Phoom.
- Return to Riverhold.
Detailed Walkthrough[edit]
Abnur Tharn offers you a tour of the town. You get to see a number of things - such as the workhouse for the poor, which somehow leaves them worse off even though the are theoretically being paid, making the conditions for poorer Khajiit citizens worse than slavery: the markets, in which various Khajiit-related taxes mean that they are heavily disadvantaged against the non-Khajiiti businessmen: and the improvements to the city and palace walls, including siege weapons and trebuchets... which are pointed, not outside the city to repel enemies, but inside the city to suppress dissent. This tour can be skipped.
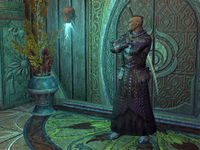
You will then go to the palace to meet Euraxia Tharn. On the way, you'll meet her pet necromancer, Zumog Phoom, and a disembodied head that you may recognize... it's the original Cadwell as he was in life, "Cadwell the Betrayer", of whom the Soul-Shriven Cadwell that we have met in Coldharbour and subsequently is merely an insane echo. Phoom has found and reanimated his head: where the rest of his body might be is not yet known, but his personality (although still insane) is very different to the genial knight we have known.
Euraxia isn't interested in meeting Abnur at all, and takes more of an interest in you. If you've played the main faction quest lines (or at least, the Aldmeri Dominion quests), she will recognize you as the killer of her son Javad Tharn (who, of course, was attempting to corrupt the Mane and unleash the Worm Cult on Reaper's March.) She is not pleased to see you, of course. Nor does she seem to care - regardless of whether you Persuade or Intimidate - about your news that the Dragons think that they are the ones using her, rather than the other way around. She reveals that a certain location - the Desert Wind caverns - has fallen to her forces, and orders an immediate march on Riverhold, and also orders her guards to arrest you both. Abnur, having come prepared for treachery (he does, after all, know his own family all too well), already has a teleport spell prepared, and casts it to get both of you out of the place...
But he's not as strong as he was: according to him, his advanced age is catching up with him, and he isn't strong enough to have got you past Euraxia's wards, so he's only managed to get you as far as the palace sewers. The first half of this complex contains nothing of interest - a bunch of skeevers, mudcrabs, a salamander or two and an entirely avoidable river troll down a side passage - while the second half is guarded by Euraxian Guards, the Usurper Queen having herself expected Abnur's escape, worked out where it's ended up, and sent the guards in after you. One or two of the guards will talk about having been told to take you alive: however they don't seem to be trying very hard to do that, and you are of course under no obligation to reciprocate anyway.
Now you have to head in two different directions - to warn Gharesh-ri in Riverhold about the upcoming attack, and investigate the Desert Wind Adeptorium, which is in danger considering Euraxia's statement about having taken the caverns underneath it. Fortunately there are two of you, so Abnur heads to Riverhold while you head to the Adeptorium.
The front entrance to the Adeptorium is barred - it apparently hasn't fallen yet, and there are a number of dead Euraxian mercenaries outside it - so you have to find the side entrance through the cave system of Desert Wind Caverns instead. It's crawling with Euraxian guards and cultists - and the summoned spirits of Senche-Tigers. You do not have to officially complete the Delve (killing its regular bosses - a boss summoner and a Senche-raht spirit) for the purposes of this quest, although you can do so along the way (and don't forget to grab the delve's skyshard as well): in fact you end up taking a side passage indicated by a Khajiit monk of the order, named Zamarak - who will just as quickly leave you, holding up a boulder that you pass, which then falls to block the way behind you, and he will have to find another way. You'll find that the Grand Adept has already just been killed, by Lieutenant Lepida, whom you will have to take down: but after you kill her, her shade reveals that she's been tricked, and is now bound to service by Zumog Phoom (whom we met earlier). The Euraxian motive for being here is to search for the rest of the body of Cadwell the Betrayer.
Zamarak, arriving too late, swears that this has roused the Desert Wind order to action, and they will come to Riverhold - few in number, but strong, apparently - to aid in its defense, after giving their Grand Adept the last rites. You, meanwhile, must return to Riverhold and catch up with Abnur Tharn and Gharesh-ri to end the quest.
Gallery[edit]
-
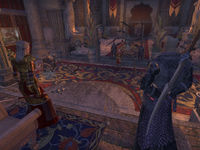
"I don't like the looks of these meddlers. I say we feed them to the Dragons and be done with it."
-
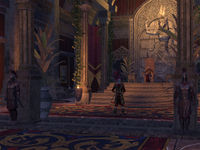
"Presenting Abnur Tharn, Grand Chancellor and Overlord of Nibenay, Imperial Battlemage of the Elder Council, and Patriarch of the Tharn dynasty. And his bodyguard."
-
"Treachery? How ever could I have anticipated this?"
-
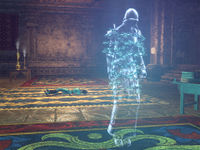
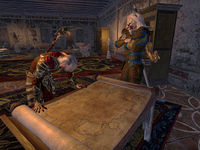
"Zumog Phoom seeks the location of the Betrayer's body parts. I learned where the dismembered corpse was hidden."
-
Report back to Abnur Tharn and Lord Gharesh-ri


Quest Stages[edit]
| The Usurper Queen | |
|---|---|
| Finishes Quest | Journal Entry |
| {Abnur Tharn wants me to meet him in Rimmen before we head to the palace to parley with his half-sister, Euraxia.
Objective: Meet Abnur Tharn in Rimmen
Optional Step: Talk to Lord Gharesh-ri
Optional Step: Talk to Captain Nala-do
|
|
| Abnur Tharn offered to give me a tour of Rimmen so I could understand how Euraxia keeps the Khajiiti in line. I can accompany him or refuse and make my own way to the palace.
Complete one: Follow Abnur Tharn or Go to Rimmen Palace On Your Own
|
|
| I agreed to let Abnur Tharn show me around Rimmen and reveal how Euraxia uses tyranny to enforce order here. I should follow him to each location and see what he has to say.
Objective: Follow Abnur Tharn
Hidden Objective: Talk to Abnur Tharn
|
|
| I agreed to let Abnur Tharn show me around Rimmen and reveal how Euraxia uses tyranny to enforce order here. I should follow him to each location and see what he has to say.
Objective: Follow Abnur Tharn
Hidden Objective: Talk to Abnur Tharn
|
|
| I agreed to let Abnur Tharn show me around Rimmen and reveal how Euraxia uses tyranny to enforce order here. I should follow him to each location and see what he has to say.
Objective: Follow Abnur Tharn
Hidden Objective: Talk to Abnur Tharn
|
|
| I agreed to let Abnur Tharn show me around Rimmen and reveal how Euraxia uses tyranny to enforce order here. I should follow him to each location and see what he has to say.
Objective: Follow Abnur Tharn
Hidden Objective: Talk to Abnur Tharn
|
|
| I agreed to let Abnur Tharn show me around Rimmen and reveal how Euraxia uses tyranny to enforce order here. I should follow him to each location and see what he has to say.
Objective: Follow Abnur Tharn
Hidden Objective: Talk to Abnur Tharn
|
|
| I agreed to let Abnur Tharn show me around Rimmen and reveal how Euraxia uses tyranny to enforce order here. I should follow him to each location and see what he has to say.
Objective: Follow Abnur Tharn
Hidden Objective: Talk to Abnur Tharn
|
|
| I agreed to let Abnur Tharn show me around Rimmen and reveal how Euraxia uses tyranny to enforce order here. I should follow him to each location and see what he has to say.
Objective: Follow Abnur Tharn
Hidden Objective: Talk to Abnur Tharn
|
|
| I need to accompany Abnur Tharn to Euraxia's throne room inside the palace.
Objective: Go to Euraxia's Throne Room
|
|
| On the way to Euraxia's throne room, the necromancer Zumog Phoom intercepted me. I should see what he has to say.
Objective: Talk to Zumog Phoom
|
|
| After a conversation with Queen Euraxia's chief necromancer, Zumog Phoom, I learned that he reanimated Cadwell's original head through necromantic means. Now I need to meet Abnur Tharn in the throne room.
Objective: Enter the Rimmen Palace Throne Room
|
|
| I entered the throne room. Now I need to step forward and wait to be introduced to Euraxia Tharn.
Objective: Wait to Be Introduced
|
|
| Euraxia dismissed her half-brother Abnur and instead asked to talk to me. I guess it's up to me to present our case and convince Euraxia that the Dragons plan to betray her.
Objective: Talk to Euraxia Tharn
|
|
| Zumog Phoom entered the throne room. I should listen to what he has to say to Euraxia.
Objective: Listen to Zumog Phoom
|
|
| Euraxia never meant to honor the terms of the parley. I need to defend myself and Abnur Tharn before Euraxia's guards overwhelm us.
Objective: Defend Yourself
|
|
| Abnur Tharn used his magic to teleport us out of the throne room. I should talk to him.
Objective: Talk to Abnur Tharn
|
|
| Euraxia's wards stopped Abnur Tharn from teleporting us out of the palace. Instead, we wound up in the sewers beneath it. The effort weakened Tharn. I need to protect him as we make our escape.
Objective: Escort Tharn Out of the Sewers
|
|
| I helped Abnur Tharn get out of the sewers beneath Rimmen Palace. I should talk to him about what we learned.
Objective: Talk to Abnur Tharn
|
|
| We learned that Euraxia has multiple plans in motion. While Abnur Tharn returns to Riverhold to warn Gharesh-ri of an upcoming attack, I need to go to the Desert Wind Adeptorium and find out what her forces are doing there.
Objective: Go to Desert Wind Adeptorium
|
|
| It appears that the main gates to the adeptorium have been sealed. I need to find another way to get inside.
Objective: Find a Way Into the Adeptorium
|
|
| I discovered caves beneath the adeptorium. I should attempt to find a way into the adeptorium from inside the caves.
Objective: Enter the Adeptorium
|
|
| A Khajiiti adept defends the entrance to the adeptorium. I should let him know I'm here to help against Euraxia's forces.
Objective: Talk to Zamarak
|
|
| Zamarak thinks the Euraxians seek one of the secrets guarded by the Grand Adept. He asked me to follow him inside.
Objective: Enter the Desert Wind Adeptorium
|
|
| A Euraxian battlemage! I need to deal with her before she gets away.
Objective: Defeat Lieutenant Lepida
|
|
| The battlemage's shade was pulled from her dead body and drawn through a nearby door. I should follow her and see what happens.
Objective: Talk to Lieutenant Lepida's Shade
|
|
| The necromancer Zumog Phoom has trapped the shade of the battlemage. I need to watch and see what's happening here.
Objective: Listen to Zumog Phoom
|
|
| Zamarak arrived, but we were too late to save the Grand Adept or to keep Zumog Phoom from learning the secret he sent the Euraxians to uncover. Now he knows where to find the rest of the Betrayer's body. I should talk to Zamarak.
Objective: Talk to Zamarak
|
|
| I got Zamarak to commit the Desert Wind adepts to aid in the defense of Riverhold. Now I should return to town and find Abnur Tharn.
Objective: Talk to Abnur Tharn
|
|
| I determined what Euraxia's forces were after in the Desert Wind Adeptorium and got the adepts to commit to aid in defense of the town. Now I should find out what I can do to help.
Objective: Talk to Abnur Tharn
|
|
<Alias=LocationHold>) is dynamically set by the game and will be filled in with the appropriate word(s) when seen in game.
- Not all Journal Entries may appear in your journal; which entries appear and which entries do not depends on the manner in which the quest is done.
- Stages are not always in order of progress. This is usually the case with quests that have multiple possible outcomes or quests where certain tasks may be done in any order. Some stages may therefore repeat objectives seen in other stages.