Category:Morrowind-Interior Images
The UESPWiki – Your source for The Elder Scrolls since 1995
This category lists pictures taken inside various Places, as opposed to this category, which contains the exterior shots.
Media in category "Morrowind-Interior Images"
The following 200 files are in this category, out of 392 total.
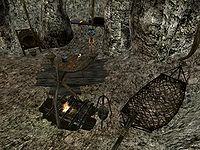
(previous page) (next page) MW-interior-Abandoned Shack.jpg 1,024 × 768; 146 KB
 MW-interior-Ald'ruhn Morag Tong Guildhall.jpg 1,333 × 1,000; 139 KB
 MW-interior-Armigers Stronghold.jpg 1,024 × 768; 159 KB
 MW-interior-Bethamez.jpg 1,024 × 768; 247 KB
 MW-interior-Corprusarium Bowels.jpg 1,024 × 768; 227 KB
 MW-interior-Foreign Quarter Tomb.jpg 911 × 698; 123 KB
 MW-interior-Ghostgate Temple.jpg 1,024 × 768; 163 KB
 MW-interior-Hlaalu Records.jpg 1,024 × 768; 152 KB
 MW-interior-Hlaalu Temple.jpg 1,024 × 768; 141 KB
 MW-interior-Ibar-Dad.jpg 1,440 × 1,080; 397 KB
 MW-interior-Kaushtarari.jpg 1,024 × 768; 106 KB
 MW-interior-Kogoruhn.jpg 1,400 × 1,050; 131 KB
 MW-interior-Kunirai.jpg 1,333 × 1,000; 146 KB
 MW-interior-Kushtashpi.jpg 1,024 × 768; 129 KB
 MW-interior-Library of Vivec.jpg 1,333 × 1,000; 143 KB
 MW-interior-Maelkashishi.jpg 1,024 × 768; 123 KB
 MW-place-Magas Volar.jpg 1,024 × 768; 96 KB
 MW-interior-Mudan, Right Tower.jpg 3,840 × 2,160; 1.41 MB
 MW-interior-Abaelun Mine.jpg 1,024 × 768; 196 KB
 MW-interior-Abaesen-Pulu Egg Mine.jpg 1,024 × 768; 169 KB
 MW-interior-Abanabi.jpg 1,024 × 768; 102 KB
 MW-interior-Abandoned Shipwreck 02.jpg 3,840 × 2,160; 940 KB
 MW-interior-Abandoned Shipwreck 03.jpg 3,840 × 2,160; 1,011 KB
 MW-interior-Abandoned Shipwreck.jpg 3,840 × 2,160; 787 KB
 MW-interior-Abernanit.jpg 1,152 × 864; 196 KB
 MW-interior-Adanumuran.jpg 1,024 × 768; 142 KB
 MW-interior-Addadshashanammu.jpg 1,024 × 768; 90 KB
 MW-interior-Addamasartus.jpg 1,024 × 768; 153 KB
 MW-interior-Aharnabi.jpg 1,024 × 768; 121 KB
 MW-interior-Aidanat Camp.jpg 1,024 × 768; 143 KB
 MW-interior-Ald Sotha, Lower Level.jpg 1,024 × 768; 91 KB
 MW-interior-Ald Sotha, Shrine.jpg 1,024 × 768; 96 KB
 MW-interior-Ald Sotha, Upper Level.jpg 1,024 × 768; 90 KB
 MW-interior-Ald'ruhn Mages Guild.jpg 1,024 × 768; 134 KB
 MW-interior-Ald'ruhn Temple 02.jpg 1,280 × 960; 372 KB
 MW-interior-Ald'ruhn Temple 03.jpg 1,280 × 960; 374 KB
 MW-interior-Ald'ruhn Temple 04.jpg 1,280 × 960; 412 KB
 MW-interior-Ald'ruhn Temple.jpg 1,280 × 960; 455 KB
 MW-interior-Ald-Ruhn, Council Club.jpg 1,280 × 960; 364 KB
 MW-interior-Ald-Ruhn, Guild of Fighters 02.jpg 1,280 × 960; 379 KB
 MW-interior-Ald-Ruhn, Guild of Fighters.jpg 1,280 × 960; 424 KB
 MW-interior-Ald-Ruhn, The Rat in the Pot 02.jpg 1,280 × 960; 395 KB
 MW-interior-Ald-Ruhn, The Rat in the Pot.jpg 1,280 × 960; 378 KB
 MW-interior-Aleft.jpg 1,024 × 768; 72 KB
 MW-interior-Almu Cave Dwelling.jpg 1,024 × 768; 127 KB
 MW-interior-Alof's Farmhouse.jpg 1,024 × 768; 119 KB
 MW-interior-Ancient Shipwreck, Cabin.jpg 1,440 × 1,080; 263 KB
 MW-interior-Ancient Shipwreck, Lower Level.jpg 1,440 × 1,080; 335 KB
 MW-interior-Ancient Shipwreck, Upper Level.jpg 1,440 × 1,080; 384 KB
 MW-interior-Andasreth, Lower Level.jpg 1,024 × 768; 152 KB
 MW-interior-Andasreth, Propylon Chamber.jpg 1,024 × 768; 114 KB
 MW-interior-Andasreth, Upper Level.jpg 1,024 × 768; 148 KB
 MW-interior-Andrano Ancestral Tomb.jpg 1,024 × 768; 114 KB
 MW-interior-Andrethi Ancestral Tomb.jpg 1,024 × 768; 81 KB
 MW-interior-Ansi.jpg 1,024 × 768; 150 KB
 MW-interior-Anudnabia.jpg 3,840 × 2,160; 1.03 MB
 MW-interior-Aran Ancestral Tomb 02.jpg 1,024 × 768; 110 KB
 MW-interior-Aran Ancestral Tomb.jpg 1,024 × 768; 97 KB
 MW-interior-Arano Plantation.jpg 1,024 × 768; 133 KB
 MW-interior-Arena Canton.jpg 1,024 × 703; 259 KB
 MW-interior-Arkngthand, Cells of Hollow Hand 02.jpg 1,024 × 768; 122 KB
 MW-interior-Arkngthand, Cells of Hollow Hand.jpg 1,024 × 768; 140 KB
 MW-interior-Arkngthand, Deep Ore Passage.jpg 1,024 × 768; 144 KB
 MW-interior-Arkngthand, Hall of Centrifuge.jpg 1,024 × 768; 166 KB
 MW-interior-Arkngthand, Heaven's Gallery.jpg 1,024 × 768; 140 KB
 MW-interior-Arkngthand, Land's Blood Gallery.jpg 1,024 × 768; 128 KB
 MW-interior-Arkngthand, Weepingbell Hall.jpg 1,024 × 768; 131 KB
 MW-interior-Arkngthunch-Sturdumz.jpg 1,024 × 768; 121 KB
 MW-interior-Arrow 02.jpg 3,840 × 2,160; 871 KB
 MW-interior-Arrow.jpg 3,840 × 2,160; 1,002 KB
 MW-interior-Aryni Orethi's House.jpg 1,280 × 960; 362 KB
 MW-interior-Ashalmimilkala.jpg 1,024 × 768; 102 KB
 MW-interior-Ashanammu.jpg 1,024 × 768; 147 KB
 MW-interior-Ashirbadon.jpg 1,024 × 768; 150 KB
 MW-interior-Ashurnibibi.jpg 1,024 × 768; 93 KB
 MW-interior-Assarnatamat.jpg 1,024 × 768; 121 KB
 MW-interior-Assemanu, Shrine.jpg 1,024 × 768; 180 KB
 MW-interior-Assemanu.jpg 1,024 × 768; 182 KB
 MW-interior-Assernerairan 02.jpg 1,280 × 960; 303 KB
 MW-interior-Assernerairan Statue.jpg 734 × 734; 55 KB
 MW-interior-Assernerairan.jpg 1,280 × 960; 269 KB
 MW-interior-Assu 02.jpg 1,024 × 768; 155 KB
 MW-interior-Assu.jpg 1,024 × 768; 153 KB
 MW-interior-Assumanu.jpg 1,024 × 768; 124 KB
 MW-interior-Assurdirapal.jpg 4,000 × 3,000; 398 KB
 MW-interior-Balmora, Council Club.jpg 1,280 × 960; 400 KB
 MW-interior-Balmora, Guild of Fighters 02.jpg 1,280 × 960; 422 KB
 MW-interior-Balmora, Guild of Fighters.jpg 1,280 × 960; 389 KB
 MW-interior-Balmora, Guild of Mages 02.jpg 1,280 × 960; 436 KB
 MW-interior-Balmora, Guild of Mages.jpg 1,280 × 960; 404 KB
 MW-interior-Balmora, South Wall Cornerclub.jpg 1,280 × 960; 394 KB
 MW-interior-Balur's Farmhouse.jpg 1,024 × 768; 121 KB
 MW-interior-Band Egg Mine.jpg 1,024 × 768; 172 KB
 MW-interior-Berandas 02.jpg 1,280 × 960; 392 KB
 MW-interior-Berandas 03.jpg 1,280 × 960; 578 KB
 MW-interior-Berandas 04.jpg 1,280 × 960; 435 KB
 MW-interior-Berandas.jpg 1,280 × 960; 425 KB
 MW-interior-Beshara.jpg 1,024 × 768; 158 KB
 MW-interior-Big Head's Shack.jpg 1,920 × 1,017; 315 KB
 MW-interior-Caius Cosades' House.jpg 3,840 × 2,160; 1.07 MB
 MW-interior-Caldera, Guild of Mages.jpg 1,280 × 960; 407 KB
 MW-interior-Caldera, Shenk's Shovel 02.jpg 1,280 × 960; 428 KB
 MW-interior-Caldera, Shenk's Shovel.jpg 1,280 × 960; 387 KB
 MW-interior-Canodia Felannus' House.jpg 3,840 × 2,160; 1.38 MB
 MW-interior-Cavern of the Incarnate 02.jpg 570 × 570; 114 KB
 MW-interior-Cavern of the Incarnate.jpg 1,024 × 691; 129 KB
 MW-interior-Derelict Shipwreck Cabin.jpg 3,743 × 2,105; 2.85 MB
 MW-interior-Dirara's Farmhouse.jpg 1,024 × 768; 122 KB
 MW-interior-Drinar Varyon's House.jpg 1,280 × 960; 406 KB
 MW-interior-Druegh-jigger's Rest.jpg 1,024 × 768; 125 KB
 MW-interior-Dushariran.jpg 4,000 × 3,000; 389 KB
 MW-interior-Eastern Guard Tower 02.jpg 3,840 × 2,160; 960 KB
 MW-interior-Eastern Guard Tower 03.jpg 3,840 × 2,160; 1.13 MB
 MW-interior-Eastern Guard Tower.jpg 3,840 × 2,160; 1.08 MB
 MW-interior-Ebonheart Underground Caves 02.jpg 1,024 × 768; 140 KB
 MW-interior-Ebonheart Underground Caves.jpg 1,000 × 750; 118 KB
 MW-interior-Ebonheart, Six Fishes.jpg 1,280 × 960; 388 KB
 MW-interior-Eight Plates.jpg 1,024 × 768; 136 KB
 MW-interior-Eldafire's House.jpg 1,920 × 1,080; 900 KB
 MW-interior-Eluba-Addon Egg Mine.jpg 1,024 × 768; 110 KB
 MW-interior-Ervyna Hlervu's Shack.jpg 1,280 × 960; 472 KB
 MW-interior-Esutanamus.jpg 1,024 × 768; 125 KB
 MW-interior-Fadase Selvayn- Trader 02.jpg 1,280 × 960; 425 KB
 MW-interior-Fadase Selvayn- Trader.jpg 1,280 × 960; 412 KB
 MW-interior-Fadathram Ancestral Tomb.jpg 1,024 × 768; 118 KB
 MW-interior-Falas Ancestral Tomb.jpg 1,024 × 768; 133 KB
 MW-interior-Fara's Hole in the Wall.jpg 1,280 × 960; 303 KB
 MW-interior-Fargoth's House.jpg 1,024 × 768; 201 KB
 MW-interior-Fast Eddie's House.jpg 1,920 × 1,080; 825 KB
 MW-interior-Fine-Mouth's Shack.jpg 1,024 × 768; 160 KB
 MW-interior-Foreign Quarter Plaza.jpg 1,333 × 1,000; 142 KB
 MW-interior-Galom Daeus Observatory.jpg 3,840 × 2,160; 1.19 MB
 MW-Interior-Ghorak Manor 02.jpg 1,024 × 768; 129 KB
 MW-Interior-Ghorak Manor.jpg 1,024 × 768; 122 KB
 MW-interior-Gildan's House.jpg 1,280 × 960; 408 KB
 MW-interior-Giron Manas's Shack.jpg 1,280 × 960; 476 KB
 MW-interior-Gnisis Barracks.jpg 1,024 × 768; 177 KB
 MW-interior-Gnisis, Eggmine 02.jpg 1,024 × 768; 165 KB
 MW-interior-Gnisis, Eggmine.jpg 1,024 × 768; 180 KB
 MW-interior-Gnisis, Lower Eggmine.jpg 1,024 × 768; 183 KB
 MW-interior-Gnisis, Underground Stream.jpg 1,024 × 768; 216 KB
 MW-interior-Habinbaes.jpg 1,024 × 768; 141 KB
 MW-interior-Hanarai Assutlanipal's House 02.jpg 1,280 × 960; 344 KB
 MW-interior-Hanarai Assutlanipal's House 03.jpg 1,280 × 960; 371 KB
 MW-interior-Hanarai Assutlanipal's House.jpg 1,280 × 960; 365 KB
 MW-interior-Hawia Egg Mine.jpg 1,024 × 768; 168 KB
 MW-interior-Hecerinde's House.jpg 3,840 × 2,160; 1.18 MB
 MW-interior-Heleran Ancestral Tomb.jpg 1,024 × 768; 116 KB
 MW-interior-Heran Ancestral Tomb.jpg 1,024 × 768; 92 KB
 MW-interior-High Fane.jpg 1,024 × 768; 123 KB
 MW-interior-Hlaalu Ancestral Vaults.jpg 1,024 × 768; 137 KB
 MW-interior-Hleran Ancestral Tomb.jpg 1,024 × 768; 109 KB
 MW-interior-Hlormaren, Dome.jpg 1,024 × 768; 118 KB
 MW-interior-Hlormaren, Keep, Bottom Level.jpg 1,024 × 768; 129 KB
 MW-interior-Hlormaren, Keep, Top Level.jpg 1,024 × 768; 131 KB
 MW-interior-Hlormaren, Propylon Chamber.jpg 1,024 × 768; 117 KB
 MW-interior-Hlormaren, Sewers.jpg 1,024 × 768; 61 KB
 MW-interior-Hlormaren, Underground.jpg 1,024 × 768; 154 KB
 MW-interior-Ibishammus.jpg 4,000 × 3,000; 425 KB
 MW-interior-Ienas Sarandas's House.jpg 1,280 × 960; 422 KB
 MW-interior-Ihinipalit.jpg 768 × 768; 86 KB
 MW-interior-Imperial Prison Ship.jpg 1,440 × 1,080; 341 KB
 MW-interior-Indalen Ancestral Tomb.jpg 1,024 × 768; 116 KB
 MW-interior-Indrele Rathryon's Shack.jpg 1,024 × 768; 175 KB
 MW-interior-Karlirah's House 02.jpg 1,920 × 1,080; 792 KB
 MW-interior-Karlirah's House.jpg 1,920 × 1,080; 811 KB
 MW-interior-Koal Cave.jpg 1,280 × 1,024; 146 KB
 MW-interior-Kudanat.jpg 1,024 × 768; 186 KB
 MW-interior-Lighthouse 02.jpg 1,024 × 768; 151 KB
 MW-interior-Lighthouse 03.jpg 1,024 × 768; 145 KB
 MW-interior-Lighthouse.jpg 1,024 × 768; 150 KB
 MW-interior-Lleran Ancestral Tomb.jpg 1,024 × 768; 77 KB
 MW-interior-Llovyn's Farmhouse.jpg 1,024 × 768; 132 KB
 MW-interior-Lucky Lockup.jpg 1,280 × 960; 392 KB
 MW-interior-Mallapi.jpg 1,024 × 768; 135 KB
 MW-interior-Malmus Grotto.jpg 796 × 745; 121 KB
 MW-interior-Mamaea, Sanctum of Awakening.jpg 1,024 × 768; 145 KB
 MW-interior-Mamaea, Sanctum of Black Hope.jpg 1,024 × 768; 108 KB
 MW-interior-Mamaea, Shrine of Pitted Dreams.jpg 1,024 × 768; 162 KB
 MW-interior-Manat's Farmhouse.jpg 1,024 × 768; 125 KB
 MW-interior-Manat's Yurt.jpg 1,024 × 768; 107 KB
 MW-interior-Mannammu.jpg 1,024 × 768; 122 KB
 MW-interior-Milk.jpg 1,024 × 768; 154 KB
 MW-interior-Missamsi.jpg 1,024 × 768; 165 KB
 MW-interior-Missir-Dadalit Egg Mine.jpg 1,920 × 1,017; 352 KB
 MW-interior-Molag Mar Temple 02.jpg 1,280 × 960; 466 KB
 MW-interior-Molag Mar Temple 03.jpg 1,280 × 960; 477 KB
 MW-interior-Molag Mar Temple.jpg 1,280 × 960; 423 KB
 MW-interior-Molag Mar, St. Veloth's Hostel.jpg 1,280 × 960; 427 KB
 MW-interior-Moonmoth Legion Fort.jpg 960 × 643; 133 KB
 MW-interior-Mudan Grotto.jpg 1,024 × 768; 115 KB
 MW-interior-Mudan, Central Vault.jpg 1,024 × 768; 122 KB
 MW-interior-Mudan, Lost Dwemer Checkpoint.jpg 1,024 × 768; 91 KB
 MW-interior-Mzuleft-02.jpg 1,024 × 768; 134 KB
 MW-interior-Mzuleft-03.jpg 1,024 × 768; 128 KB
 MW-interior-Mzuleft.jpg 1,024 × 768; 127 KB
 MW-interior-Nchuleftingth, Lower Level.jpg 1,024 × 768; 122 KB
 MW-interior-Nchuleftingth, Test of Pattern.jpg 1,024 × 768; 120 KB
 MW-interior-Nchuleftingth, Upper Level.jpg 1,024 × 768; 121 KB
 MW-interior-Nchurdamz.jpg 1,280 × 960; 362 KB


