Battlespire:Deathmatch level 4

Deathmatch level 4 is a Battlespire Multiplayer map which features a central pit with an elevated platform going around it. A large crystal in the center of the pit restores Health when touched. There are exits in each of the cardinal directions. The exits at the level of the pit go into hallways, while the exits from the raised platform go into rooms.
To the north, taking the exit in the pit, a fork leads to two hallways that ramp and spiral upwards, entering the west and east sides of the upper level north room. The south pit exit has a small alcove with a treasure on the right, and a ramp on the left. This ramp curves and enters into the east upper level room. The east side of this room has an alcove with a treasure. Walking along the raised ramp around the pit, you can enter the south or west upper level rooms. Each has a treasure in an alcove opposite the entrance from the pit. The west and south room both have hallways leading to a shared room between them, in which there is a treasure and the Magicka crystal.
Back in the pit, the exits to the east and west lead to a roughly symmetrical lower level. Taking the right path for either hallway, you will curve to the right and come to a short bridge over a pit of lava. There is a button on the opposite side that lowers the bridge into the lava. Further along this hallway, you will enter a large central room, and a cross shaped walkway extends in front of you. You can fall from this walkway down to a lower level, or into the lava pit below that if you miss. If you continue straight across this walkway, you will arrive at another small lava bridge, the same one you would have reached by taking the opposite entrance from the pit.
Back to the east and west exits from the pit, if you take the left fork, you will curve downward until you arrive at a small bridge over a pit of lava. However, this is a T-shaped bridge. If you head to the left, you will find the button that lowers this walkway into the lava. Just beyond that is the cross-shaped walkway mentioned above. If you continue straight, you will continue to curve around until you arrive at the lowest level from either the north or south. There is another cross-shaped walkway just above the surface of the lava here; the lowest level cross is aligned with the cardinal directions, while the walkway above is along the ordinal. There are rooms to the east and west of this walkway, and each contains three treasures. Note that, if the two T-bridges are both submerged in the lava, there is no way someone on the lowest level can walk back to the rest of the map. However, a sufficiently athletic character may be able to clear the gap with a running jump.
Gallery[edit]
-
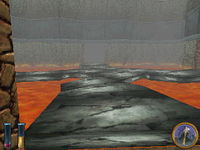
The lower room
-
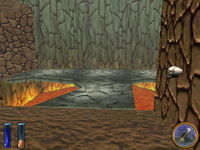
One of the stone bridges with its skull switch

