Skyrim:Shroud Hearth Barrow
|
|||
|---|---|---|---|
| # of Zones | 2 | ||
| Clearable | Yes | ||
| Dungeon | Yes | ||
| Respawn Time | 10 days or 30 days | ||
| Level | Min: 6 | ||
| Occupants | |||
| Draugr, Skeletons, Wyndelius Gatharian, Magrathi the Dragon PriestCC |
|||
| Important Treasure | |||
| Before the Ages of Man Philter of the Phantom |
|||
| Console Location Code(s) | |||
| ShroudHearthBarrowExterior, ShroudHearthBarrow01, ShroudHearthBarrow02 | |||
| Region | |||
| The Rift | |||
| Location | |||
| East of Ivarstead | |||
| Special Features | |||
| Word Wall | Kyne's Peace | ||
| # of Alchemy Labs | 1 | ||
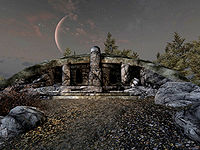
Shroud Hearth Barrow is a medium-sized Nordic ruin east of Ivarstead containing draugr and skeletons. It contains two zones: Shroud Hearth Barrow and Shroud Hearth Depths.
The residents of Ivarstead believe the barrow is haunted. Wilhelm, the local innkeeper, will provide you with the most information, citing the example of Wyndelius Gatharian, an adventurer who tried exploring the barrow a year earlier but never returned.
Related Quests[edit]
- Lifting the Shroud: Investigate the haunted barrow outside of Ivarstead.
- A Matter of PrideCC: Obtain the legendary katana Goldbrand.CC
Walkthrough[edit]
Shroud Hearth Barrow[edit]
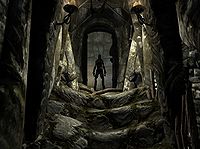
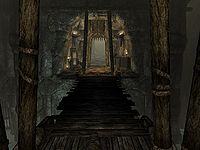
A typical Nordic stone barrow, the outer ring is lined with coffins holding ancestral remains. The door into the barrow is on the inner wall. The entryway door opens to a winding wooden stairway going down. At the landing is a shelf holding a potion, a petty soul gem, and a small burial urn to loot. The path continues downward, heading southeast with dead draugr to loot on either side of the passage. A coin purse is tucked into the bottom crypt on the left. The passage ends in an intersection where a ghost may be behind the gate to the right, warning you to leave, and another room is to the left. Go into the room on the left. Once inside, you will notice four levers: two on either side of the door. Activate the levers closest to the door to open the iron gate on the other side of the passage. The lever on the far right activates a dart trap. Before you leave, there is a burial urn stuck in the rubble in the right-hand corner of the room and a copy of the Illusion skill book Before the Ages of Man is on the embalming table.
In the next room, there are doors on either end. One is an apprentice-locked door, and the other an iron portcullis with a pull-chain. Open the locked door first. Directly inside is pressure plate triggering a spear trap. However, the spears are well enough ahead that they do not present an issue if you proceed slowly into the room. Ahead is an unlocked chest rigged with an adept-locked tension cable trap. The cable will activate a dart trap if not disarmed before opening the chest. After looting the chest go back out to the portcullis. Pulling the chain will lift the gate and trigger a spear trap. Wait until the spears retract back into the wall and proceed through without incident. At the bottom of the stairs are two more iron doors. The door to the right is tension cable rigged to trigger flamethrower statues when opened. Wait until the flames extinguish and proceed through. At the other end of this room is a puzzle door. In order to operate the door, and continue exploring the barrow, you will need the Sapphire Dragon Claw. This can be obtained by giving Wilhelm, the innkeeper in Ivarstead, Wyndelius Gatharian's journal.
In order to find the journal, go back to the last room and open the other door. This leads to adventurer Wyndelius Gatharian. The antechamber has a small burial urn on the south wall. The next room is Wyndelius' chambers. He may be sleeping when you arrive. If he is awake he will attack you. In his room, there is an alchemy lab and a large table serving as a desk. The journal you need is on the table. Also on the table are a small satchel, the Philter of the Phantom, and two books. Next to the fire are a pair of random boots, a random potion, and a pair of random gauntlets on the shelf. Now, backtrack out of the barrow to take the journal to Wilhelm. Initiate a conversation about the barrow and then give him the journal. If you have not initiated the related Lifting the Shroud quest, giving Wilhelm the journal will activate and update the quest in your journal.
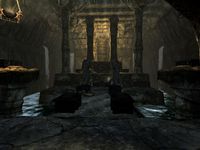
Once you have the Sapphire Dragon Claw go back to Shroud Hearth Barrow to the puzzle door room. The combination is on the palm of the claw; starting with the outer ring Moth—Owl—Wolf. When the door recedes go straight to the end of the hall. Here you will find a broken table beneath a stone etching bearing an empty random soul gem and a random helmet. The passage turns left and descends passing a sideboard with a random mace on top and into a hall containing five sarcophagi: two around the perimeter and three up on a raised dais. On a pedestal in the middle of the dais is the spell tome Oakflesh. As you move about the room the portcullises on either end will close, trapping you inside. A small illuminated alcove in the eastern corner of the chamber to the right of the dais has a lever which reverses this. Its gate will open automatically as you move about the room. When that happens, draugr will emerge from the coffins and attack. After the draugr are done activate the lever. As you exit a large urn is on the ground to the left just before a winding staircase. Notice the trap door grate on the floor with water below at the base of the stairs. Stepping on the grate will cause it to collapse, dumping you into the water. A pull chain directly across the grate locks it into place. At the bottom of the pool are some skeletal remains with a coin purse and a random greatsword. Avoid touching the handle on the nearby wall as it will close the grate above you causing you to drown if you cannot quickly reactivate it.
The stairs lead to a door on the second level and yet another door on the third. Open the uppermost door first. It is master-locked and inside is an expert-locked chest and a random soul gem is beside it. Go back down a flight to the first door. Just inside is a pressure plate triggering a poison dart trap. At the bottom of the stone stairs is a second pressure plate that triggers a battering ram. A skeleton is waiting just around the corner. The skeleton is positioned correctly so that if you sneak down the stairs, you can use the pressure plate battering ram to smash him. On the left is a sideboard with a random potion on top.
The next door opens onto the balcony of a large room. To the left is an urn. Next to the urn are two sarcophagi, each with an activating handle next to it. If you are up to it, pulling each handle will expel a draugr and a skeleton, respectively. To the right is a hole in the stone showing a chest in a well lit room. The doorway is actually a sarcophagus around the corner to the right, opened by a handle on the wall beside it.
Looking through the wooden bulwark, you will spot five skeletons down below, all conveniently standing in an oil slick. Use a flame spell or take advantage of the oil lamps hanging above the skeletons to neatly incinerate them. The chest is unlocked, and the room contains a random potion, a random empty soul gem, a random sword, and a small burial urn. When your plundering is complete, head down the platform stairs.
Cross through the pit and up the stairs to the balcony on the other side. More draugr will awaken to impede you. A small burial urn is in the rubble at the top of the stairs. A random mace can be found on a broken table tucked in the northwest corner of the balcony. The next door opens to a stairway with a tripwire at the base that triggers a swinging blades trap. At the top of the stairs, a draugr is waiting. The tripwire can be used to kill the draugr, or simply jump over the wire to avoid the hassle of running through the swinging blades. (Revisiting this area will require you to still have the Shroud Hearth Barrow key to open the door at the top of these stairs.) A chain just inside the room at the top of the stairs will stop the blades. More draugr will awaken as you enter the room. A pressure plate triggering a spike wall trap is right at the mouth of the passage heading east. More draugr are in this passage as well. The draugr guarding the door will have a Shroud Hearth Barrow key for you to pick up. On the right before the door is a burial urn.
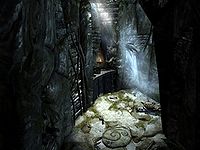
The key will open up the expert-locked door that leads to a room with an underground stream and a stone bridge. Before going farther into the room, jump into the shallow water to your left and activate the chain, which raises the gate. A coin purse and draugr body to loot are underwater against the back wall. Before going up the stairs, take the stone walkway to the bridge. Cross the bridge to the alcove with a filled random soul gem and a pair of random gauntlets. Farther on, a leveled sword is behind the waterfall at the end of the room. Back across the bridge and up the stairs you will find a pressure plate in the middle of the room that seemingly does nothing and four rotating totem pillars. Ignore the pillars for now and enter the doors ahead. A draugr is waiting in the next room along with a second pressure plate. A medium coin purse is on the table to the left along with a burial urn and a pair of random boots. A small urn is on the shelves to the right.
Step on the pressure plate. Revolving doors will open on four alcoves revealing a totem statue. Note which totem is revealed in each alcove from left to right (Whale—Eagle—Snake—Whale). This is the combination for the pillars in the outer room. Back in the outer room, activate each totem pillar, again from left to right, in the combination revealed. Once the totems are correctly aligned, step on the pressure plate to lower the wooden bridge across to the next room, as well as to open the portcullis.
Across the bridge, a throne is to the left and a random potion of healing and a random war axe are on a table to the right. A draugr is also waiting in the passage ahead. A spike wall pressure plate is just inside the doorway, but a little off-center. Sidle your way past it on the right. Just past the gate, to the right, is an alcove with a large urn on one side and a random filled soul gem and random dagger on a shelf on the other. An apprentice-locked door opens to a room with a gold ingot on a pedestal. The pedestal is actually a weight sensitive plate, and removing the ingot will trigger another flamethrower trap. If you are quick, stand to the far left of the pedestal, grab the ingot, and quickly move backwards behind the corner to avoid the flames. Alternatively, shoot the ingot off of the pedestal and wait for the flames to stop.
Back in the main passage, a tripwire triggering falling boulders is across your path. Jump over it, or trigger it, backing up quickly to avoid the damage. In either case, you may be able to kill or injure another wandering draugr (just up ahead) with the trap. At the top of the incline a small burial urn is to the right, and a random potion of magicka and random bow are on the table. The next set of doors leads to Shroud Hearth Depths.
Shroud Hearth Depths[edit]
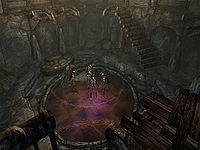
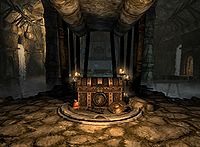
Ahead of you is a great hall. However, before you descend the stairs to enter, look to your left for a random potion of healing, then proceed. The great hall you enter has a large stone temple in the center and thirteen sarcophagi arranged around it—a bad omen. Stepping into the room causes the gate behind you to close and the enemies to start emerging. There are six skeletons and seven draugr, one of which is boss level. An advantage here is that the enemies do not all emerge at once; they will rise to replace the fallen. Once all have been defeated, both the way back and the way forward will be opened. Take some time to loot the corpses before heading up the wooden plank to a very narrow tunnel.
The tunnel opens to another large room with a boss chest, front and center. The chest has a novice-locked tension cable trap that triggers a dart trap from the ceiling. A large coin purse, a random weapon, and a piece of random armor are also lying by the chest. A random potion of healing is lying in the rocks on the left-hand wall, and more random armor (a chestpiece) and weaponry, as well as a small burial urn with a large coin purse tucked behind is on the table to the right.
Make your way past the chest to hear the telling chanting of a word wall. The wall holding a part of the Kyne's Peace shout is directly ahead.
After collecting the shout, there is an adept-locked chest in the water. The most direct route to it is to stand on the edge of the wooden platform leading to the word wall, and face northwest. Jump down into the water and turn around to face southeast. In a small alcove, just under a large support beam for the platform, is the submerged chest. To the left of the word wall is a broken bridge. Using the Whirlwind Sprint shout you can reach the small alcove on the other side to find a random filled soul gem and a quality greatsword, with a large coin purse nestled in between.
The exit is across the intact stone bridge to the right. This leads back to the barrow and into a small, circular room with a pull chain. The chain opens a hidden door leading into a partially collapsed tunnel. The tunnel ends in another pull chain and secret door. There is also a random warhammer in your path as you approach the end of the tunnel as well as a small urn by the secret door. This secret door opens into Wyndelius Gatharian's chambers. Backtrack to the entrance of the barrow.
Notes[edit]
- If you lack Whirlwind Sprint, you can hug the wall in between each pillar and jump your way to the alcove in the room with the word wall, or you can try using shouts, spells or arrows to knock these items from the bridge, though either method is difficult.
- If you're stuck in Shroud Hearth Depths coffin room, look for any foe in the area. Sometimes a skeleton flees into the water, it must be killed to progress. The last draugr will not emerge if any previously killed are currently raised to fight for you. Just kill the raised undead to progress.
- Shroud Hearth Barrow also appears in ESO.
Bugs[edit]
- If the dragon claw door does not work, check here for possible fixes.
- The word wall may not glow, rendering you unable to learn part of the Kyne's Peace shout.
- The pressure plate for the puzzle may not work at all, regardless of the presence of an object. Reloading to a previous save and attempting again seemed to fix this. ?
- Sometimes the pressure plate for the puzzle does not work if there is something on or very close to the plate. Moving the item/body away fixes this issue.[verification needed — Needs testing to determine cause]
- In the room with the Oakflesh spell tome, there are two triggers that will close the gates in the room—one on the raised platform and one on the lower portion. If you trigger one, open the gates, then trigger the other, the escape lever will be blocked off and you will have no way out of the room.
The Unofficial Skyrim Legendary Edition Patch, version 3.0.6, fixes this bug.
- If you are trapped in the room, try the following: Open the console, click on a gate with mouse, then type
disable. This will disable the chosen gate, allowing you to exit. - Triggering the pressure plate in the room with the puzzle solution using an arrow fired from a Bound Bow will cause the windows to cycle indefinitely. ?
- Sometimes the draugr holding the Shroud Hearth Barrow key is behind the locked door, making getting to the key to unlock the door impossible. ?
- If you summon a flame atronach to fight Wyndelius Gatharian, the journal you need to complete your quest may be destroyed before you can collect it. The remedy is to reload an earlier save and fight him using a less destructive method. ?
- Skyrim-Places-Nordic Ruins
- Skyrim-Places
- Skyrim-Places-Level 6
- Skyrim-Places-The Rift
- Skyrim-Places-Alchemy Labs
- Skyrim-Places-Word Walls
- Skyrim-Places-Clearable
- Skyrim-Places-Discoverable
- Skyrim-Places-Draugr Crypts
- Skyrim-Confirmed Bugs
- Skyrim-Unconfirmed Bugs
- Skyrim-Bugs Fixed by the Unofficial Skyrim Legendary Edition Patch
