Skyrim:Korvanjund
|
|||
|---|---|---|---|
| # of Zones | 3 | ||
| Clearable | No | ||
| Dungeon | Yes | ||
| Respawn Time | Never (storage is safe) | ||
| Level | Min: 12 | ||
| Occupants | |||
| Draugr, Imperial Soldiers or Stormcloak Soldiers (Depending on who you've sided with) | |||
| Important Treasure | |||
| The Jagged Crown Jornibret's Last Dance |
|||
| Console Location Code(s) | |||
| KorvanjundExterior01, KorvanjundExterior02, KorvanjundExterior03, KorvanjundExterior04, Korvanjund01, Korvanjund02, Korvanjund03 | |||
| Region | |||
| The Pale | |||
| Location | |||
| Northeast of Whiterun South of Silverdrift Lair |
|||
| Special Features | |||
| Word Wall | Slow Time | ||
| # of Cooking Pots/Spits | 1 | ||
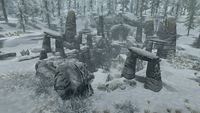
Korvanjund is a medium-sized Nordic ruin northeast of Whiterun. The ruin has three interior zones: Korvanjund Temple, Korvanjund Halls, and Korvanjund Crypt.
If you take sides in the civil war, you will be given the quest The Jagged Crown, in which you are told to retrieve the Jagged Crown for either Ulfric Stormcloak or Elisif the Fair, depending on whom you sided with. Korvanjund also contains a word wall that will teach you a word of the Slow Time shout (this word cannot be learned without starting the Jagged Crown quest).
Related Quests[edit]
- The Jagged Crown (Imperial): Find the Jagged Crown for the Imperials.
- The Jagged Crown (Stormcloaks): Find this crown for Ulfric Stormcloak.
Walkthrough[edit]
Exterior[edit]
The exterior consists of a series of stairs and ledges within a deep ravine, with the entrance to Korvanjund Temple on the upper level at the south end. The exterior area is occupied by several bandits until the start of the relevant quest, at which time only the bandits' corpses will be found among the living hostile enemy soldiers. On the lowest level at the south end, below the entrance to the temple, is a master-locked gate securing an alcove. Within this alcove is a large coin purse, a medium coin purse, and an unlocked chest.
Korvanjund Temple[edit]
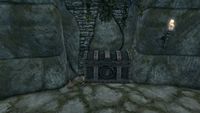
The interior is blocked by rubble if you attempt to enter the ruin prior to starting the quest. There are many urns and burial urns throughout the ruin. Upon entering, you will be in a small antechamber with a doorway ahead. To the right of the doorway is a cooking spit over a campfire and two bed rolls, and to the left of the doorway is an unlocked chest under a table next to three weapon racks holding a selection of iron weapons. The doorway opens into a large room that has suffered quite a lot of damage. Partway across the room is a wide flight of ascending stairs stretching across the entire room, where several enemy soldiers wait to attack as soon as they detect you or any of your companions. The stairs then descend to a pair of corridors on the rear wall; however, the right-hand corridor has caved in. Through the left-hand corridor is a wooden door to the west up a flight of stairs; however, the door is barred from the other side, and will be used as a shortcut on your return to the exit later. Stairs continue down into another room you will enter on a balcony, with the remains of a broken walkway straight ahead. More enemy soldiers are below and along the balcony to your right. Following the balcony to the right, you pass the other end of the previous right-hand caved-in corridor, with a flight of stairs opposite leading down to the bottom of the room. There is a doorway in the middle of the north wall at the bottom, where your companions will stop and discuss the possibility of an ambush ahead. You will be tasked with finding an alternate route, and are promised your allies will come to your aid when they hear fighting.
Return to the balcony and follow it east, north, and west around the room. You will pass a novice-locked chest with a random potion and a random empty soul gem beside it. Directly above the lower doorway is another, which leads to a short flight of ascending stairs, after which the passage staggers east then back to the north. The passage leads onto a walkway above the room ahead; if you are sneaking, you will be able to see several enemy soldiers lying in wait. You can start the attack from this position with ranged magic or a bow, as there are plenty of oil lanterns hanging from the ceiling and oil slicks below you on the ground, with at least one of the soldiers standing in one of the slicks. You can also continue across the room, descending at the other end of the walkway where it has fallen to form a steep ramp down. This puts you on a balcony at the far end of the room. Attacking from here will cause all of the enemy soldiers to rush you, leaving the route clear for your companions.
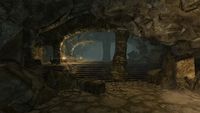
The stairs down from the balcony are along the west side of the room. South of the top of these stairs is an unlocked chest behind a piece of fallen masonry. Against the east wall at the bottom of the room is a flight of stairs up to an empty chest and a lootable skeleton holding a copy of the Light Armor skill book Jornibret's Last Dance. Returning to the balcony, a corridor west of the top of the stairs has caved in partway along, but a doorway is to the north. Through the doorway is a semi-circular room with two more soldiers to fight, as well as the first dead draugr to be looted. A matching door to the west on the opposite side of the room leads back into the corridor on the other side of the cave-in. A short way farther along, the passage turns to the south and descends a flight of stairs, then turns back to the west before descending to an iron door that leads to Korvanjund Halls.
Korvanjund Halls[edit]
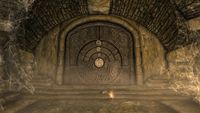
You emerge in a room with a stone table and two bookcases on your left holding only ruined books, stairs ascending ahead, and more soldiers to fight. At the top of the stairs, a third bookcase against the north wall holds more ruined books, while the balcony continues back to the south, with an iron door on the west wall that opens into a wide corridor heading north. Halfway along the passage is another short corridor to the west, with swinging blades and the corpse of an enemy soldier killed by the trap. At the other end of the trapped corridor is a small room containing an unlocked chest on a stone table and an empty bookcase with a lever beside it. The lever stops the blades. The main corridor continues to the north, then descends a flight of stairs and passes through a pair of iron doors into a corridor with pictures carved into the walls and an ancient Nord puzzle door at the far end.
Two dead enemy soldiers and the ebony claw are on the ground near the puzzle door. The combination required to open the door is on the inside of the claw; from the outer to the inner circles, it is Fox—Moth—Dragon. Beyond the door is a flight of stairs up to a turning to the west that ends at an iron door. The room beyond has a slightly raised floor in the northwest corner and along the south wall. There are three bookcases around the room holding only more ruined books, while six upright sarcophagi line the walls. (These contain slumbering draugr that will be released later as described below; however, the draugr may be dispatched individually now by casting elemental rune spells against the sarcophagi.) There is a trap floor in the middle of the room with wooden planking across it, and two corridors: one to the west blocked by a lowered gate, and another to the north.
The corridor to the north soon turns west and climbs a flight of stairs before turning south and ascending again, finally opening onto a balcony above the previous room. The balcony continues around the room, passing against the west wall a random dagger on a weight sensitive plate, with two garnets beside it. Removing the dagger opens a hidden door to the left to a twisting tunnel that ends at another concealed door, with a chain to open it on the right. The room beyond has an adept-trapped chest on a stone ledge against the east wall, which triggers a spear trap. To the right of the chest is a leveled healing potion and a flawless amethyst. Following the balcony around the room leads to a stone and plank walkway that crosses the room below to the east. At the end of the walkway is another balcony, with three empty bookcases against the walls, an unlocked chest at the rear against the east wall, and a handle on the north wall beside a burial urn at the front of the balcony. The handle opens the gate to the west on the ground level, as well as the six sarcophagi around the room, releasing several draugr. However, your companion soldiers should be able to defeat the draugr without much difficulty. The corridor to the west ends at an iron door that leads to Korvanjund Crypt.
Korvanjund Crypt[edit]
The crypt is the innermost zone of the temple. You begin in a corridor descending to the west, which turns south then east to enter the final room. The room features bookcases along the walls, and a raised area in the center with a sarcophagus on either side of a throne. Sitting on the throne is a draugr boss of the highest possible level wearing the crown; both sarcophagi also open to reveal leveled draugr. Behind the throne is an apprentice-locked chest, with a leveled magicka potion beside it. At the rear of the room is the word wall for a word of the Slow Time shout, with wooden stairs along the east wall that lead up through a passage to an iron door to Korvanjund Temple. Beyond the door is the barred wooden door near the beginning of the ruin, providing a convenient exit.
On the east side of the final room, you may spot two bowls in corners placed higher than you can normally reach. They are both on stone shelves near the throne: one above a bookshelf, the other close to the stairs. They hold valuable loot in the form of gems, weapons, and a Spell Tome for Conjure Flame Atronach, and although they may be difficult to reach by jumping, they can be toppled through ranged attacks. The easiest method to access the bowls' contents is to use the Unrelenting Force shout to shake each bowl. Just remember to then search the entire room for the gems, as they may scatter widely.
Notes[edit]
- On top of the barrow entryway, under a tree, is the treasure chest corresponding to Treasure Map VI, if you have obtained the related map.
Bugs[edit]
- If the puzzle door does not work, check here for possible fixes.


