Skyrim:Inner Sanctum (Vale)
| This article is being developed as part of the Skyrim Houses Redesign Project. If you see this tag it means the article can still be improved. Please see the project page for guidelines. |
|
||
|---|---|---|
| Added by | Dawnguard | |
| # of Zones | 1 | |
| Respawn Time | Never (storage is safe) | |
| Level | Min: 13 | |
| Occupants | ||
| Arch-Curate Vyrthur, Chaurus, Falmer, Frost Giant | ||
| Important Treasure | ||
| Auriel's Bow Staff of Icy Spear |
||
| Console Location Code(s) | ||
| DLC1FalmerTemple01 | ||
| Region | ||
| Haafingar | ||
| Location | ||
| Forgotten Vale | ||
The Inner Sanctum is a relatively well-preserved portion of the Chantry of Auri-El in the Forgotten Vale. It is the location of Auriel's Bow, and is where the final stages of Touching the Sky take place.
Related Quests[edit]
- Touching the Sky: Find and retrieve Auriel's Bow.
Walkthrough[edit]
Exterior[edit]
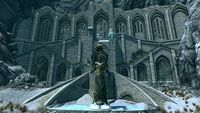
The exterior to this large building is the Forgotten Vale. A bridge leads to a flight of stairs ascending to the chantry courtyard, which is dominated by a statue of Auri-El. The huge double doors beyond the two curved stairs are locked until you complete the pilgrimage ritual. To do so, after having used it at each of the five wayshrines, empty the initiate's ewer into the basin at the top of the stairs behind Auri-El's statue. The water will then empty from the bottom of the basin, flow along grooves cut in the floor, and collect in a carved sun design. A green crystal above will then shine onto the water, and the sun carving on the doors will revolve, unlocking the doors and granting access to the Inner Sanctum.
Inner Sanctum[edit]
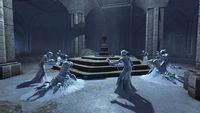
The entrance leads into a large room with a number of frozen Falmer and chaurus surrounding a Shrine of Auriel. Some of the statues are individual Falmer and chaurus, and some are in groups. A number of these statues hold items of interest. Taking one of these items may free its possessor from its icy paralysis, resulting in them attacking you, and possibly also releasing other nearby hostile creatures; however, at other times, the creatures are not released. The items that can be looted from the creatures in this room are: a philter of resist cold, an elven shield, an enchanted elven sword, a philter of extra magicka, a scroll of blizzard, a philter of health, a rare staff of icy spear, an elven sword, and a silver emerald necklace. Around the central shrine are a number of offerings: two gleamblossom flowers, four red mountain flowers, a scroll of fireball, an emerald, a garnet, a random potion of magicka, an elixir of health, a quiver of sixteen elven arrows, three yellow mountain flowers, and an amethyst. There are many skeletons found throughout the building, most of which can be looted.
By the west wall is a pedestal serving as an altar, which when activated will place the initiate's ewer on top and raise a concealed door with a sun symbol behind the altar. You must then pass through the door and turn around to retrieve the ewer, as you'll need it for other doors. Each altar is a waist-high pedestal featuring the sun design, and additional altars are on the far side of each concealed door to allow you to return the way you came. Another lootable skeleton lies in the passage beyond the door. The passage continues to a normal door, beyond which is a room containing the frost giant carrying the ruby paragon. Two lootable skeletons and a stone chest are in the southeast corner. By the north wall is another altar and concealed door. Placing the ewer on the altar opens the door, granting access to a small room containing a stone table holding leveled potions of healing, magicka, and stamina, two quivers of elven arrows, and a stone chest.
Return to the first room, where doors in the northeast and northwest corners both lead to the same room. This room contains three lootable skeletons and more frozen Falmer, some of which again hold items that can be looted. The items that can be looted from the Falmer in this room are: a potion of vigorous healing, an expert-level spell tome, and a staff of ice spikes. Opposite each of the doors is a stone table holding a leveled potion of healing, a leveled potion of health, and a scroll of conjure flame atronach. In the middle of the south wall is another table holding a random potion of healing and a random potion of magicka, with a passage opposite to the north. To the left of the passage is a stone bench with a skeleton next to a scroll of ironflesh. In the passage, the first frozen Falmer you encounter holds a leveled necklace of health, and the next holds an elven war axe. Southeast of the second frozen Falmer is a small room with a stone chest and a brazier containing a scroll of grand healing, a leveled potion of health, and a leveled potion of extra magicka. North of the second frozen statue is a room with two lootable skeletons by a stone table to the left. Open doors to the north lead into another room filled with frozen statues, including four chaurus and a single Falmer holding a circlet of waterbreathing. Taking the circlet will cause each of the statues to burst free and attack. Once they are dealt with, continue through a hole in the ice-encrusted wall to the west.
Through the hole is an icy tunnel that splits into two paths, with one route straight ahead to the west, and the other branching to the south. The south path leads to a small area containing a stone chest with a random potion of healing, a random potion of magicka, and a scroll of fire storm beside it. The west path leads to Auriel's Chapel in the exterior area of the vale.
Auriel's Chapel[edit]
The exit from the Inner Sanctum leads onto a ledge, with a path below and no way to get back up. Dropping down, a small empty alcove is to the south, and the passage continues to the east, where a chamber filled with more frozen statues features a throne at the far end in which Arch-Curate Vyrthur sits behind a shimmering force field. As you approach, he will initiate conversation before beginning to release wave after wave of frozen Falmer and chaurus upon you. After several waves, he will start collapsing sections of the ceiling before raising an ancient frost atronach and the last of the frozen Falmer. Once you've defeated these creatures, he will blow the entire roof and large parts of the walls to rubble, at which point a cutscene plays with Serana instructing you to get up, followed by her moving to confront Vyrthur. You will be unable to do anything other than follow Serana as she passes another lowered wayshrine and climbs one of the two flights of stairs up to where Vyrthur stands on a balcony overlooking the frozen lake in the vale. At the end of the cutscene, you will be released to battle Vyrthur. As soon as he is defeated, the wayshrine below the stairs will rise and Knight-Paladin Gelebor will emerge; the wayshrine is displayed as "Temple Balcony". Don't forget to loot Vyrthur's corpse for his unique set of ancient Falmer armor. After a short conversation with Gelebor, he will grant you Auriel's Bow, which will appear above a capped basin in the wayshrine. Gelebor informs you about sunhallowed arrows and will give you twelve such arrows, also offering to transmute 20 elven arrows to sunhallowed arrows as often as you want. If you are a Vampire Lord, be sure to keep some elven arrows in order to transmute them into bloodcursed arrows. On the walls of the wayshrine are the other five portals.
Using the sapphire paragon teleports you to an otherwise inaccessible badly damaged room in the Inner Sanctum. The broken stone arch forming the portal allows you to return directly to the paragon platform. The room contains three unlocked stone chests, with many loose gems, a random enchanted elven sword, an elven helmet, a pair of elven light gauntlets, and an elven shield among them.
Bugs[edit]
- If you have multiple followers, such as personal or quest-related companions, armored trolls, permanently conjured beasts, or zombies, they may require some "coaxing" in order to follow you past various portals. A combination of waiting, saving, and reloading will eventually resolve this issue. ?
- Followers may enter through the wrong door due to a badly placed door link at the other end of the cell.
The Unofficial Dawnguard Patch, version 2.1.1, fixes this bug.

