Skyrim:Abandoned Prison
|
|||
|---|---|---|---|
| # of Zones | 1 | ||
| Clearable | Yes | ||
| Dungeon | Yes | ||
| Respawn Time | 10 days or 30 days | ||
| Level | Min: 6 | ||
| Occupants | |||
| Ghosts | |||
| Important Treasure | |||
| Song of Hrormir | |||
| Console Location Code(s) | |||
| AbandonedPrison01, AbandonedPrisonExterior01 | |||
| Region | |||
| Eastmarch | |||
| Location | |||
| Just northwest of Fort Amol along the White River. | |||
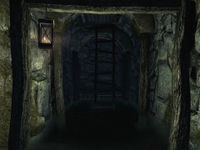
The Abandoned Prison is a collapsed, partially flooded Imperial prison inhabited by the ghosts of its drowned prisoners.
Walkthrough[edit]
Exterior[edit]
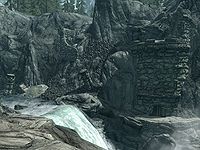
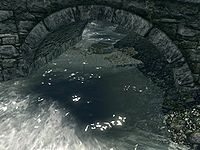
There are two entrances into the abandoned prison. The first is the marked main entrance and is located along the White River as you approach Fort Amol. The second is a hidden exit underneath the bridge along the river just east of the main entrance. It is not possible to explore the entire prison if you enter via the hatch under the bridge due to a one-way drop inside the prison. There is a novice-locked chest at the top of the tower directly above the main entrance. It can be reached by crossing the river by Lucky Lorenz's crushed house, walking along the bank, and then climbing the hillside to the left of the tower. On the riverbank opposite the main entrance is a corundum ore vein.
Abandoned Prison[edit]
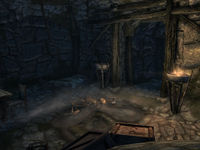
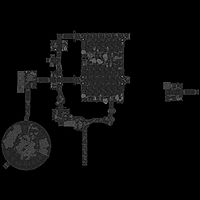
The main entrance leads directly into the second level of a circular tower. Rubble blocks the stairs leading up to higher levels to the left. There is plenty of hanging moss to be harvested on the two accessible floors of the tower. Stairs on the right spiral down to a passage and circular room that have also suffered extensive damage, with water seeping in and partially flooding the room. There are several crates, barrels, and food sacks around the walls. Against the wall of the passage is a tall wardrobe containing random clothes with an unlocked chest on top. To the left is an open door and passage heading north. To the left of this is a wooden table with another food sack on and under it. In the center of the circular room, among some rubble is an open chest with an iron battleaxe, a Solution of Regeneration, and a poison inside. Against the west wall is a leveled potion of healing sitting on a crate next to a food barrel. To the northwest is a doorway that originally led to more stairs leading down; however, these are also blocked by a cave-in.
Head north through the open door down some stairs to a guard room. The table in front of you holds only a few cheap pieces of crockery. There is an unlocked gate to the left leading into a long, narrow room that was used for storage. It contains a set of shelves that are leaning against the wall and another set holding a weak poison, a potion of strength, a sliced goat cheese, a fillet of horker meat, and a food sack. To the left of this is a row of three weapon racks holding an Imperial sword and an Imperial bow, with an Imperial shield leaning against a stack of crates with a bowl of apple cabbage stew on top. At the back of the room is a small table with an iron dagger, a small coin purse, two loose septims, and the guard's orders to kill or let the prisoners drown and for the guards to evacuate the prison.
To the east is another flight of stairs leading to a small room, with passages to the north and south that are partially blocked with fallen beams and masonry, allowing you to look through to other areas that are unreachable from here. To the north a ghost is wandering up and down a passage to the room you can see. You can either snipe them from here or leave them for later. There is a dresser containing a mix of common and fine clothes and boots, with a pair of Imperial light boots on top. In the southwest corner are two sets of shelves. One holds a pair of leather bracers, an iron mace, and cheap crockery. The other holds three potions of minor healing, four iron ingots, one of them hidden in a bowl, a pair of leather boots, and a pair of iron boots.
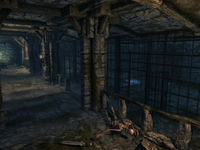
To the east is another flight of stairs leading down to the start of the cells. Two ghosts inhabit this room. One ghost is in the second cell on the south side of the room. This cell door is wide open. The second ghost is in the third cell on the north side of the room. This cell door is expert-locked, so you can either unlock it or fire through the bars to deal with this ghost. Both will try to attack when alerted to your presence. The room has a raised central passage with rows of cells and lower paths on either side. On your immediate right as you enter the room are the skeletal remains of one of the prisoners; an Imperial sword and shield lie beside the skeleton, along with a note detailing the prisoner's plan to attack the guards and escape through the drainage grate. The first cell to the south is empty except for a couple crates. The second contains a skeleton and bed roll in addition to the ghost. The third contains a bed roll and an open trap door leading to the drains and leads to the escape route mentioned in the note—a flooded passageway that gives access to the secret exit underneath the bridge. Once you drop through the trap door, you will not be able to climb back up to the jail cells, so it is advisable to leave exploration of this area until you have finished exploring the rest of the prison. The first cell on the north side contains two skeletons and a bed roll. The second is expert-locked and only contains a bed roll. The third contains a bed roll and a large hole in the wall leading to another cell-filled room. At the east end of the room is another skeleton next to a table with an iron dagger, a small coin purse, and the Abandoned Prison Key on it that opens all of the locked cells in the prison as well as the master-locked chest in the warden's quarters. If you wish to hone your lockpicking skill, leave this key behind.
Through the hole to the north is another room with a row of three more expert-locked cells. Each cell contains one or two bed rolls, but only the last of the three contains a skeleton. All of the skeletons in both rooms can be looted for a few gold and/or bone meal. At the eastern end of the passage between the row of cells and a raised passage is a food barrel and an unlocked chest on top of a crate. At the western end of the lower passage is a large vat. On the higher passage, at the eastern end is a wardrobe containing clothes and four food sacks among a couple of crates. Continuing to the west you'll pass a table and a wall shelf, which hold cheap crockery, and a wooden bench. At the far end, stairs lead up to the warden's quarters. If you didn't deal with the first ghost through the cave-in, then this is where you'll have to face it. On your left is an unowned single bed, a wardrobe containing random clothes, and a small table with a potion of minor magicka, an iron war axe, a medium coin purse, and four loose septims on top. Opposite, to the west is an overturned end table partially buried in rubble, an unlocked chest, a potion of minor magicka, and a leather helmet. A skeleton with an Imperial sword and shield lies on the floor in the middle of the room. To the south the passage is blocked, but on the right is a doorway to another long, narrow storeroom. At the northern end is a master-locked chest, which is opened with the same key as the one that opened the cells, and on the floor in front is a copy of the Two-handed skill book Song of Hrormir. There are also two sets of shelves holding thirteen common books, some cheap crockery, and four iron ingots.
You can now exit the prison through the trap door in the southeast prison cell or backtrack to the main entrance. Dropping down the drain, the tunnel leads west before turning south and opening out to a normal-sized passage. It then turns west again and continues to a T-junction, where you'll find another skeleton and a food barrel with a satchel on top. The passage ahead is caved-in, so your only option is to turn south. At the end is a ladder leading to the alternative exit. The skeletons scattered around the hatch under the bridge provide more evidence of the prisoners' ill-fated escape attempt.
Notes[edit]
- The prison is across the river from Treasure Map IX on Lucky Lorenz's corpse. His collapsed house can be seen from the top of the crumbling prison tower.
- East of the prison cells there is a room that can only be reached on the PC by using the 'tcl' console command. The room has no doors, and contains a bucket, a basket, a woodcutter's axe, a mug, and a chest.
- The many locked items provide an unusual opportunity to increase lockpicking skill.
Bugs[edit]
- Fast traveling to the Abandoned Prison with a follower may cause that follower to appear on the riverbank opposite the prison's main entrance, with no way of crossing the river itself.
The Unofficial Skyrim Patch, version 2.0.1, fixes this bug.
- Followers may be unable to enter or exit the Abandoned Prison through either of the prison's entrances.
The Unofficial Skyrim Patch, version 1.2.1, fixes this bug.
Followers may be moved inside the prison using the console. Once you are inside, use
prid <actor ID>(where <actor ID> is the follower's RefID) and thenmoveto playerto select and move the follower next to you. Followers moved inside the prison in this manner will need to be moved back outside afterwards, due to their inability to follow you through either exit.
