Shivering:Dire Warren
|
|||
|---|---|---|---|
| # of Zones | 2 | ||
| Occupants | |||
| Traelius boss-level Scalons, Monsters (1 boss-level Monster) |
|||
| Important Treasure | |||
| 1 boss-level Chest 1 boss-level Hollowed Stump 2 Hollowed Amber Limbs 2 Hollowed Amber Stumps Ly'ssane |
|||
| Console Location Code(s) | |||
| XPDireWarrenExterior, XPDireWarren01, XPDireWarren02 |
|||
| Region | |||
| Mania, [-8,10] | |||
| Location | |||
| A small cave south of the Isle of Flame containing monsters | |||
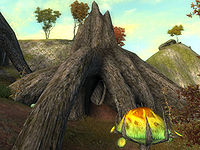
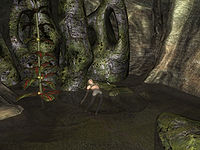
Dire Warren is a small cave south of the Isle of Flame containing monsters. It contains two zones: Dire Warren and Dire Warren, Subterrane.
Notes[edit]
- This cave contains 58 Flame Stalk plants, 37 Red Kelp plants, 28 Worm's Head plants, 26 Mushroom Tree Sapling plants, 10 Hydnum Azure plants, 9 Alocasia plants, 8 Root Stalk plants, 7 Screaming Maw plants, 4 Flame Stalk plants and 2 Watcher's Eye plants.
- On the Zone 2 map, the stream tunnels appear to extend some distance south past Alyssa's corpse and east past the turn to Traelius' room, but they are blocked off by several rock pillars in the middle of each tunnel. There is no way to get past these pillars without using the
tclconsole command, and no loot past the pillars other than one Red Kelp plant.
Exterior[edit]
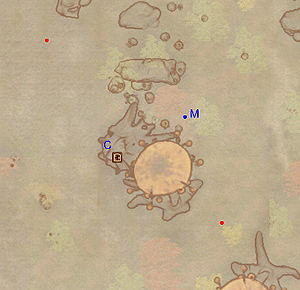
- The exterior is located at coordinates: SEWorld -8, 11
- This location's map marker (M on map) is named Dire Warren (editor name XPDireWarrenMapMarker). The entrance door is WSW of the marker, 90 feet away.
- 2 Wilderness Creatures (Mania) are near the entrance
- The following plants can be found near the entrance: 4 Alocasia plants, 8 Red Kelp plants, and 4 Mushroom Tree Sapling plants
Zone 1: Dire Warren[edit]
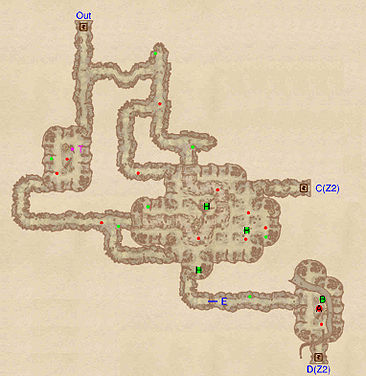
This zone is quite complex, and some backtracking is required to gather all the loot present. At the first intersection, head left and then press on south at the next one. After looting the hollowed stump, return to the intersection and head west: this will take you to the upper level of the large room, allowing you to snipe at the enemies below. Dispatch them and those on your level, and loot the three amber veins (H) present. Head south, open the root door at E and you will arrive in a small room with a boss chest (B) guarded by a boss-level monster (A). Once you're done, proceed to the next zone, Dire Warren, Subterrane, through door D.
When you enter this zone again from door C, which is initially inaccessible, jump down and you will find yourself in the large, central room. Jump down to the lower level and head west and then north, looting the two hollowed stumps you missed out earlier. Avoid the spore pod trap at T and leave through door Out.
Occupants:
- 1 boss-level Monster (Mania) at location A on map
- 5 Monsters (Mania)
- 6 Monsters (Mania, always best possible level)
Treasure:
- 1 boss-level Hollowed Stump (Monster variety) at location B on map
- 1 Hollowed Amber Limb (1-4 Amber; non-respawning) at H
- 2 Hollowed Amber Stumps (1-4 Amber; non-respawning) at H
- 3 Hollowed Stumps
- 5 Hollowed Stumps (Healing)
- The following plants will always be found: 58 Flame Stalk plants, 7 Screaming Maw plants, 11 Mushroom Tree Sapling plants, 2 Watcher's Eye plants, and 2 Root Stalk plants
Traps:
- 1 Spore Pod trap at location T on map
Doors and Gates:
- There are three doors in/out of this zone
- 1 door (at Out) leads outside
- 2 doors (at C and D) lead out of dungeon to Dire Warren, Subterrane and Dire Warren, Subterrane
- 1 Root Door at E
Zone 2: Dire Warren, Subterrane[edit]
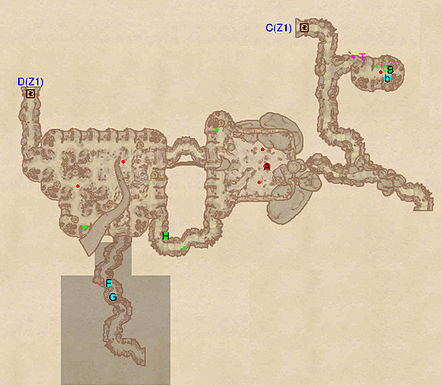
After entering from door D, head down in the stream below, where you will find three glass arrows floating around. Pressing south, the source is clear: near a shot-down Scalon (F), Alyssa's corpse (G) lays on a rock next to her trusted bow Ly'ssane and her journal. It appears that a young couple from New Sheoth established camp here but Alyssa longed for the city life and left. However, she got injured and died of starvation after crawling to end of the stream. As she hints at a location above a waterfall as her lover Traelius's hideout, finding it should be your priority now. Instead of following the stream up to the north, climb back up to the first room and take the tunnel in the southeastern corner, which will give you access to an amber limb (H).
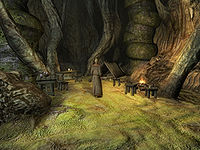
The waterfall is now in front of you, guarded by three monsters, including a boss-level Scalon (A). Before attempting to scale it, don't miss the hollowed stump in the northwestern corner. Getting up to the top can be quite hard, use the rocks on the northern side, which can be easily accessed from the hollowed stump, to then jump onto the main waterfall. Near the chair mid-way up is a bronze necklace. Jump from ledge to ledge until you see an opening in the rock, which leads to the camp. Follow the stream and head left and then right. Here is Traelius, with a root spikes trap (T) protecting the entrance. His high aggression may cause him to attack you, so be prepared. His abode contains a boss chest (B), a bedroll (b), a full set of apprentice alchemical equipment and a few ingredients (E). Head out and use door C to return to the first zone.
Occupants:
- 1 boss-level Scalon (Mania) at location A on map
- Traelius (non-respawning)
- 2 Monsters (Mania)
- 2 Scalons (at low levels will be a Young Baliwog, Mania, always best possible level)
Treasure:
- 1 boss-level Chest (Heretic variety) at location B on map
- 1 Hollowed Amber Limb (1-4 Amber; non-respawning) at H
- Ly'ssane
- 1 Hollowed Stump
- 3 Hollowed Stumps (Healing)
- The following alchemy equipment will always be found: 1 Apprentice Alembic, 1 Apprentice Calcinator, 1 Apprentice Mortar & Pestle, and 1 Apprentice Retort
- The following ingredients will always be found: 3 Alocasia Fruits, 3 Flame Stalks, 2 Hydnum Azure Giant Spores, and 2 Red Kelp Gas Bladders
- The other following items will always be found: 1 Bronze Necklace and 3 Glass Arrows
- The following plants will always be found: 9 Alocasia plants, 4 Flame Stalk plants, 10 Hydnum Azure plants, 37 Red Kelp plants, 15 Mushroom Tree Sapling plants, 6 Root Stalk plants, and 28 Worm's Head plants
- Some of the above items are clustered at the following locations:
- At B: 1 Apprentice Alembic, 1 Apprentice Calcinator, 1 Apprentice Retort, and 1 boss-level Chest (Heretic variety)
- At E: 3 Alocasia Fruits, 1 Apprentice Mortar & Pestle, 3 Flame Stalks, 2 Hydnum Azure Giant Spores, and 2 Red Kelp Gas Bladders
Traps:
- 1 Root Spikes trap at location T on map
Doors and Gates:
- There are two doors (at D and C) in/out of this zone, both leading to the zone Dire Warren
Other:
- Alyssa's corpse at location G on map
- 1 Diseased Scalon (dead; 3 glass arrows) at F
- 1 bedroll at b
