Online:Of Knives and Long Shadows
| This page is currently being rewritten as part of the Online Quest Project. The page is being both written and checked. All users are welcome to make changes to the page. If you make a change that is relevant to the project, please update this template accordingly, and make sure you have observed the project guidelines. Detail
Quick Summary: written by Enodoc, checked by FolkPunkDruid, Solomon1972
Quest Stages: written by Tib, FolkPunkDruid, not checked |
|
||||||||||||||||||||
Quick Walkthrough[edit]
- Find Skaldir at the Mages Guild in Mournhold.
- Locate and warn the other scryers in Shornhelm, Marbruk, and Stormhold.
- Talk to Lilatha.
- Recover the Anuic Lantern from Khenarthi's Roost and the Liminal Lens from the Howling Sepulchers.
- Find Lilatha's boat in Vulkhel Guard.
- Talk to Bonafryd.
- Travel to Dranil Kir and find Lilatha.
- Defend Lilatha
- Reassemble and activate the Obscuros.
- Talk to Lilatha.
Detailed Walkthrough[edit]
A Vision of Obscurity[edit]
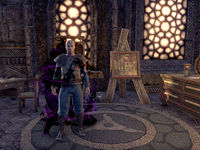
To begin this quest, locate the Order of the Eye Dispatch at Mages Guild hall in Vivec. It hints at a shocking discovery made by scryers of the Order of the Eye, but fails to go into much more detail. To find out more, you must seek out Skaldir at the Mournhold Mages Guild.
When you arrive, he is busy examining a bookshelf, but turns as you approach:
- "You read my letter? Oh, I'm so grateful you've come! We found something powerful. A Daedric—wait, what's happening?"
Unfortunately his explanation is cut off, as at that moment, his shadow comes to life and stabs him to death. Bonafryd runs over and cries out in frustration.
- Bonafryd: "Skaldir! No!"
- Bonafryd: "Damn it! Who's doing this? I'll send them straight to Sovngarde!"
You must talk to her to ascertain what is going on. Apparently a number of the scryers have been looking into some obscure Daedric artifact. Bonafryd wants you to warn the other scryers before they suffer the same fate as Skaldir. Adeber Loumont can be found in Shornhelm, Wenridil is in Marbruk, and Neelo can be found in Stormhold.
Warning the Scryers[edit]
At the Shornhelm Mages Guild, you come across Eloic Montieu. If you have completed the Mages Guild questline, he will recognize you and offer his assistance. If not, he will be somewhat wary. Either way, once you mention that his life is in danger, he informs you that Adeber has stepped outside for some quiet. You can find him behind Merethrin's House, slumped against a barrel, already dead. Collect his journal to learn more about his scrying techniques. At this point, you have the opportunity to return to Eloic Montieu to deliver the sad news. Once that is done, you can move on.
In Marbruk, Wenridil can be found on the patio behind the Queen's Residence. She moves off as you approach, accusing you of leering at her. At the same time, her shadow comes to life and starts attacking, but she manages to escape. You will need to defeat the shadow and catch up with her. Inside the Marbruk Mages Guild, Wenridil can be found hiding behind a plant pot and will cower when spoken to. She thinks that the shadow may have ripped off part of her animus, but is nonetheless grateful for your help. She directs you to another planter, where you can find her logbook and pocket it.
Neelo is tucked between some big rocks down by the river, just to the east of Stormhold Wayshrine. He threatens you to stay away, saying he will not die like the others and that, if you approach, his wards will tear you apart. You can either intimidate him into lowering his wards or locate his sister, Xarei, who may be able to convince him. She can be found by the market stalls in the center of the city and, upon telling her the situation, you can lead her to Neelo to convince him. When you approach, she will speak with him briefly.
- Captain Xarei: "Easy does it, Neelo. It is me. What troubles you this time?"
- Neelo: "Egg-sister? What are you doing with that … that shadow tamer?"
- Captain Xarei: "Do not be a withered root. This one means you no harm, and I am here to protect you now, all right? So lower your wards."
- Neelo: "I … yes, sister."
Once Neelo has been convinced (one way or another) to lower his wards, he will direct you to his journal, located at the root of a nearby tree, so that you may take them "far, far away." If you fetched his sister, he also apologizes for his paranoia.
The Obscuros[edit]
Once you have found all three scryers, a projection of an Altmer named Lilatha appears, speaking to you.
- Lilatha: "You, who would unravel the secret of these murderous shadows. Approach me."
Talk to her and she will explain that she is a member of the Psijic Order, and that she has also been looking into the same Daedric artifact that the scryers have seen. In order for you to find out where the artifact is located, she explains, you will need to collect both a Liminal Lens from The Howling Sepulchers in Craglorn and an Anuic Lantern from a shipwreck on Khenarthi's Roost. If questioned, she will explain that they are needed to build a Psijic scrying device known as The Obscuros.
To find the Anuic Lantern, head south of Eagle's Strand on Khenarthi's Roost. Just south of a group of sailors is the shipwreck; upon checking inside the cabin, you will find an open chest and a dead bandit holding a soggy note. The note urges you to get revenge for the author and reveals that the lantern has been taken to Hazak's Hollow on the other side of the island. The lantern can be found in a freshly packed crate on the west side of the cave, near the back.
The Liminal Lens is located inside the Ancient Priest's Coffer in the Dragon Priest's Burial Chamber at the far end of The Howling Sepulchers. From the entrance, head north along the ravine bridge and turn to the west once you leave the cavernous passage. Again, head through a small cave and cross another bridge. From there, you will need to enter another cave; this time, you will end up in a Nordic barrow. You can ignore the necromancer, Rosathild, pretty easily. Heading east, you will need to cross yet another bridge over the ravine. Continue in roughly a straight line along the path, up the stairs, and to the Dragon Priest's Burial Chamber. Unlike before, you can't avoid the boss, Akiirdal, since they are directly behind the coffer. Once defeated, you can open the Ancient Priest's Coffer and take the Liminal Lens.
Once you have collected both items, head to Vulkhel Guard, where Lilatha's boat is waiting. It can be found on the far side of the outer harbor wall, but, before boarding, Bonafryd appears and rushes over.
- Bonafryd: "Wait! Don't leave yet!"
The Isle of Dranil Kir[edit]
Apparently, before you left Mournhold, Bonafryd slipped a coin with a tracking charm on it into your pocket. She wants to go with you, since she thinks it will be too dangerous otherwise. You need to decide whether or not to bring her along.
If you decide against it, she sends you on your way and you arrive at Dranil Kir alone and in the rain. If you agree to bring Bonafryd on the boat, she arrives with you but gets sea sick and tells you to go on ahead. Either way, head up the path to find Lilatha warming her hands at a fire as she waits for you.
- Lilatha: "Campfire on the beach... I still don't see the appeal."
- Lilatha: "Ah, you've arrived! Welcome to Dranil Kir. Let's get out of the rain, shall we?"
- Lilatha: "I trust you brought the items I requested. The scrying chamber is just up the hill. Follow me."
She runs off up a hill and into the Obscuros Scrying Chamber, a room in some Ayleid ruins. Lilatha heads towards the podium, making idle conversation as she does.
- Lilatha: "I'm confident that the components you brought will it [sic], but the Obscuro's device has been dormant for centuries."
- <Lilatha stops in front of the Obscuros.>
- Lilatha: "Do you feel that chill? It's like … oh no."
- <Lilatha freezes awkwardly, shadows surrounding her. She struggles, but is unable to move.>
- Lilatha: "What's happening to me?"
- <Lilatha's shadow appears behind her.>
- Lilatha: "You must …. kill the shadow. Hurry!"
Her shadow has similar attacks to the previous one fought. It must be defeated.
Suddenly, Bonafryd calls out. Her dialogue changes depending on whether you took her with you or not, but, no matter the choice, she will appear and threaten the pair of you. She enters the way you came, wearing a dark, shadowy set of armor and armed with a mace and shield. It turns out she is behind the shadow attacks. She summons another copy of Lilatha's Shadow.
- Lilatha: "No! I will not perish here!"
You must defeat Bonafryd in order to save both Lilatha and the device. During the battle, she yells angrily at you, and when she is close to death she cries out that she will "not fail [her] mistress." Once she and the second shadow are defeated, you are able to reassemble and activate the Obscuros.
- Lilatha: "Set the lens and the lantern in the Obscuros. Time to see what this has all been about."
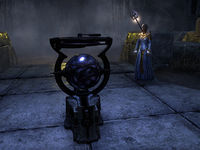
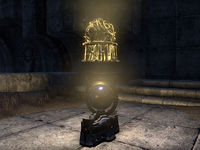
Place the lantern in its housing and mount the lens on top to rebuild it. Activate it. A series of golden projections appears, starting with an odd creature that resembles a clannfear.
- Lilatha: "A fabricant? I don't …."
- <The projection changes to one of the Clockwork City's external structure, the Revolving Celestiodrome.>
- Lilatha: "No, this cannot be. The city was sealed long ago."
- <A woman in a long, roughly made skirt and brassiere appears, holding a staff.>
- Lilatha: "What is this creature? Some new Daedric beast?"
- <The projections end.>
- Lilatha: "The Clockwork City. Could it be, after all this time …?"
Talk to Lilatha for further interpretation of what the Obscuros has shown you. She will explain that this is likely a serious threat to all of Tamriel, and gives you a reward for your assistance. If you have completed the main questline of the Clockwork City, she will instead say the threat is most likely not over.
Notes[edit]
- The minimum character level of this quest is 10[verification needed — It's not 5. Is it 10?]
- Prior to Update 40, the Order of the Eye Dispatch could be found in every Mages Guild hall.
- As with other prologue quests, the events of this quest foreshadowed future events in the ESO quest timeline. In this case, the events of the Clockwork City DLC.
- Once this quest is completed, Lilatha will be available to give the follow-on quest, To The Clockwork City, although she will not start it automatically.
- If you complete the quest without the book being read, a copy can be found in the Bangkorai Garrison in Bangkorai.
- If you have a quest that requires you to kill a number of daedra, the shadows will count... as will Bonafryd!
- If the city guard comes across Wenridil's shadow, they will attack it. However, even if you normally turn off the option to attack innocents, you can still attack the guard if this happens.
Quest Stages[edit]
| Of Knives and Long Shadows | |
|---|---|
| Finishes Quest | Journal Entry |
| I should travel to the Mages Guild hall in Mournhold. Perhaps I can learn more from Skaldir himself.
Objective: Talk to Skaldir
|
|
| As soon as I arrived in the Mournhold guild hall, Skaldir's shadow came to life and stabbed him to death. A Nord woman arrived shortly thereafter, demanding answers. I should talk to her.
Objective: Talk to Bonafryd
|
|
| Three of Skaldir's associates are in danger. Accoding to Bonafryd, Adeber is studying in Shornhelm, Rivenspire. Wenridil can be found in the city of Marbruk, Greenshade. And Neelo resides in Stormhold, Shadowfen. I must warn these mages.
Objective: Warn Adeber
Objective Hint: Collect Adeber's Notes
HINT: I arrived too late. Adeber is dead. His notebook, however, remains intact. I should see what he knows about the Daedric artifact. Optional Step: I should speak to the Mages Guild adept who directed me to Adeber's corpse. He'll no doubt want to arrange a proper burial.
Objective: Warn Wenridil
Objective Hint: Defeat Wenridil's Shadow
HINT: Wenridil's shadow attacked, but failed to land a killing blow. I must defeat this monstrosity before it completes its mission. Objective Hint: Talk to Wenridil
HINT: I defeated Wenridil's shadow—now I must find its owner. She's probably hiding out in the nearby Mages Guild hall. Objective Hint: Collect Wenridil's Logbook
HINT: Wenridil confessed that the loss of her shadow has weakened her in some way. Nonetheless, she offered me her notes as a token of appreciation. I should go collect them from the planter nearby. Objective: Warn Neelo
Objective Hint: Talk to Xarei
HINT: Neelo is too scared to lower his wards, but he did mention a sister, Xarei. Perhaps if I find Xarei and convince her I'm a friend, she can convince Neelo. Objective Hint: Take Xarei to Neelo
HINT: Xarei agreed to talk to Neelo for me. I must take her to his hiding place. Objective Hint: Talk to Neelo
HINT: Neelo offered me his notes on the Daedric artifact. I should collect them before I leave Stormhold. Objective Hint: Collect Neelo's Notes
HINT: Neelo finally lowered his wards. I should ask him what he knows about the Daedric artifact. |
|
| A projection of a High Elf woman has appeared. I should speak to her.
Objective: Talk to Lilatha
|
|
| Lilatha, a Psijic mage, believes she can discover the location of the Daedric artifact, but ahe needs two powerful objects to do so. I can find the Anuic Lantern in Khenarthi's Roost, and the Liminal Lens in Craglorn's Howling Sepulchers.
Objective: Collect the Anuic Lantern
Objective Hint: Search for Clues
HINT: It looks like someone took the Anuic Lantern before I arrived. I should look for any clues that might lead me to the item. Objective Hint: Find Hazak's Hollow
HINT: It appears that bandits raided the shipwreck ahead of me, then turned on each other. I found a note on a dead bandit pointing to Hazak's Hollow. Hopefully the Anuic Lantern is still there. Objective Hint: Search Hazak's Hollow
HINT: I found the bandit's hideout in Hazak's Hollow. Now I must find the stolen Anuic Lantern. Objective: Collect the Liminal Lens
|
|
| I collected the items Lilatha requested, now I must find the boat she promised. It should be moored somewhere just outside Vulkhel Guard.
Objective: Find Lilatha's Boat
|
|
| Bonafryd appeared as soon as I arrived at Lilatha's boat. I should talk to her to figure out what this is about.
Objective: Talk to Bonafryd
|
|
| Bonafryd admitted that she's been following me. Now she wants to accompany me in Lilatha's boat. I must decide whether or not to bring her along.
Complete one: Bring Bonafryd Along or Leave Bonafryd Behind
|
|
| I've found Lilatha's enchanted boat. Hopefully it will take me to her current location.
Objective: Travel to Lilatha's Island
|
|
| I arrived on a gloomy island off the coast of Auridon. I should search for Lilatha.
Objective: Find Lilatha
|
|
| I found Lilatha outside an ancient ruin on Dranil Kir. I should follow her inside.
Objective: Follow Lilatha
|
|
| Lilatha's shadow came to life. It no doubt seeks to kill her. I must defeat this creature to defend Lilatha and the Obscuros.
Objective: Defeat Lilatha's Shadow
|
|
| It appears that my former ally, Bonafryd, is responsible for the shadow murders. I must defeat her and the shadow if Lilatha and I plan to make it out of this ruin alive.
Objective: Defeat Bonafryd
|
|
| Lilatha and I managed to defeat Bonafryd and her shadowy minion. Now that Lilatha is safe, I should reassemble the Obscuros device.
Objective: Reassemble the Obscuros
|
|
| I reassembled the Obscuros. Now we can activate it and see if it shows us the location of the Daedric artifact.
Objective: Activate the Obscuros
|
|
| The Obscuros is working! The device appears to be showing us the location of the Daedric artifact.
Objective: Watch the Projection
|
|
| The Obscuros showed us several images of the Clockwork City. I should talk to Lilatha to see if she can elaborate on what we've witnessed.
Objective: Talk to Lilatha
|
|
| Lilatha believes that the mysterious Daedric artifact we've been seeking is somewhere inside the Clockwork City. We should discuss our next move.
Objective: Talk to Lilatha
|
|
| I told Lilatha about my adventures in the Clockwork City, and the Daedric plot brewing there. We should discuss our next move.
Objective: Talk to Lilatha
|
|
<Alias=LocationHold>) is dynamically set by the game and will be filled in with the appropriate word(s) when seen in game.
- Not all Journal Entries may appear in your journal; which entries appear and which entries do not depends on the manner in which the quest is done.
- Stages are not always in order of progress. This is usually the case with quests that have multiple possible outcomes or quests where certain tasks may be done in any order. Some stages may therefore repeat objectives seen in other stages.


