Skyrim:Benkongerike
|
|||
|---|---|---|---|
| # of Zones | 2 | ||
| Clearable | Yes | ||
| Dungeon | Yes | ||
| Respawn Time | 10 days or 30 days | ||
| Level | Min: 6 | ||
| Occupants | |||
| Bristlebacks, Rieklings | |||
| Important Treasure | |||
| Black Book: Untold Legends East Empire Pendant |
|||
| Console Location Code(s) | |||
| DLC2Benkongerike01, DLC2Benkongerike02, DLC2BenkongerikeExterior01 | |||
| Region | |||
| Solstheim | |||
| Location | |||
| Southeast of Saering's Watch | |||
| Special Features | |||
| Word Wall | Cyclone | ||
| # of Stalhrim Deposits | 1 | ||
| Ore Veins | |||
| # of Silver | 4 | ||

Benkongerike is a medium-sized cave southeast of Saering's Watch and northwest of Headwaters of Harstrad containing bristlebacks and rieklings.
Related Quests[edit]
- Black Book: Retrieve a Black Book from a dungeon.
- Black Book: Untold Legends: Learn the Black Book's hidden knowledge.
- Lost Knowledge: Retrieve the Black Books for Neloth.
- Pain in the Necklace: Find East Empire pendants for Fethis Alor.
Walkthrough[edit]
Exterior[edit]
From the Headwaters of Harstrad, follow the path to the northwest, and when you reach a junction, turn left to the southwest. You eventually pass under an arch consisting of two columns with a large slab on top. On your right is a statue with unusable barrels and crates. There is a food barrel to the right of the entrance, and a novice-locked chest to the left.
Benkongerike[edit]
As soon as you enter, you will be in a snowy tunnel descending to the northwest. As soon as the passage levels out, there is a narrow tunnel on your right that twists and turns and eventually leads to a novice-locked chest and two burial urns. There is also a hidden door next to the chest that will act as a shortcut back from the end of this cave system. At the end of the initial tunnel is a riekling tent with a deer pelt inside and a piece of firewood to the left. A tunnel on the left leads into a large cavern.

In the cavern, you can see three large pillars (all leaning over), a nearby riekling camp consisting of two riekling huts and a riekling tent, and various crates, barrels, and sacks all around the room below you. Two more riekling tents can be seen in the distance. There are three rieklings running about that you can see. The path down is on your right, and follows the wall around the cavern to place you beside a riekling hut to your right. A tent to your left contains a bottle of alto wine. To the right of the tent is the second hut, and beside this hut is a bottle of alto wine, a pine thrush egg, two bulbs of garlic, and a medium coin purse, all beside and on top of a crate. In the middle of this area among more crates is a large urn.

On your right as you move through the cavern heading south, past the first riekling hut are two large urns and two burial urns lined up in a row against the rocks. Just past these urns is another hut to the right. Behind this hut are some large mammoth ribcages, and to the left are two more large urns by a fence behind one of the pillars. In front of the same pillar is yet another tent, with an archery target inside, and a large urn and a gourd to the right. To the left (west) is a tall lookout platform with a riekling on guard and a bristleback wandering around the bottom, next to another tent to the left. This tent has a burial urn inside, a large urn to the left, and an open crate containing two samples of imp stool and a sample of Namira's rot in front. Beside the fence and pillar to the right of the platform is another tent. Inside this tent is a sample of wheat, three steel ingots hidden under a kettle, and a sack. To the left of the tent is a barrel with a pair of weightless shoes on top, with a bowl and a goblet on a nearby crate (see bugs). Returning to the area near the entrance of this first cavern, to the left along the southeast wall is a statue with an unlit brazier in front holding an iron helmet. To the right is a tent with the usual crates, barrels, and sacks piled on either side and a drum in front. To the right are two barrels and a crate, with an empty random soul gem and a silver necklace on top. Between these items and the tunnel onward are three large urns and two burial urns. The tunnel onward leading south is to the right.
Following the tunnel south, it becomes an icy passage. At the end is a food barrel with a piece of large charcoal on top, and three samples of wheat, a bowl, and two more burial urns on the ground beside it. The tunnel turns to the west, passing a rock on the right with a flute on top, then a knapsack and two large urns on your left beside a large rock. The tunnel then turns to the north and becomes a ledge above another cavern, where there are three rieklings. In front of the ledge is a platform with a ramp down to the cavern floor. On your right on the ledge is an alcove holding two large urns, an unlocked chest with a deer pelt to the left of it, and a pickaxe. At the end of the ledge in the northeastern corner is a riekling hut, beside which is a large urn, a deer pelt, a sample of scaly pholiota, some hawk feathers, a sample of white cap, and an apothecary's satchel. A wooden plate to the left of the hut holds some slaughterfish scales and a large piece of charcoal. Farther west is another tent containing two wooden plates holding a bulb of garlic, a filled random soul gem, and a flawless sapphire.
Underneath the ramp down is an unlocked strongbox and a cast iron pot containing a thistle branch. The cavern continues to the west. Against the southern wall is a salt pile beside a chair. To the west is a large rock with a bucket containing eight loose septims and a rock warbler egg. Beneath this rock is an iron helmet. In the southwestern corner is a tent with an iron mace in a kettle, with an urn beside the tent. To the right along the wall next to a large rock with an animal skull displayed on top are two food sacks, with two bottles of alto wine among them. The cavern turns to the northwest, with a tent to the right with a fire in front of it. Around the fire are two ash yams, two sheaves of wheat, and two rabbit haunches. To the left of the tent, beside the next tunnel is a drum and a large carved stone head.
An ice tunnel continues to the northwest and descends to another tent. Just before reaching the tent, a riekling barrel on the right will burst open, revealing a riekling. At the end of this tunnel, a riekling is hiding in a bush to the left of the tent, which contains two pieces of firewood. To the left is a woodcutter's axe in a kettle, and to the right, on a rock under some clutter, is a snow fox pelt. The tunnel turns to the northeast and continues to descend. Take care, as there is a tripwire ahead that triggers a claw trap, hinged on the left. Just past the tripwire, an alcove on the left has a tent with a riekling barrel in front. Inside the tent is a pair of iron boots, and two urns flank the tent. Past this alcove is a second tripwire that triggers another claw trap, hinged on the right. By the claw on the right is a riekling hut, and to the left of the hut is a stone bowl containing a Dibella statue. Farther to the left is a large rock with a knapsack, a potion of cure disease, an ash yam in a cast iron pot, and a salt pile. The tunnel ends to the northeast with an urn and some riekling spears on a crate, and a riekling hidden in the snow. There is another tunnel heading to the northwest, with a tripwire at the start of the tunnel triggering another claw trap, hinged from above. The tunnel turns back to the northeast and opens into another cavern.


You will enter this cavern on a ledge, with bridges ahead joining several platforms, ledges, and columns, and a ramp down to the cavern floor below on the left. On the right is a bucket containing a woodcutter's axe, a chef's hat, and a chef's tunic. Below, the cavern is partially flooded. On the ledges, quite a few rieklings are running about. Crossing the first bridge to the first platform, there are three bottles of alto wine, two bottles of ale, and a goat cheese wedge in a bucket. Two rieklings are on this platform. Across a second bridge heading southeast to the next platform, there is a leg of goat and an unlocked chest hanging off the right side, with a drum to your left. Two more rieklings are in this area. Continuing to the southeast across another short bridge to a well-lit area, the next bridge is to the north. There are then two more bridges, the second of which bears to the northeast, where another riekling stands. The next bridge is to the southeast; it leads to the far side of the cavern and a ledge with a doorway to the east. There is an ash yam on a crate to the left by the bridge, and to the right of the doorway are five pieces of clam meat and two pearls, most of which are in a bucket. From this ledge, there is also another bridge to the south to another ledge against the south wall, where another riekling stands and a ramp leads down to two silver ore veins and a burial urn.
The best place to drop into the water is from the second silver ore vein, as a novice-locked chest sits beneath it. There are two more silver ore veins slightly west of the chest, behind a rock. The only other item of interest on the lower level is a random enchanted greatsword, which is found between the ramp at the beginning of the cavern and the first platform. The sword is beside an unlootable skeleton at the narrowest part. This provides the easiest access to the ramp back up.
In the tunnel to the east, the architecture changes to that of a Nordic barrow. At the end of this short corridor is an unlit brazier on a stone plinth containing a pair of random boots. A corridor to the north leads into a room with an iron door opposite. There are two goblets, a bowl, and a burial urn in the corridor. The room contains six barrels at the other end, three of which are actually riekling barrels which rieklings will burst from to ambush you. This will scatter a number of items around the room. There are two gourds, a rock warbler egg, three random potions, and two common books; some of these items may remain on a set of shelves in the room. The iron door leads to Benkongerike Great Hall.
Benkongerike Great Hall[edit]
Through the door is another room, with a broken sideboard on your left and a piece of quicksilver ore in front. Farther along the left wall is a bookcase containing some riekling spears and four random books. On the right side of the room is a riekling tent containing thirteen copies of The Lusty Argonian Maid, v1 and six copies of v2, with a Telekinesis spell tome hidden under them all. At the far end of the room are three large urns (two on the left, one on the right) and a doorway to an ascending wooden spiral staircase in the northern wall.

Climbing the staircase, there are still plenty of signs of rieklings, with painted symbols on the walls. At the top, the corridor heads north again. On the left, you pass some bars through which you can see a chest, two pedestals, and two urns. There is an open iron door on your right heading east. Opposite is an expert-locked iron door and some more bars farther along on the left. Through the locked door, the chest in front of you is unlocked, with the two urns on the far left. The left-hand pedestal holds a copy of the Benkongerike Key, and the other pedestal holds a copy of Dragon Language: Myth no More. Following the corridor to the east, there are two burial urns where it turns to the south. The room ahead opens into another large room on a balcony overlooking the floor below. There are bridges around this room joining platforms on top of columns. There are three rieklings and a mounted riekling in this room. On your left is an urn, and to the right are the wooden steps down.
At the bottom of the steps, ahead are two barrels in the room's northeast corner (see bugs). Under the steps is a rock warbler egg and a chicken's egg on the ground. To the left is an open sarcophagus with a dead draugr inside and a bulb of garlic on the northwestern edge of the sarcophagus, as well as a cast iron pot containing a flute and potato. Along the wall to the left is another sarcophagus, which has a stalhrim deposit covering another dead draugr. The first pillar nearest the bottom of the stairs has a bucket with two pieces of corundum ore inside. The pillar to the right has a crate and a barrel beside it with a torchbug thorax, a bottle of wine, and an orange dartwing on the crate, and a bowl of bone meal in a metal bowl on the barrel.
Against the east wall is a crate, with a medium coin purse on top and a sack beside it. To the right is a collapsed pillar, beside which are three corundum ingots, several pieces of cheese, a pair of leather boots, and on top of a barrel a gold sapphire ring that is easily missed. To the west, past another pillar, are wooden steps leading up to the walkways above. Under the steps are two unusable barrels, a crate, two sacks, a pair of iron boots, and a practice dummy.

The steps lead to a balcony with a riekling hut to the right. Beside the hut are two barrels and two crates, among which are a chaurus egg, an imp stool sample in a bucket, an apothecary's satchel, and two charred skeever hides. Opposite is an urn, and farther along is a stone walkway over to the first of the pillars and onward to the second pillar. On your left is a platform built on the side of the pillar, with a piece of honeycomb on a plate on the ground. Another walkway continues to another balcony on the other side of the room. There is another hut on this side, next to which is an open box containing two iron ingots and a flute, with a crate and two barrels beside it. On one barrel is an expert-locked East Empire Company strongbox, and on the other, which is a fish barrel, is a potato on a plate. Also on this balcony is a sack next to a crate, as well as three garlic bulbs in a bucket, a leek, and a silver ingot, all by two barrels and a crate. There is also a large piece of stone carved with the symbol of a whale, as generally used for rune totem puzzles.
On the southern side of the room on ground level, among some rune totems, are some crates with two goblets, a cabbage, and a bowl with lavender inside. There is also a gate blocking a doorway in the middle of the southern wall. The symbols needed are above the rune totems, except for the second, which is on the eastern balcony. The handle to operate the gate is on a raised section between two pillars, with lit braziers lighting the area. Once you've lined up the correct symbols (from left to right: Eagle—Whale—Whale—Snake), pull the handle to open the gate. Incorrect guesses seem to have no negative repercussions. You can see the word wall through the gate. The wall teaches a word for the Cyclone shout. In front of the wall is an unlocked boss chest.
On the east side of the room with the wall is a cave-in, leaving a ramp up to an opening in the east wall. This leads to a tunnel that twists and turns and eventually opens into a circular room with the Black Book: Untold Legends. There is an iron door to the south leading back to the first zone. Through this door is a small room with two large urns on your left, and a short tunnel ahead leading to a hidden door. The chain to open the door is to the right of the door, and the passage beyond leads you back to the first chest with two burial urns near the exit.
Notes[edit]
- This location also appeared in the Bloodmoon expansion for Morrowind.
- Ben is Norwegian for "bone", while Kongerike is "kingdom."
Bugs[edit]
- There are some items that you can't interact with.
 The Unofficial Dragonborn Patch, version 2.0.2, fixes this bug.
- The rune totems will not rotate in some cases.
- When Lost Knowledge is the active quest, Clairvoyance and the map marker can direct you to the escape passage even when it hasn't been opened.
- If you re-enter Benkongerike Great Hall after everything has respawned, the sarcophagus with the stalhrim deposit will appear to have more stalhrim in it. However, when you approach it, you don't get the option to "mine deposit"; you only get the "search draugr" option, as if the deposit was not there. ?
Gallery[edit]
-
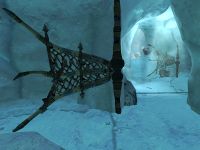
Traps
-
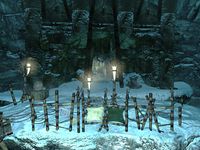
Changing architecture
-
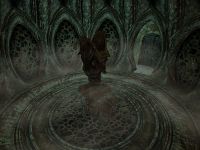
Room with the Black Book


- Skyrim-Places-Caves
- Skyrim-Places
- Skyrim-Places-Level 6
- Skyrim-Places-Solstheim
- Skyrim-Places-Silver Veins
- Skyrim-Places-Stalhrim Deposits
- Skyrim-Places-Word Walls
- Skyrim-Places-Clearable
- Skyrim-Places-Discoverable
- Skyrim-Dragonborn-Places-Riekling Camps
- Skyrim-Dragonborn-Places-Ice Caves
- Skyrim-Bugs Fixed by the Unofficial Dragonborn Patch
- Skyrim-Confirmed Bugs
- Skyrim-Unconfirmed Bugs